10 Painted Arch Bedroom Ideas for a Cozy, Stylish Space
A plain wall behind the bed can make an otherwise beautiful bedroom feel unfinished. If you want to create a focal point without buying a new headboard or installing expensive wall panelling, a painted arch is a simple option worth considering. It adds a curved shape, introduces colour, and helps define the sleeping area using little more than paint and a few basic tools.
Painted arch bedroom ideas work with many decorating styles, from soft and romantic rooms to modern, colourful, and moody spaces. You can choose a single bold arch, layer two shades for extra detail, or use a lighter colour to create a subtle outline on an already-painted wall.
Below are 10 ways to use a painted arch in your bedroom, along with advice on choosing the right design, planning its size, and painting a clean curve.
Quick Answer: Best Painted Arch Idea at a Glance
A warm terracotta arch is a versatile starting point if your bedroom has warm wood furniture, cream bedding, or natural textures. For a cooler colour scheme, deep teal or muted sage can create a more balanced look. If you prefer something subtle, try dusty rose or a soft cream arch.
Before choosing a design, consider your wall colour, bed size, ceiling height, and existing furniture. The arch should frame the bed or another feature rather than compete with everything around it.
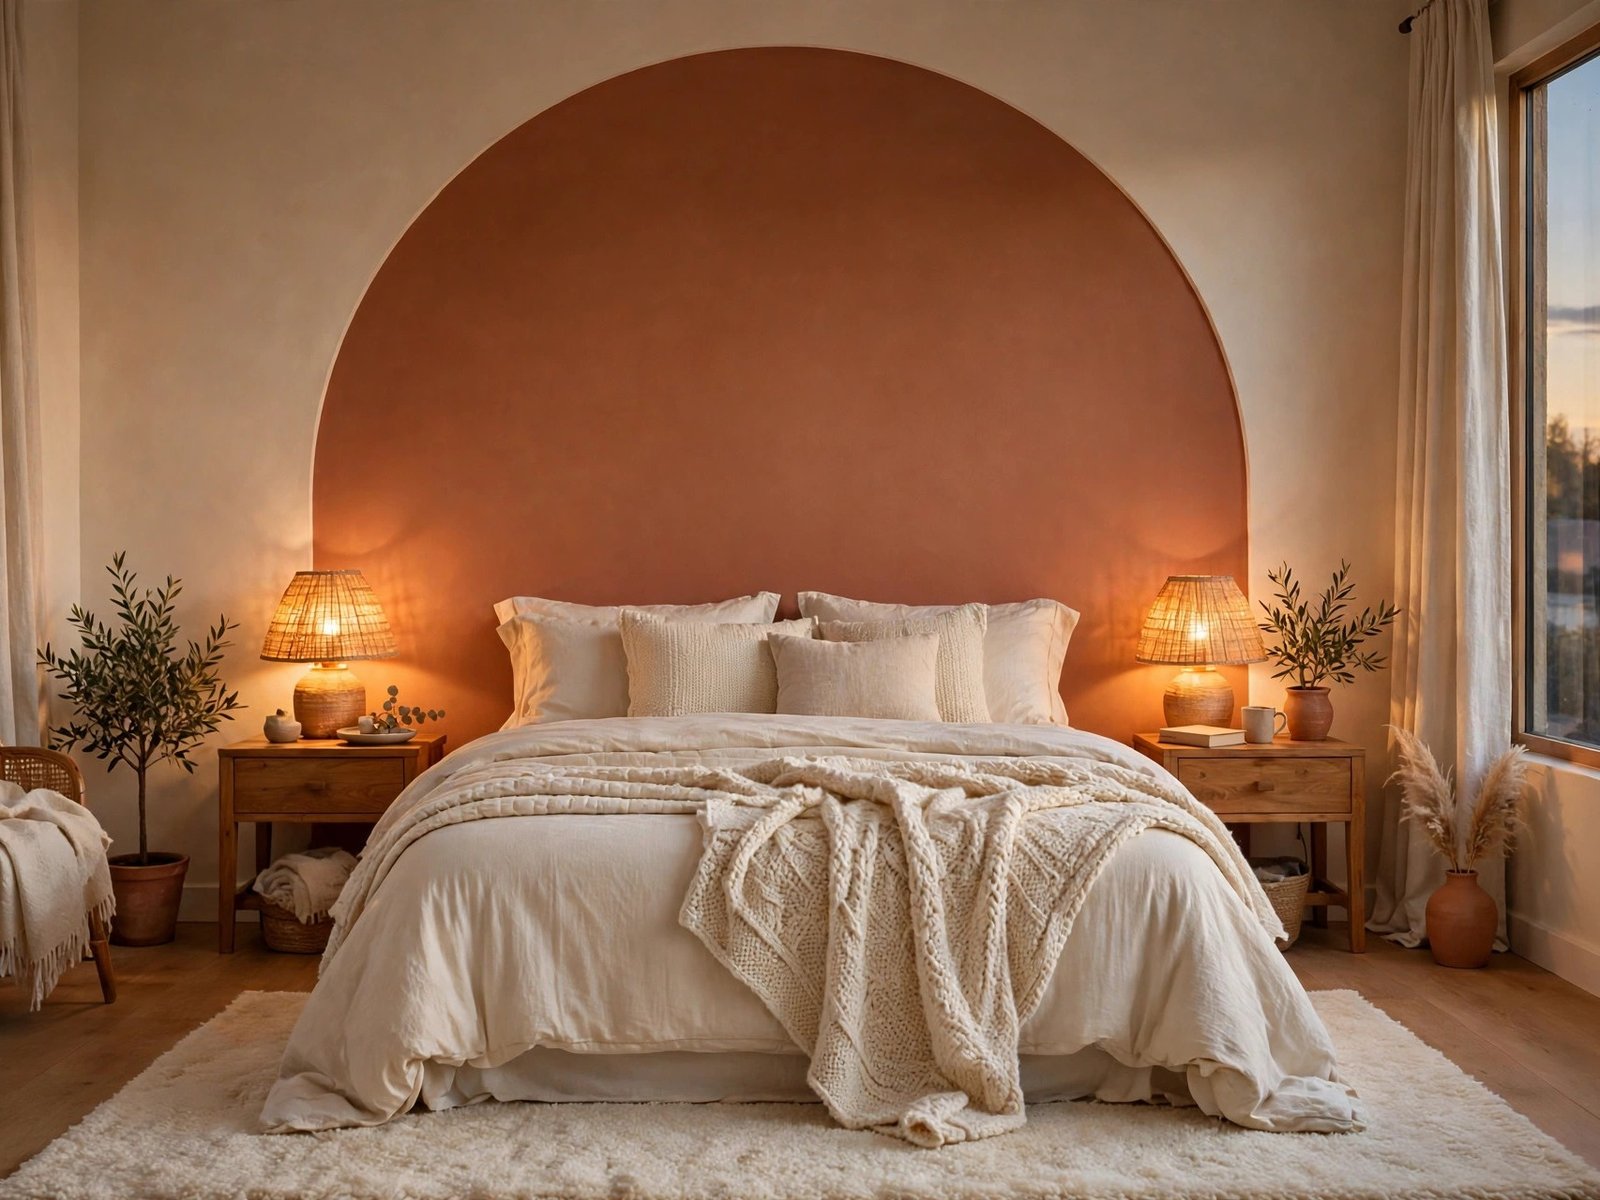
1. Warm Terracotta Arch

A warm terracotta arch creates a welcoming focal point behind the bed. Its earthy red-orange tone works particularly well with oak furniture, natural wood floors, cream bedding, and woven accessories. It can also add warmth to a bedroom that feels a little plain or lacks colour.
For a relaxed look, combine terracotta with ivory bedding, textured cushions, and simple wooden nightstands. You could also introduce small touches of rust or muted brown through a throw blanket or bedside accessories. If your room already has several warm colours, choose a softer clay shade rather than a very strong orange-red.
What you need: Terracotta paint, painter’s tape, pencil, string, small roller, angled paintbrush, and measuring tape.
2. Deep Teal Arch
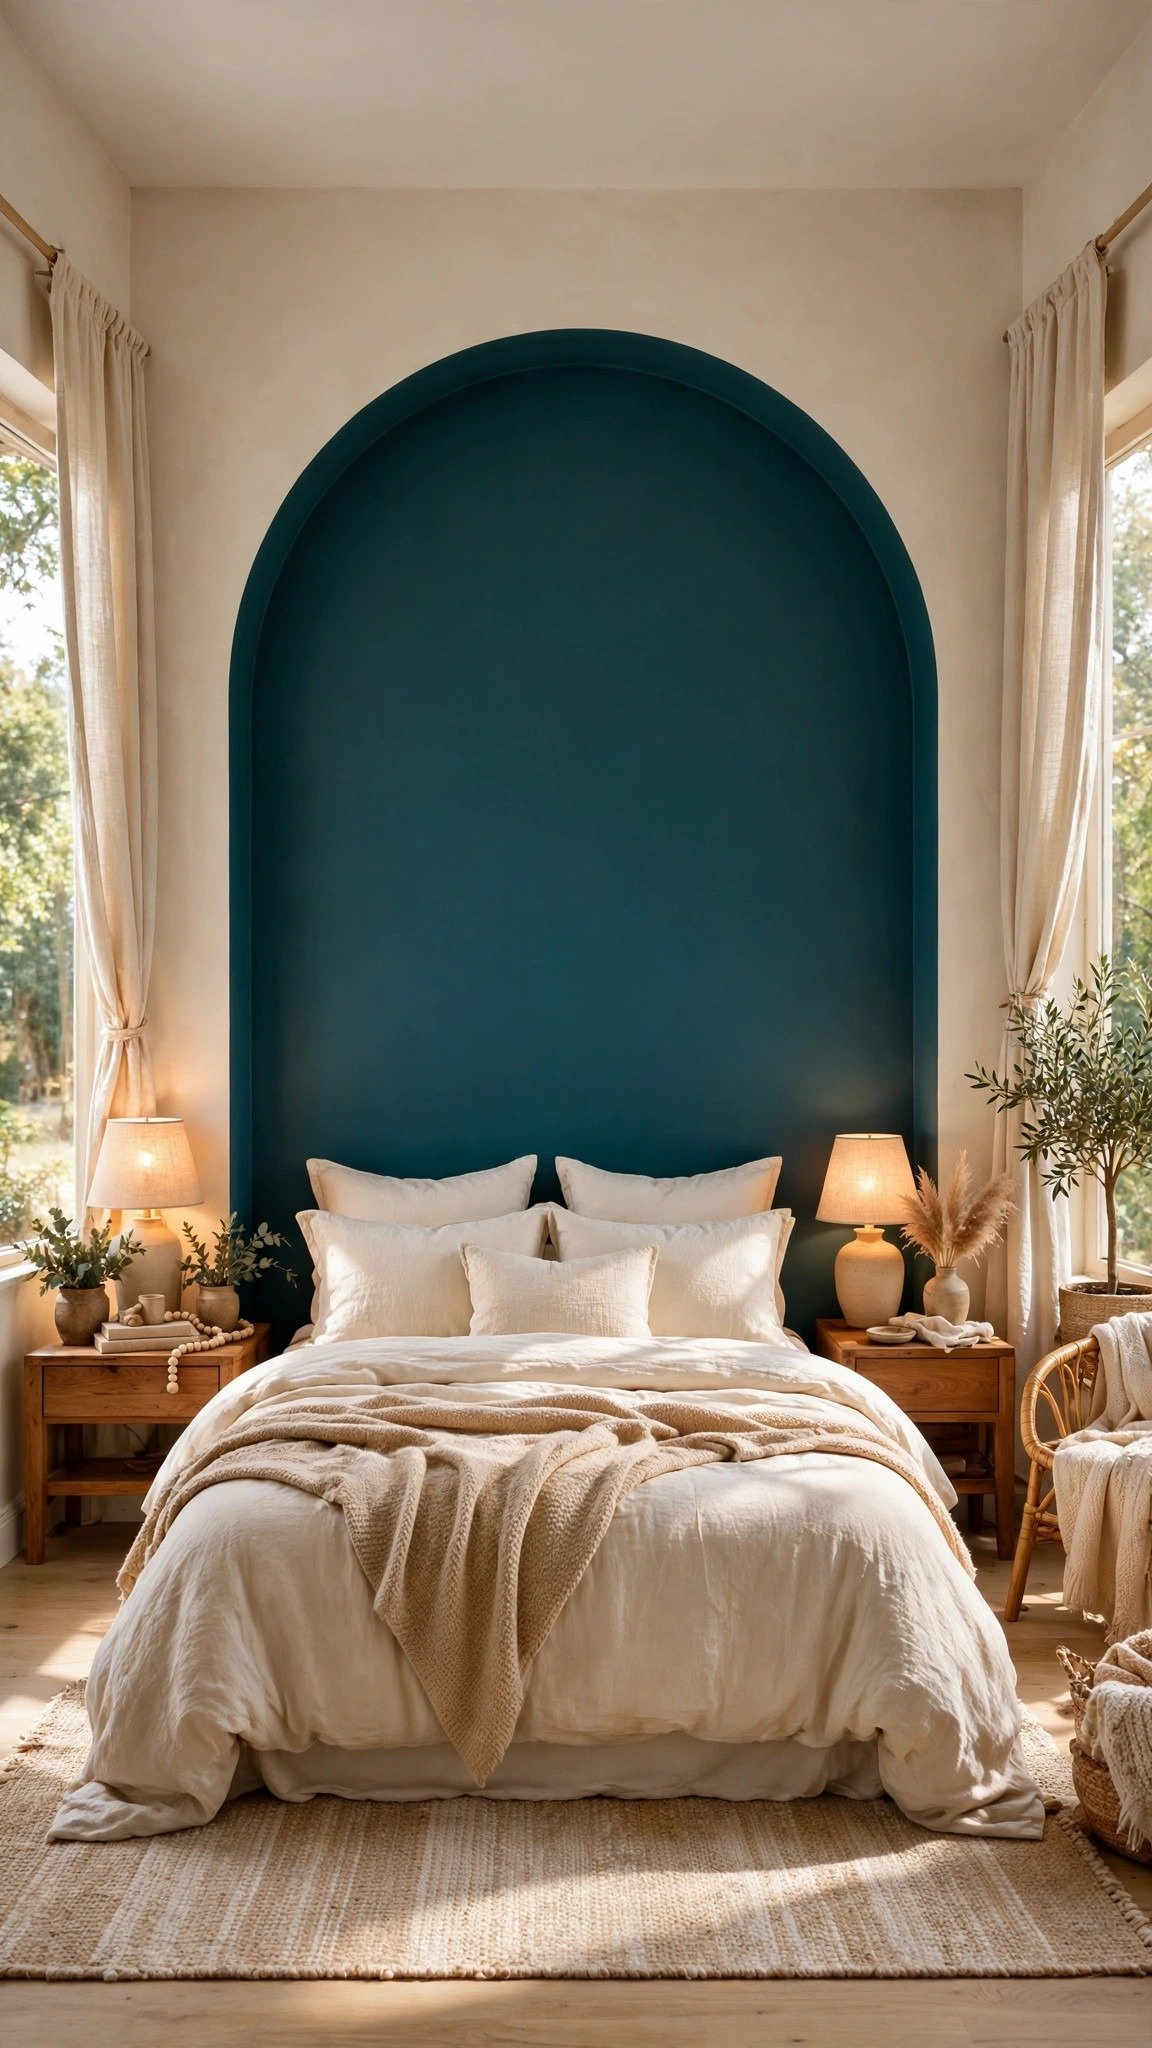
A deep teal arch gives the bedroom a richer look without requiring you to paint the entire wall. It is a good option for rooms with cool grey walls, black metal furniture, or neutral flooring. The colour creates contrast and makes the bed area feel more defined.
To keep the room comfortable, balance the darker paint with lighter bedding and natural textures. Cream, soft grey, or warm white sheets can prevent the wall from feeling too heavy. Wooden bedside tables or brass-coloured lamps can also soften the contrast.
If you are unsure about using a dark shade, test a small sample on the wall first. Teal can look different in daylight and under warm bedside lighting, so check it at different times before committing.
What you need: Deep teal paint, painter’s tape, pencil, string, small roller, angled paintbrush, and measuring tape.
3. Dusty Rose Arch

Dusty rose is a lovely choice if you want colour without making the bedroom feel overly bright. Unlike a strong pink, this muted shade has a softer appearance and works well with cream, light grey, warm white, and pale wood.
Use it behind a simple upholstered or wooden headboard to create a gentle focal point. Linen curtains, textured cushions, and a warm bedside lamp can complete the look without making the room feel too decorative. If you prefer a slightly more modern style, combine dusty rose with charcoal details or dark wood furniture.
This colour is especially useful when you want the painted shape to stand out without becoming the strongest feature in the room.
What you need: Dusty rose paint, painter’s tape, pencil, string, small roller, angled paintbrush, and measuring tape.
4. Muted Sage Arch

A muted sage arch brings a natural touch to the bedroom. It pairs easily with wooden furniture, cream bedding, indoor plants, and woven materials. The green tone can make a simple wall feel more connected to the natural textures already in the room.
For a fresh look, place the arch behind a wooden headboard and add a few botanical details nearby. You do not need to fill the whole bedroom with plants; one or two well-placed plants can be enough. White or warm neutral bedding will keep the green visible without creating too much contrast.
Sage is available in both grey-based and yellow-based shades. Check the undertone against your wall colour and flooring before choosing a paint sample, as some versions can look cooler or warmer depending on the light.
What you need: Muted sage paint, painter’s tape, pencil, string, small roller, angled paintbrush, and measuring tape.
5. Double Arch in Two Tones
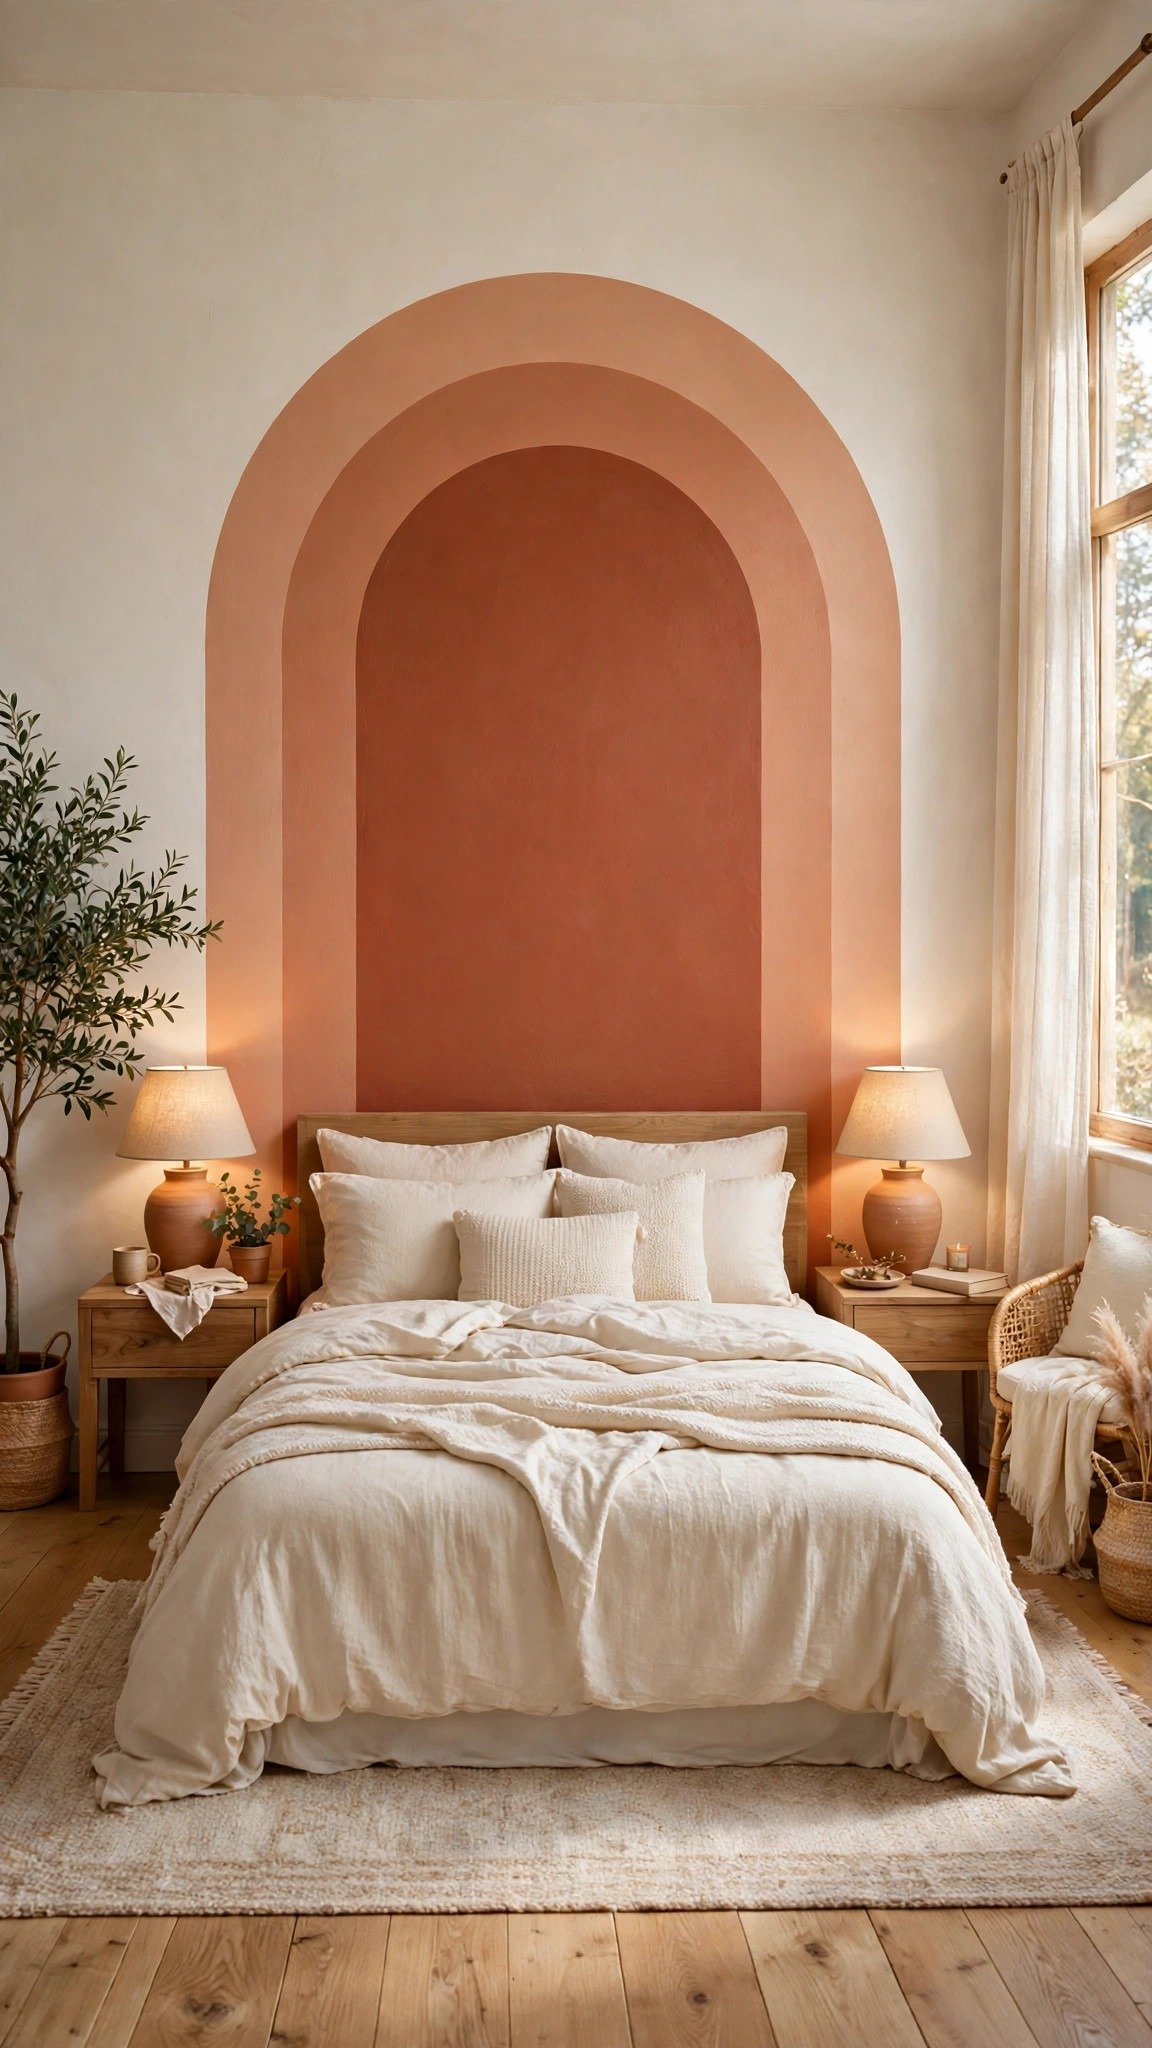
A double arch uses two curved shapes to create more depth behind the bed. You can paint a larger outer arch in a lighter shade and place a smaller, darker arch inside it. Using two colours from the same family keeps the design connected while making the layers easy to see.
For example, combine pale terracotta with a deeper clay shade, or use two versions of sage green. Keep the bed and surrounding furniture relatively simple so the layered shapes remain the main feature.
Measure both arches before painting and check that the space between them stays even. This design takes more planning than a single arch, but it can make a plain bedroom wall look more detailed without adding physical panelling.
What you need: Two coordinating paint colours, painter’s tape, pencil, string, small roller, angled paintbrush, and measuring tape.
6. Half-Height Arch Behind the Bed
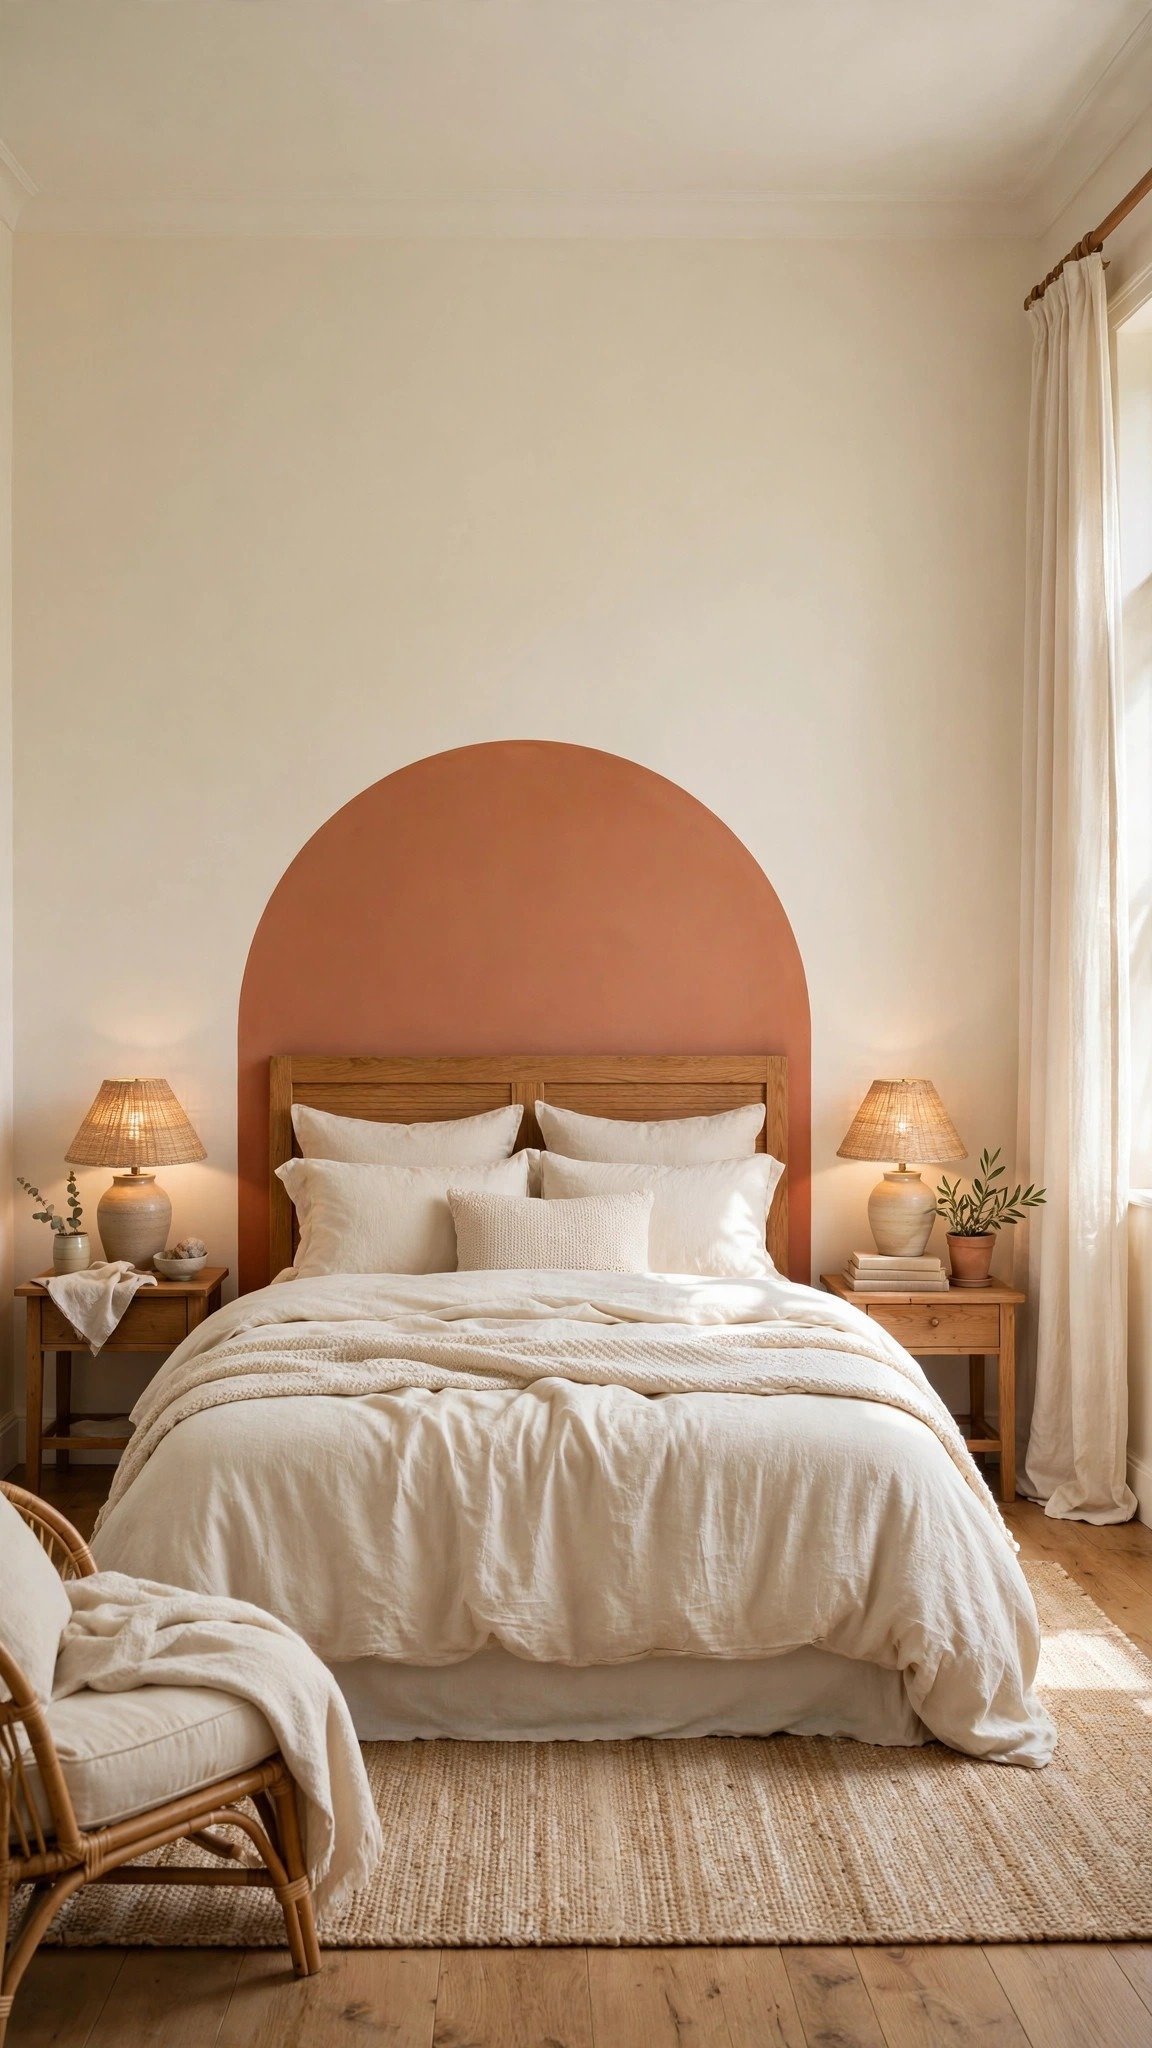
A half-height arch frames the headboard without extending too far up the wall. It is a useful choice for a small bedroom, a low ceiling, or a room where you want to leave space for artwork or a wall light above the bed.
The shape can be painted just high enough to sit behind the headboard and pillows. Choose a colour that contrasts gently with the wall so the outline is visible without overwhelming the room. A muted blue, soft green, or warm clay shade can all work depending on your existing palette.
Before painting, check the height of your headboard and how much wall space you want to leave above it. The arch should look connected to the bed rather than appearing too low or too narrow.
What you need: Accent paint, painter’s tape, pencil, string, small roller, angled paintbrush, and measuring tape.
7. Arch With a Painted Border Ring
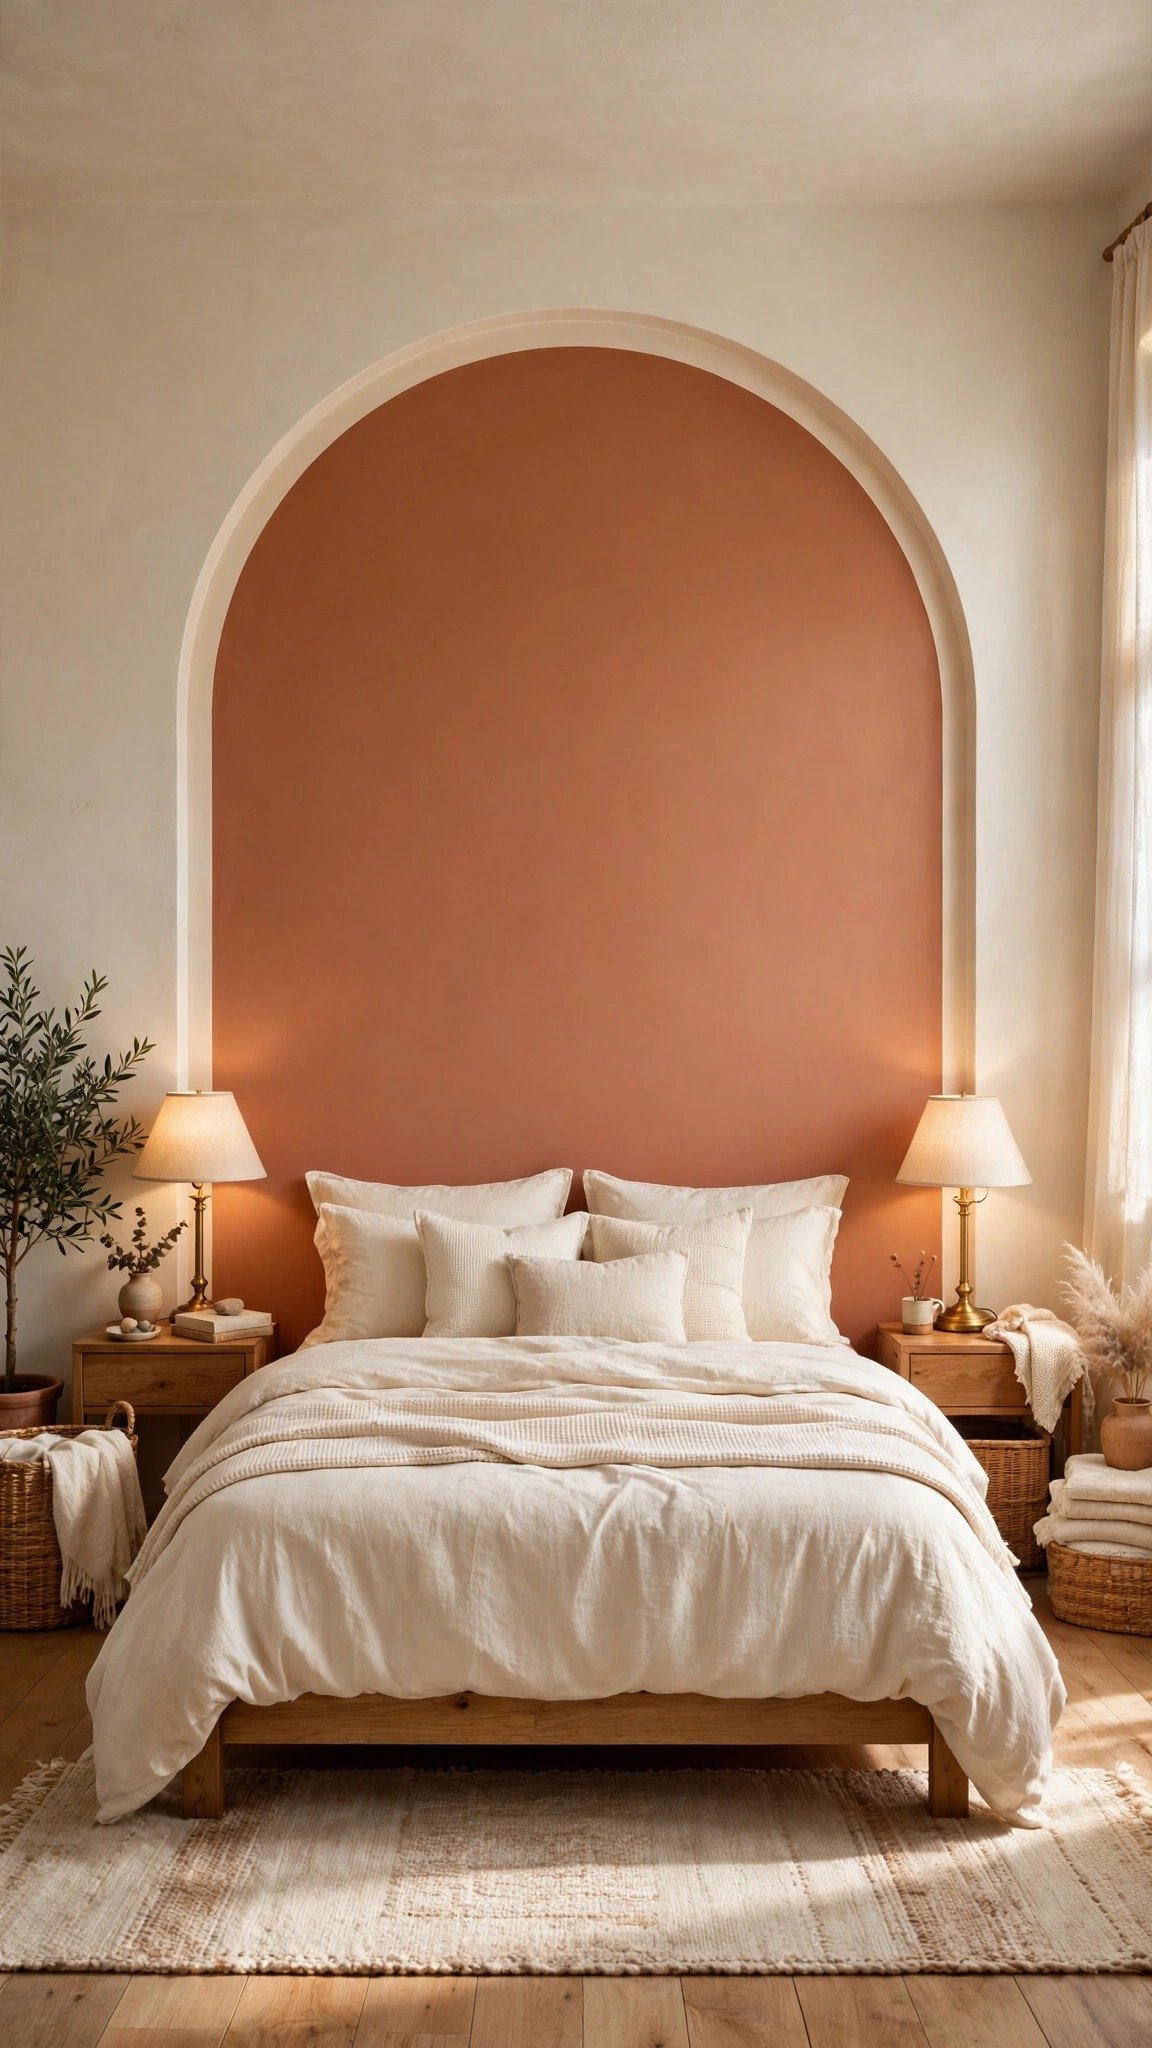
A contrasting border adds a second layer of detail around a painted arch. Start with a larger arch in your main colour, then add a narrow outline around its curve using a lighter or darker shade. Warm cream, muted gold, or a deeper version of the main colour can create an attractive border.
This design works particularly well when you want a simple painted shape to look more finished. For example, a sage arch with a soft cream outline can feel fresh and understated, while a terracotta arch with a darker border creates more contrast.
The main challenge is keeping the two curves evenly spaced. Mark both shapes carefully before painting, and use painter’s tape where needed to create clean edges. Take your time rather than trying to finish both colours in a hurry.
What you need: Main paint colour, border paint, painter’s tape, pencil, string, small roller, angled paintbrush, and measuring tape.
8. Arch Over a Reading Nook
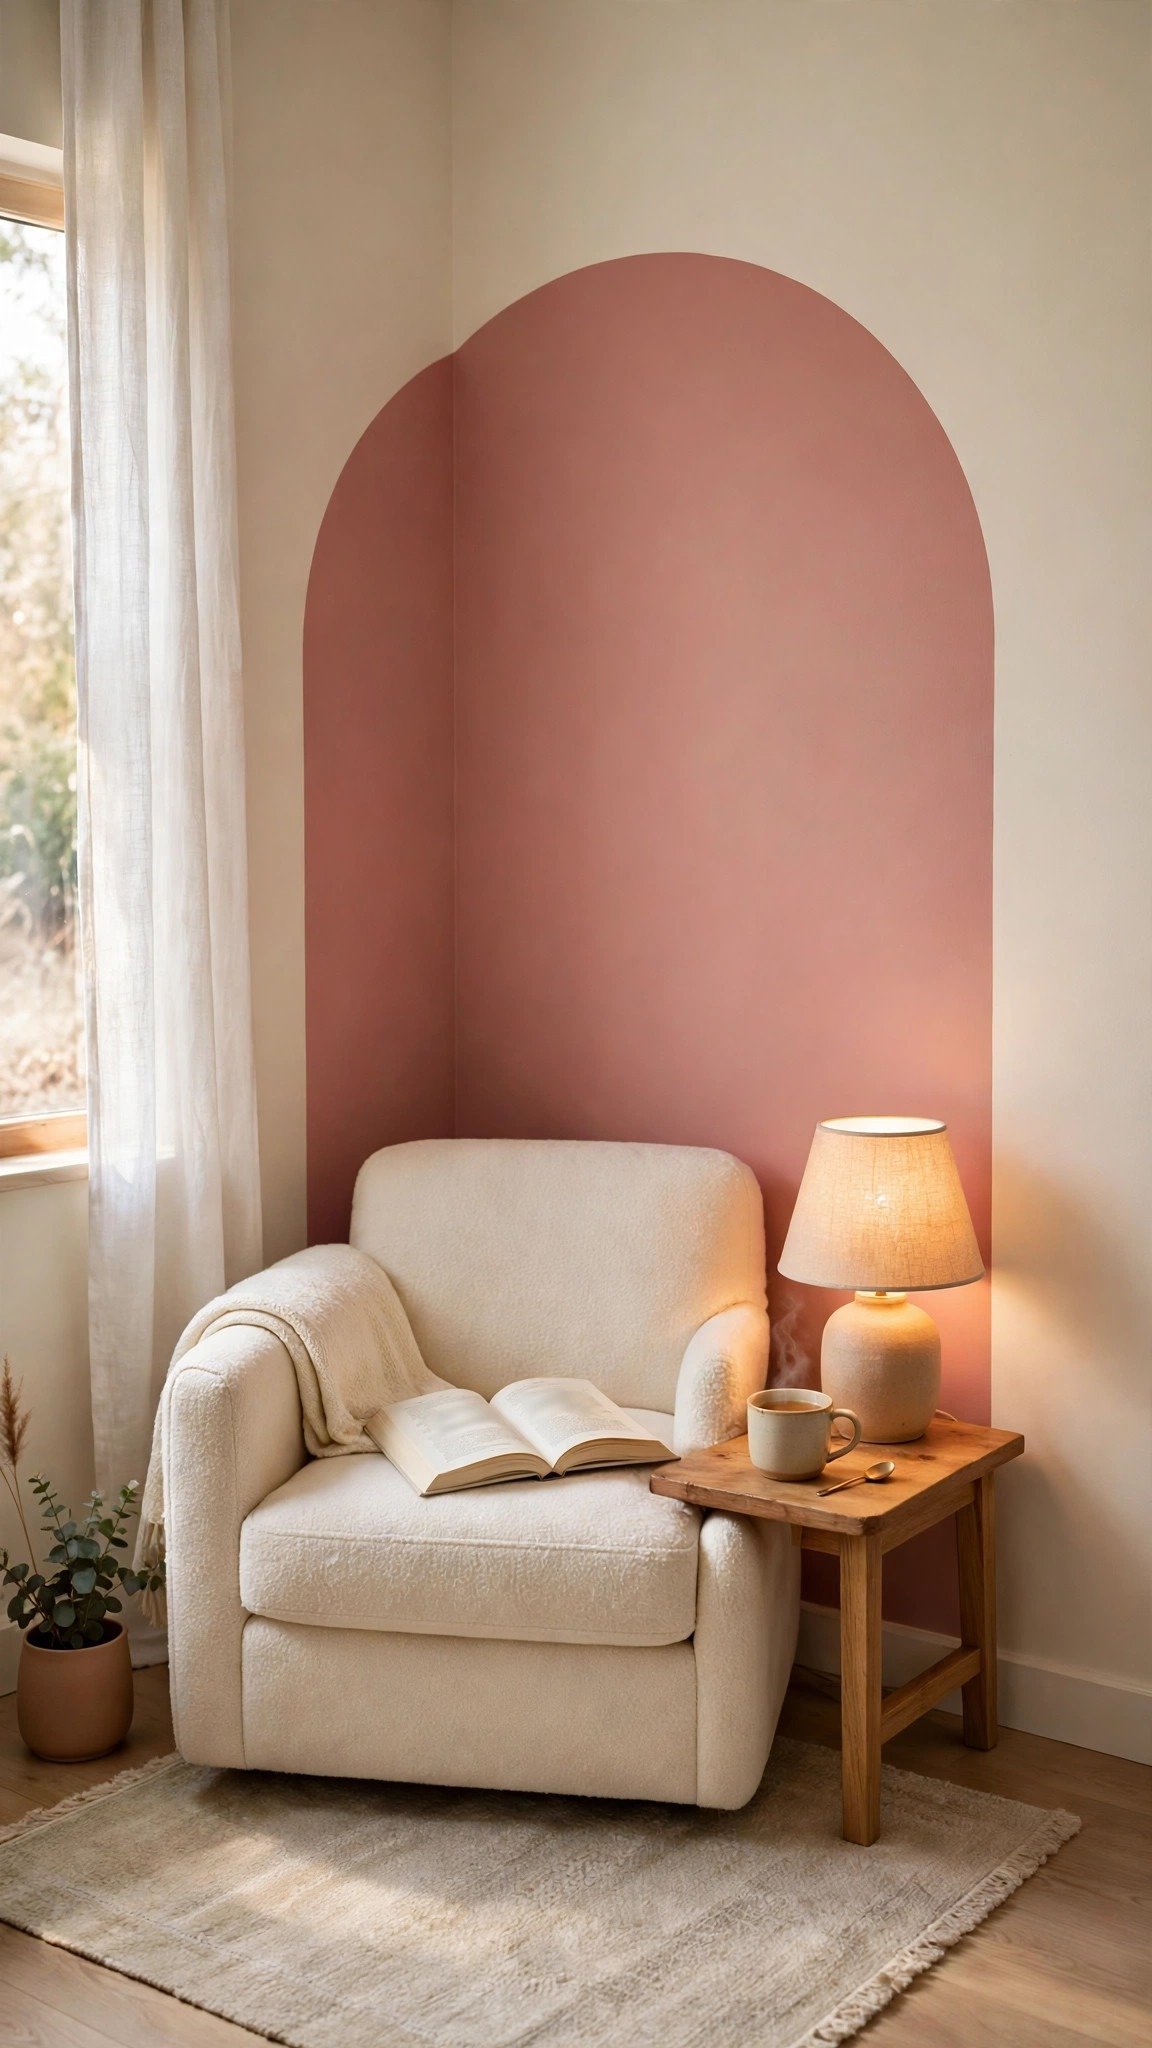
A painted arch can also create a focal point away from the bed. If you have an unused bedroom corner, use a curved shape to frame a small reading nook. Place a comfortable chair inside the painted area, then add a floor lamp or small side table to make the space practical.
Choose a colour that connects with the rest of the bedroom. For example, a dusty rose arch can complement warm neutral bedding, while a muted sage arch can work with natural wood furniture. The chair does not have to match the paint exactly; a related tone or simple neutral fabric will help the corner feel coordinated.
Keep the arrangement useful and uncluttered. A chair, reading light, and small table are usually enough to make the nook feel complete.
What you need: Accent paint, painter’s tape, pencil, string, small roller, angled paintbrush, measuring tape, and a chair or reading lamp.
9. Moody Charcoal Arch

A charcoal arch creates a dramatic focal point and works well in bedrooms that use darker furniture or rich accent colours. It can make the bed area feel more enclosed and defined, especially when paired with soft bedding and warm lighting.
To avoid making the whole room feel dark, keep some larger surfaces lighter. Cream bedding, pale curtains, or a light-coloured rug can balance the charcoal. You can also add small brass or warm wood details to soften the overall look.
If your bedroom has limited natural light, test the charcoal shade carefully. Some dark paints can look almost black in dim conditions, so choose a tone that suits the amount of daylight your room receives.
What you need: Charcoal paint, painter’s tape, pencil, string, small roller, angled paintbrush, measuring tape, and warm-toned lighting.
10. Soft Cream Arch on a Coloured Wall
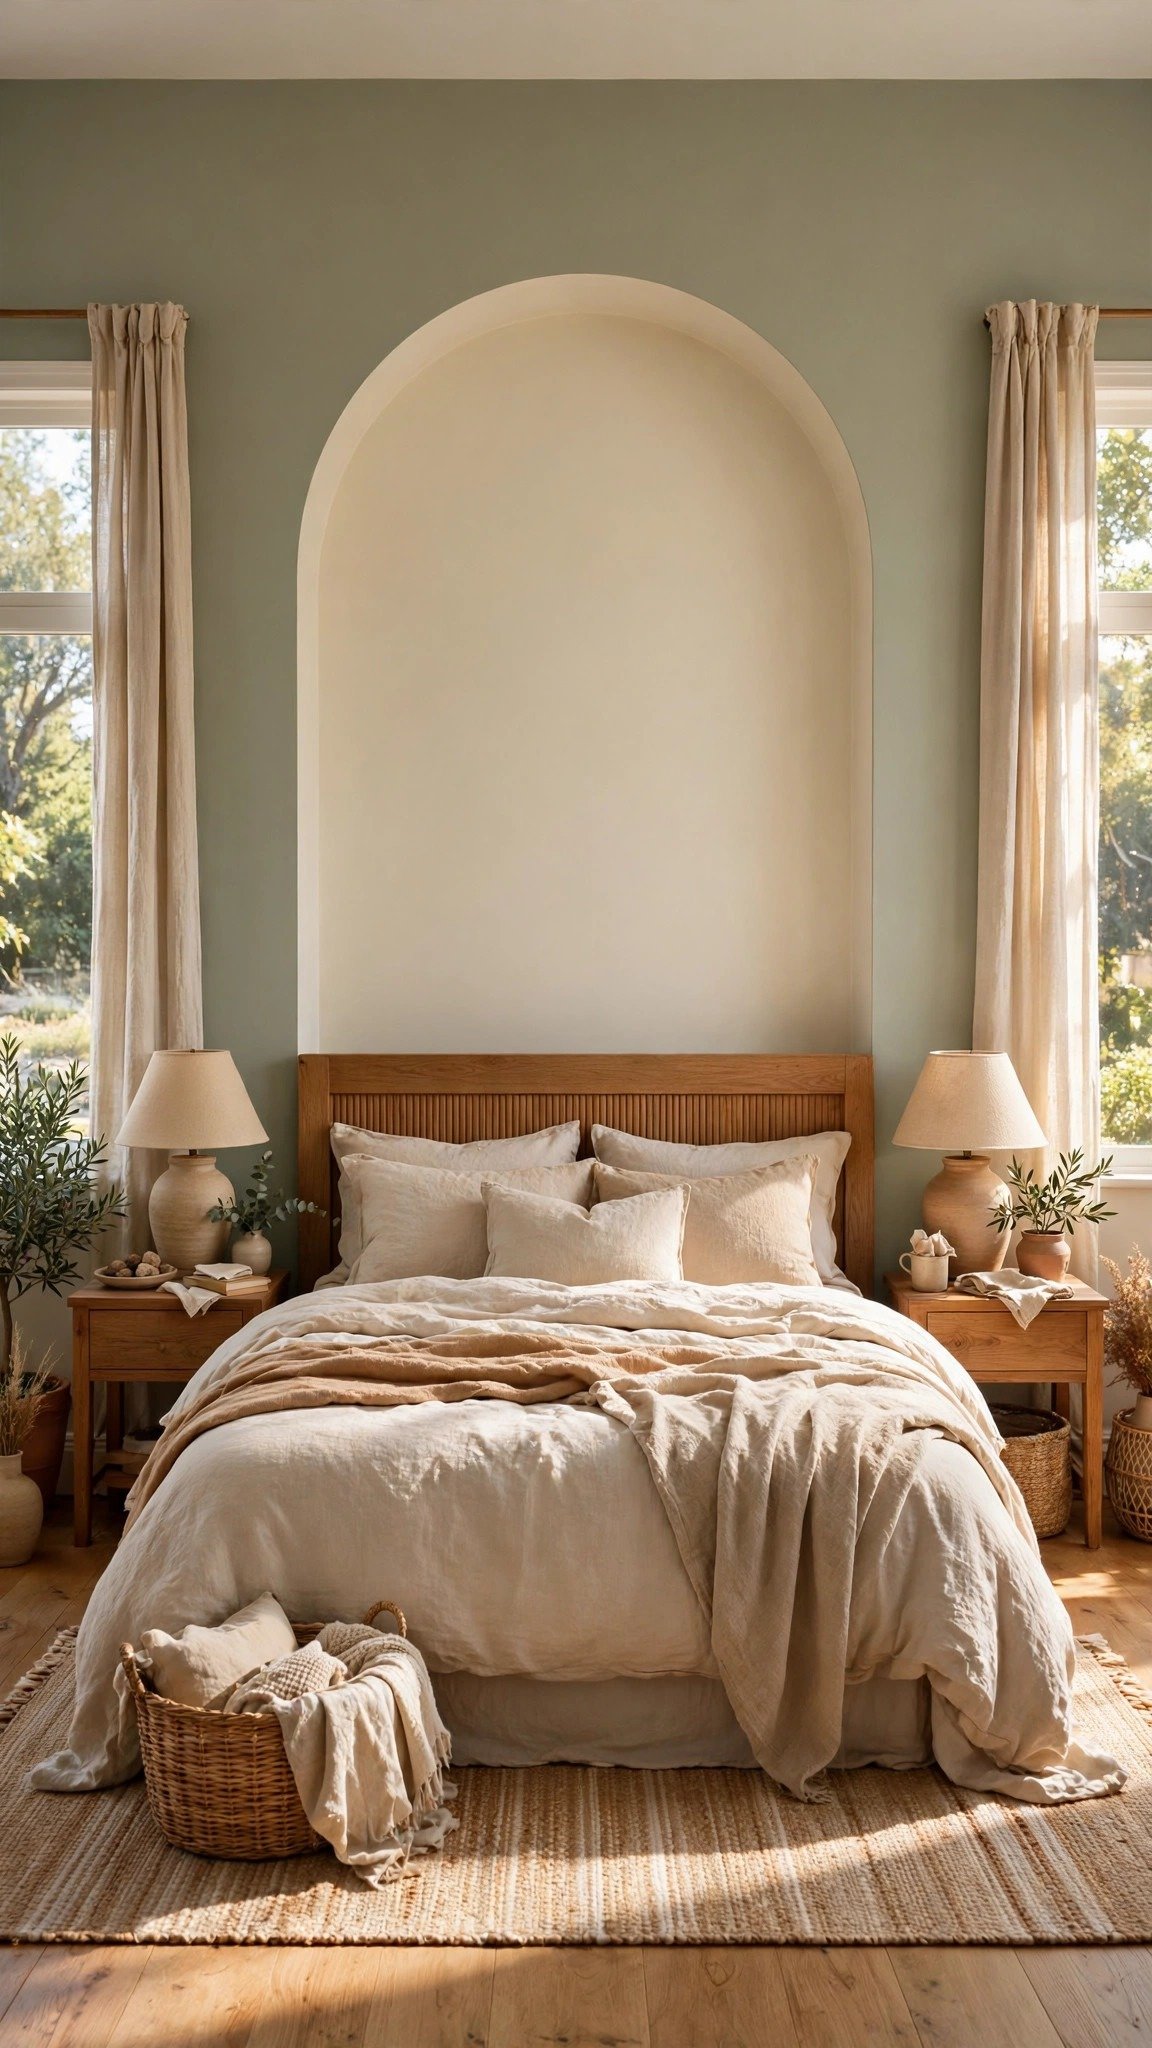
If your bedroom walls already have colour, you do not need to add another strong shade. A soft cream arch on a sage, dusty blue, muted terracotta, or other coloured wall can create a gentle contrast while keeping the room’s existing palette.
This approach is especially useful when you like your current wall colour but want to make the bed area more interesting. The cream shape creates a light backdrop behind the headboard and can help separate the sleeping area from the rest of the wall.
Use warm white or natural bedding and simple wood furniture to keep the design connected. Choose a cream shade that contrasts enough with the wall to make the arch visible; a colour that is too similar may disappear from a distance.
What you need: Soft cream paint, painter’s tape, pencil, string, small roller, angled paintbrush, and measuring tape.
Which Painted Arch Idea Is Right for Your Bedroom?
The right design depends on the colours and proportions of your room. Think about the furniture you already own before choosing a paint shade or arch shape.
- Warm wood furniture and neutral bedding: Try a terracotta or dusty rose arch.
- Grey walls and cooler finishes: Deep teal or muted sage can add colour without clashing.
- Small bedroom or low ceiling: A half-height arch can frame the bed while leaving more open wall space.
- A more decorative feature: Choose a double arch or a contrasting border.
- A dark, cosy bedroom: Charcoal can create a strong focal point when balanced with lighter textiles.
- Already-coloured walls: A soft cream arch can add definition without introducing another bold colour.
- An unused bedroom corner: Use an arch to frame a small reading nook.
You do not have to choose the most complicated design to get a good result. A single, well-proportioned arch in a colour that suits your room can be just as effective as a layered design.
How to Paint an Arch on a Bedroom Wall in 4 Steps
You can create a painted arch with basic decorating tools, but careful measuring makes a big difference. Before starting, make sure the wall is clean, dry, and suitable for painting.
1. Choose a Colour That Works With Your Room
Look at your bedding, curtains, flooring, and furniture before choosing a shade. A colour that looks attractive on a small paint card may appear quite different across a large wall.
Buy a sample pot and test the paint directly on the wall. Check the sample in natural daylight and under your bedroom lights before making a final decision. If you are painting over a dark wall with a lighter colour, you may need a suitable primer or additional coats.
2. Measure and Draw the Arch
First, decide how wide and tall you want the arch to be. Measure the bed and headboard, then mark the centre point of the area where the arch will sit. Make sure the shape is wide enough to frame the bed without extending awkwardly toward nearby furniture or wall features.
For a simple semicircular top, the radius is half the arch’s width. Tie a pencil to a piece of string and secure the other end at the centre point of the curve. Keep the string taut as you move the pencil to draw the curved top. Mark the straight sides separately with a level or measuring tape.
If you want a taller arch with longer vertical sides, plan the height and curve separately rather than stretching the string randomly. Step back and check the outline before applying painter’s tape.
3. Prepare the Wall and Apply the Paint
Protect the floor and nearby furniture with a drop cloth. Apply painter’s tape along the straight edges and use a smaller brush to work carefully around the curve. Press the tape down firmly so paint is less likely to seep underneath.
Use a small roller for the larger area and an angled brush for the edges. Apply thin, even coats and allow each coat to dry according to the paint manufacturer’s instructions. A second coat may be needed for consistent coverage, especially with strong or dark colours.
If you are creating a double arch or border, let the first colour dry as directed before marking and painting the next section.
4. Remove the Tape and Check the Edges
Follow the paint manufacturer’s guidance on when to remove painter’s tape. In many cases, removing it carefully while the final coat is slightly tacky helps prevent the paint from peeling, but the right timing depends on the product.
Pull the tape back slowly at an angle rather than yanking it away from the wall. Once the paint has dried, inspect the curve and touch up any small uneven areas with an angled brush.
Before putting furniture back, allow the paint to dry fully as directed on the tin.
Painted Arch Mistakes to Avoid
A painted arch is a manageable DIY project, but a few small mistakes can affect the finished look.
- Choosing a colour without testing it: Paint can look different under daylight and warm bedroom lighting. Test a sample on the wall first.
- Making the arch too narrow: A shape that does not relate to the width of the bed can look disconnected. Measure the bed and headboard before drawing.
- Drawing the curve by eye: An uneven curve is difficult to correct once the paint dries. Use string, a pencil, and careful measurements.
- Skipping wall preparation: Dust, loose paint, or a damp surface can affect how the new paint adheres. Clean and dry the wall before starting.
- Applying one thick coat: Thick paint can leave uneven coverage and visible roller marks. Follow the product instructions and apply additional thin coats if needed.
- Rushing the tape removal: Pulling tape away too quickly can damage the edge. Remove it carefully at the appropriate stage for your paint.
- Adding too many decorations: Artwork, mirrors, and wall lights can work with an arch, but their size and placement matter. Leave enough of the painted shape visible so it remains part of the design.
A little preparation is usually more useful than trying to fix every detail after the paint has dried.
FAQs
How much does it cost to paint an arch behind a bed?
About $45 in total for most people. A quart of accent paint costs around $28, plus painter’s tape, a foam roller, and an angled brush. A wood accent wall, by comparison, can cost over $900 for materials and labor, so the painted arch is one of the cheapest bedroom upgrades you can do.
How do I draw a perfect arch on a wall?
Use the string-and-pencil method. Tie one end of a string to a pencil and hold the other end at the center point of your wall, roughly at headboard height. Sweep the pencil in a smooth half-circle, keeping the string taut the whole time. This gives you a mathematically even curve instead of a hand-drawn arch that dips in weird places.
Can I paint an arch in a rental?
Yes, a painted arch is one of the most renter-friendly bedroom updates. It is just paint, so when you move out, you paint over it in an afternoon with the original wall colour. There is no demo, no drywall repair, and no nail holes to fill.
What paint finish is best for a bedroom arch?
Eggshell is the best finish for most bedrooms. It catches just enough light to look subtly dimensional without being glossy or flat. A flat matte finish can look chalky in a bedroom that gets a lot of natural light, so if your room faces south or west, consider bumping up to eggshell or satin.
How wide should a painted arch be?
Make the radius extend about 8 inches beyond each edge of your bed frame, which gives the arch enough presence to feel like a real design element without swallowing the whole wall. For wider beds or taller ceilings, stretch that out to 10 to 12 inches on each side.
How do I fix a wonky or lopsided arch?
Do not try to paint over the mistake — repaint the section. Let the paint dry, re-measure with the string-and-pencil method, re-tape the curve carefully, and paint two thin coats over the wrong line. Fifteen extra minutes with the string saves you a redo, so take your time on the second attempt.
How do I remove a painted arch?
Paint over it with the original wall colour. Two thin coats of the wall colour will cover most arch colours, and a primer coat helps if the arch is very dark. The whole job takes an afternoon, and there is no damage to repair afterwards.
Conclusion
Painted arch bedroom ideas offer a simple way to give an ordinary wall more character without installing expensive materials or changing the furniture. A terracotta arch can bring warmth, sage can create a natural feel, and charcoal can add drama. If you prefer a more detailed look, a double arch or contrasting border can make the wall feel more decorative.
The best result comes from choosing a colour that suits your bedroom and measuring the shape before you start painting. Begin with a design that fits your space, prepare the wall carefully, and take your time with the curved edges. Even one thoughtfully placed arch can give the bedroom a more finished and personal look.