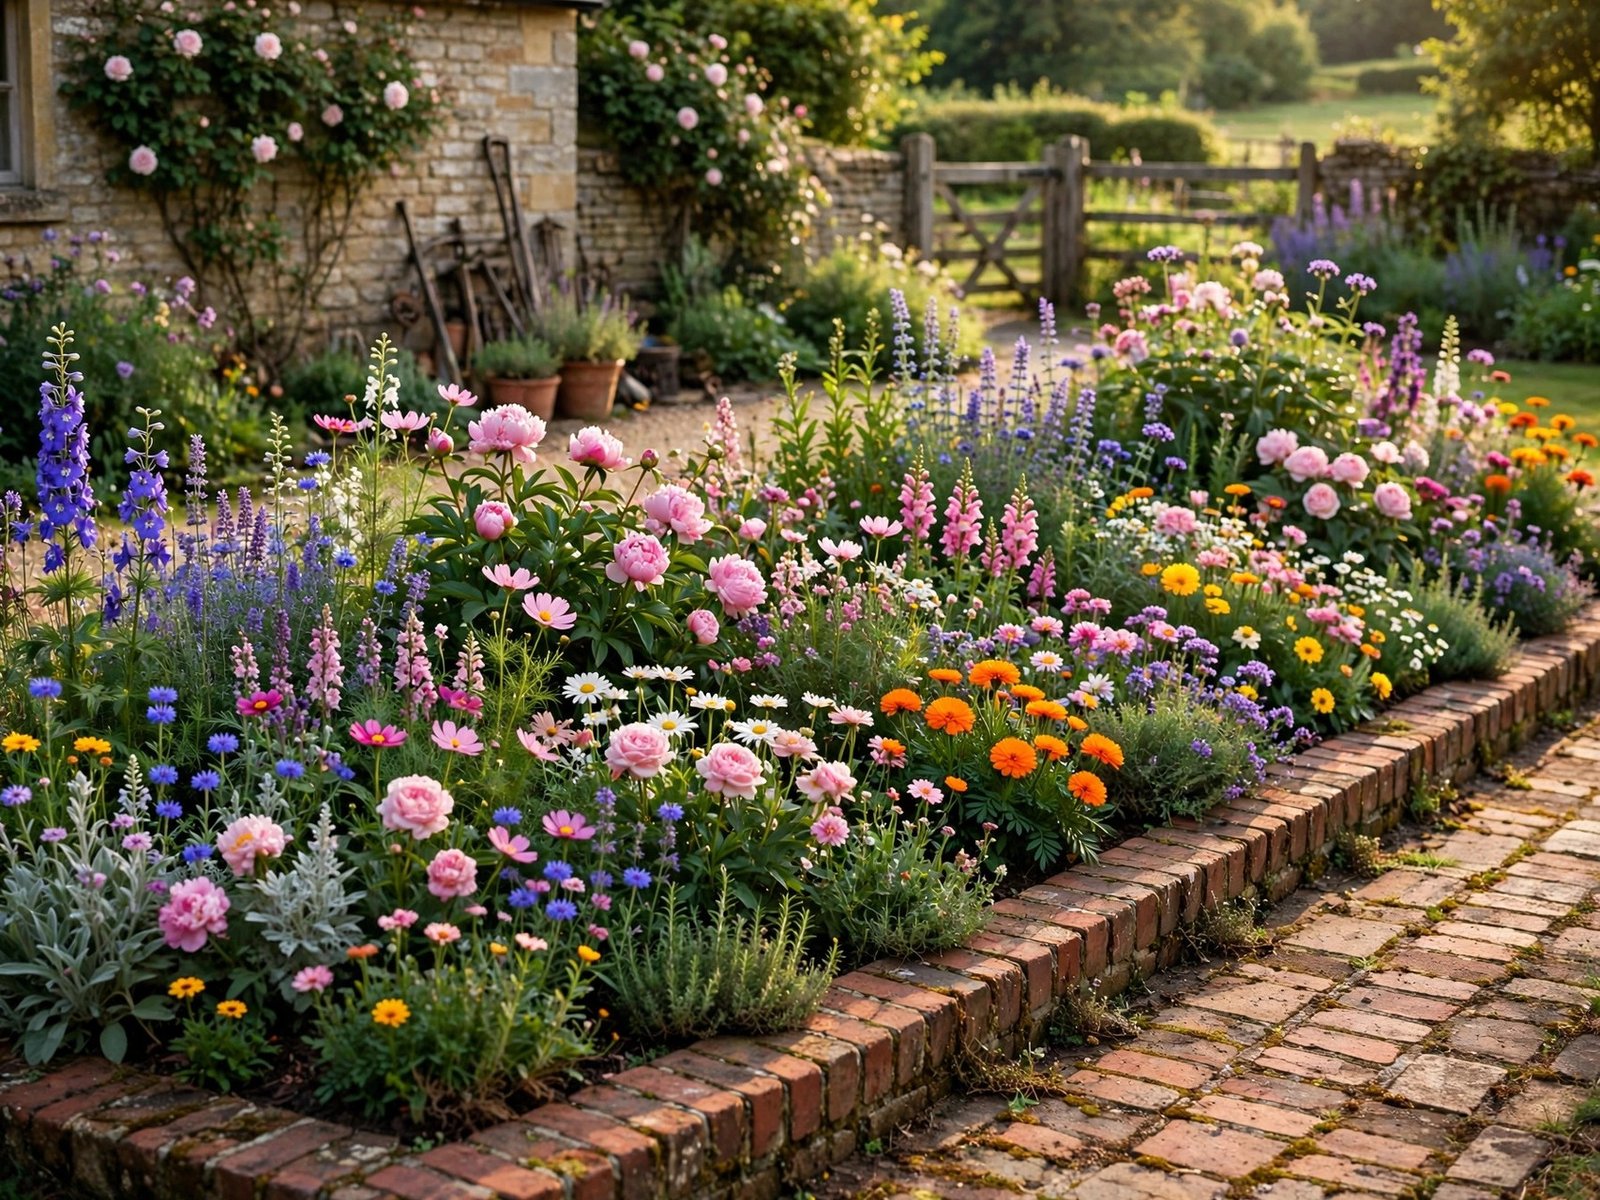
13 Flower Bed Border Ideas to Upgrade Your Garden Landscape
A flower bed is only as good as its border. The right edging gives a garden structure, keeps mulch where it belongs, and stops grass from creeping into your planting beds. It also makes the whole garden look finished, even when the flowers are still small. Without a border, even a well-planted bed can look messy and unfinished.
These 13 flower bed border ideas cover every garden style, from cottage and rustic to modern and classic. Each idea explains what the border is, why it works, which garden it suits best, and what you need to build it. You will also find a quick answer at the top, a guide to choosing the right border for your garden, and the mistakes to avoid. Start with one bed, try one idea, and see how much neater your garden looks.
Best Flower Bed Border at a Glance
If you want a fast answer, here it is. For most gardens, brick or natural stone is the safest choice: both look good with almost any style and last for years. If you want the cheapest easy start, try a river rock border or a crushed gravel strip. If your garden is modern, metal edging gives the cleanest lines. And if you love a soft cottage look, a living border of low plants like creeping thyme is the prettiest option of all.
- Best all-round border: brick or natural stone — suits most styles, lasts for years.
- Easiest for beginners: river rock or crushed gravel — few tools, fast to install.
- Best for modern gardens: metal landscape edging — crisp, clean, nearly invisible.
- Best for cottage gardens: woven willow or a living plant border — soft, romantic, natural.
- Best for slopes or statement beds: gabion stone or raised timber — strong and bold.
1. Timeless Brick Garden Edge
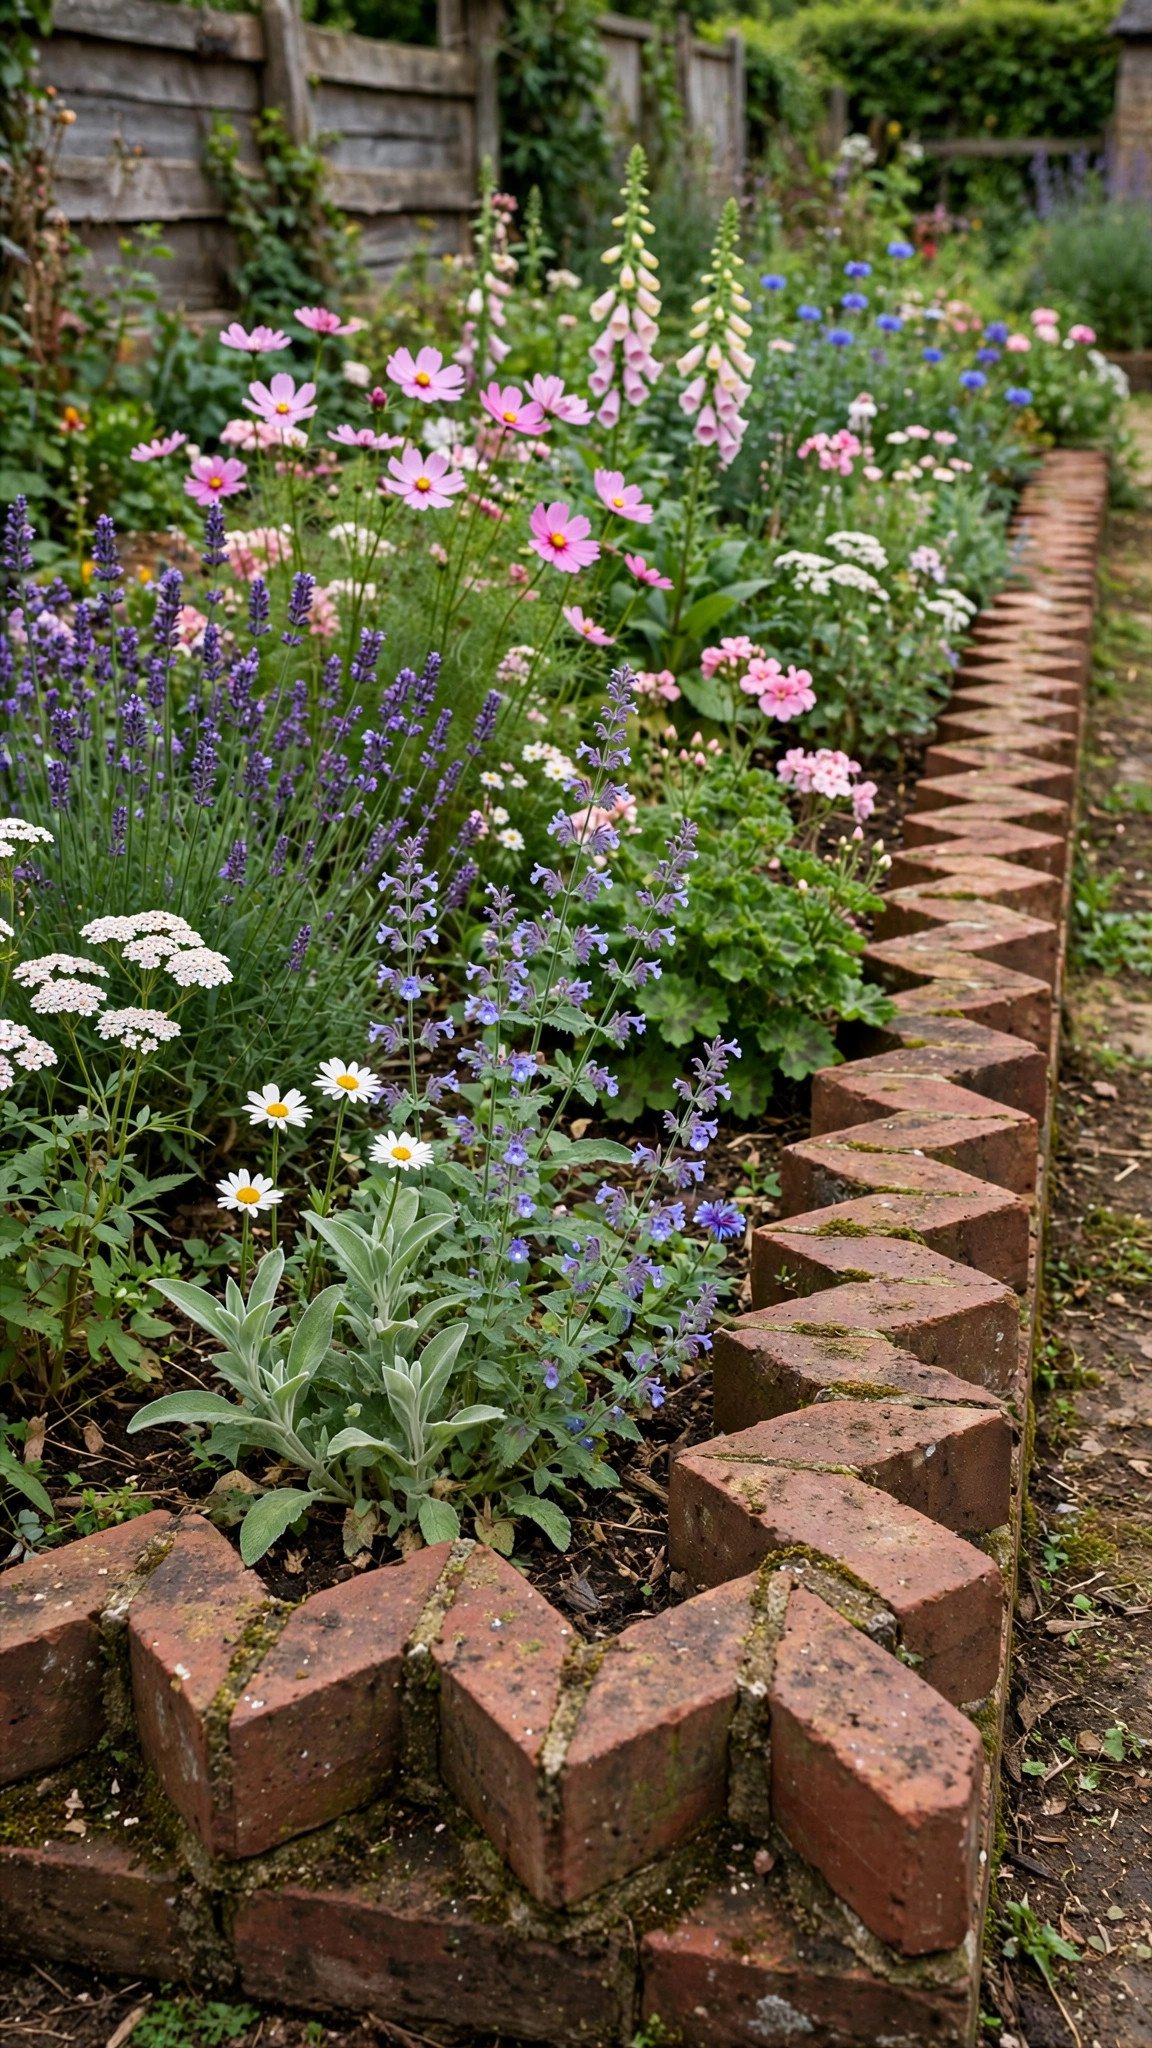
Brick borders are one of the most dependable choices because they work with nearly every landscape style. Bricks can be laid flat, stacked in two rows, or angled in a sawtooth pattern for extra character. A sawtooth edge, where each brick leans at the same angle, gives a cottage garden a charming handmade feel, while flat uniform bricks suit a classic formal garden. Brick also ages well: it softens in colour over time and looks better as the garden grows around it.
The most common mistake is placing bricks directly on soil. Bricks set on bare soil sink and shift after heavy rain or frost, and the border soon looks uneven. Dig a shallow trench, add a few inches of compacted gravel, then a thin layer of sand, and set the bricks tightly together. Bury the first layer slightly so it cannot move. Check with a level as you go, backfill soil around the border, and water the area well to settle everything in place.
2. Natural Stone Border Charm
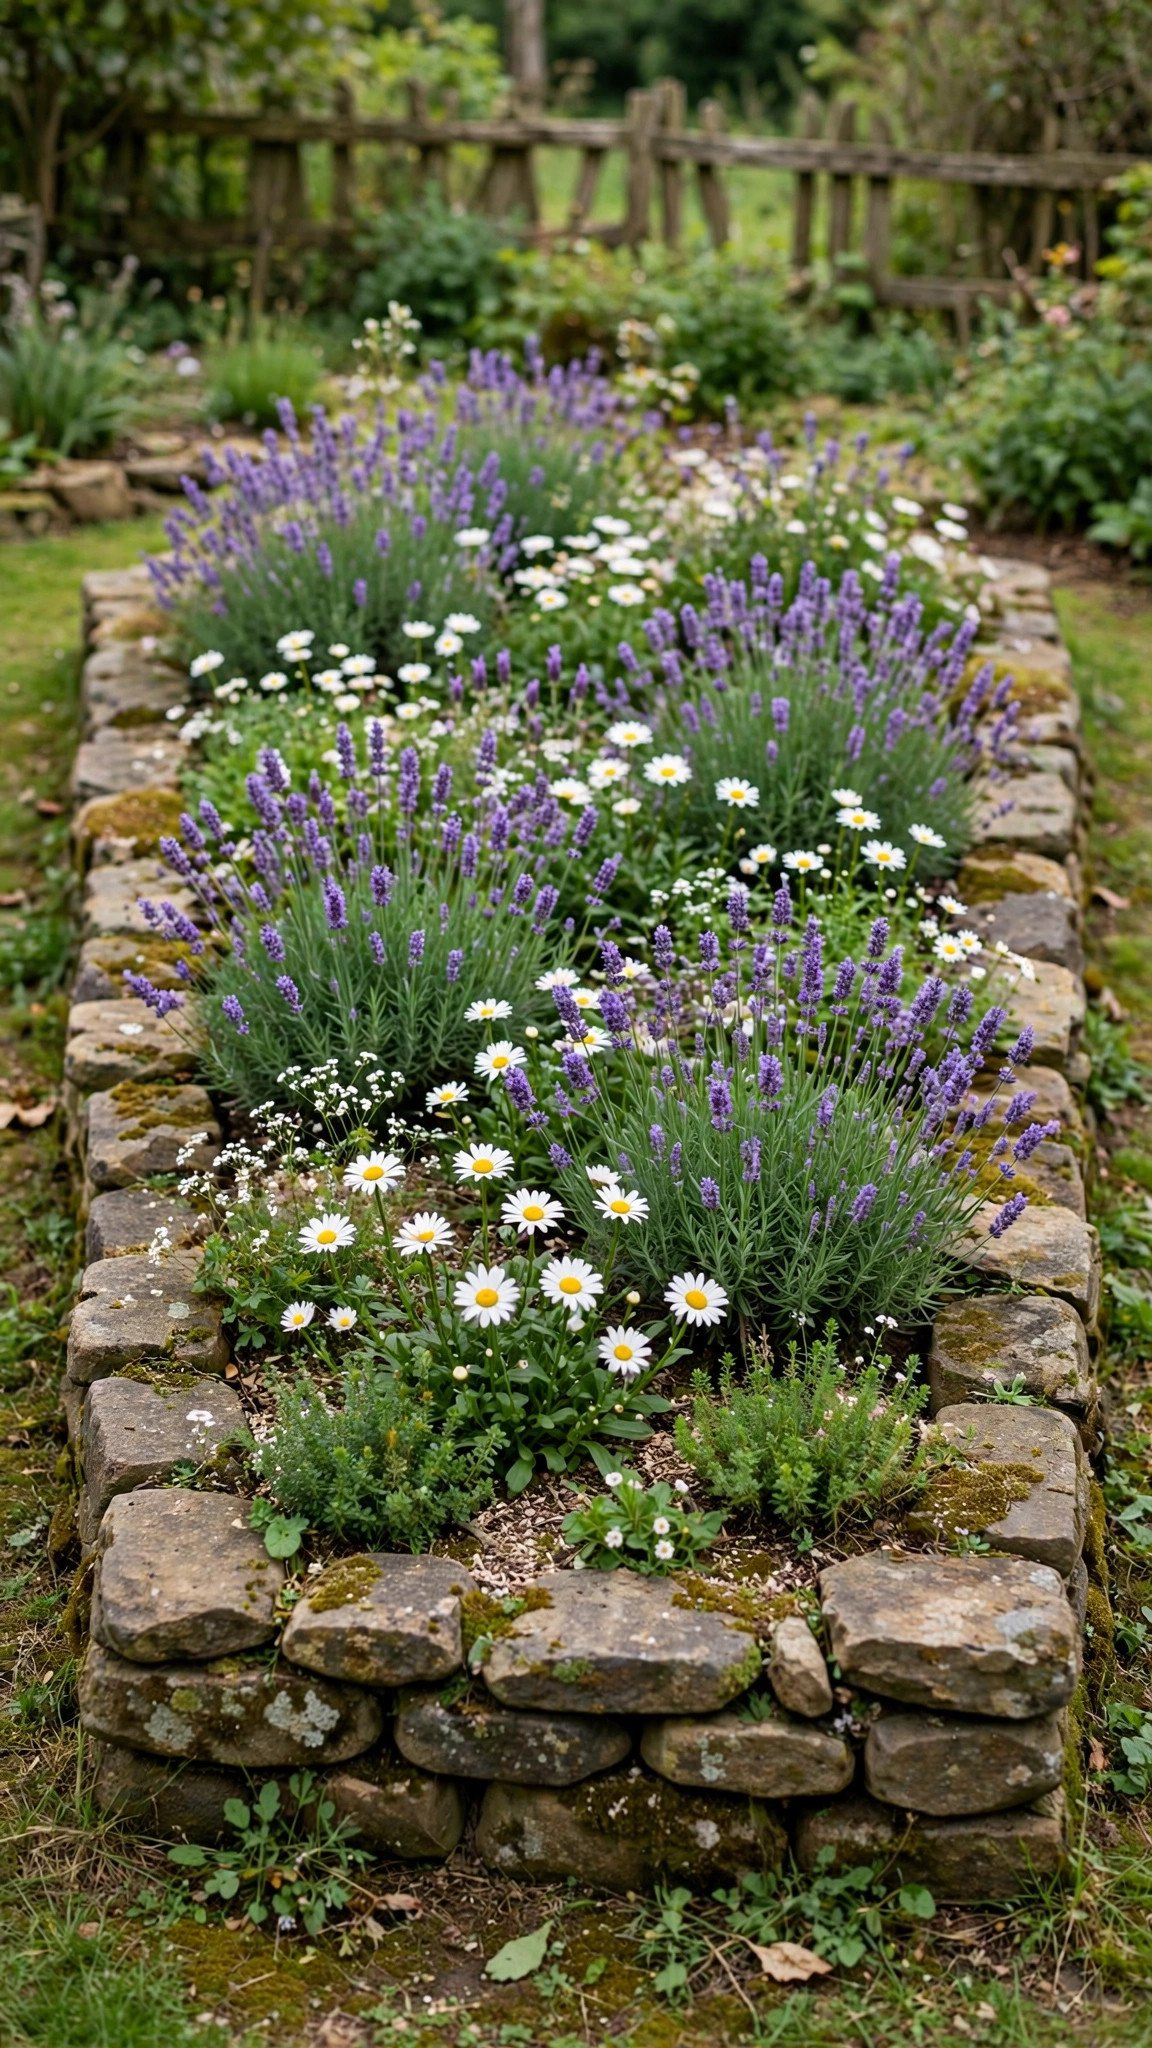
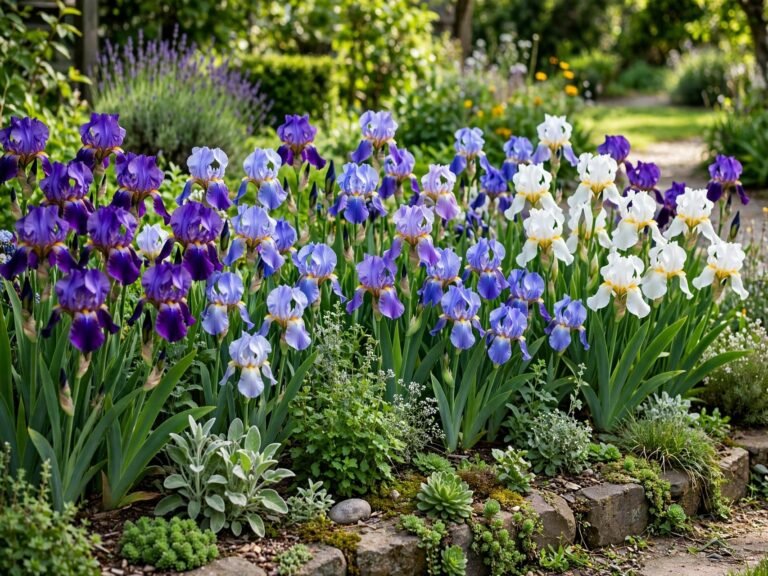
Natural stone edging creates an organic look that blends into established gardens beautifully. Irregular fieldstones and flagstones soften the line between lawn and flower bed, and no two borders ever look the same. Larger stones work better than small ones because they resist shifting and frost movement, so choose pieces you can lift with both hands rather than small pebbles. Vary the sizes as you place them instead of building a perfectly symmetrical line — a natural, uneven rhythm looks far more authentic.
Stone borders suit cottage gardens, woodland edges, and older homes especially well. Pair them with soft flowers like lavender, daisies, and salvia for a relaxed, lived-in feel. Dig a shallow trench, add gravel for drainage, and nest the stones closely together so they lock against each other. Adjust each stone until it sits stable, then backfill soil around the base. A stone border needs almost no care once it is set, and it only looks better with age.
3. Rustic Log Slice Border
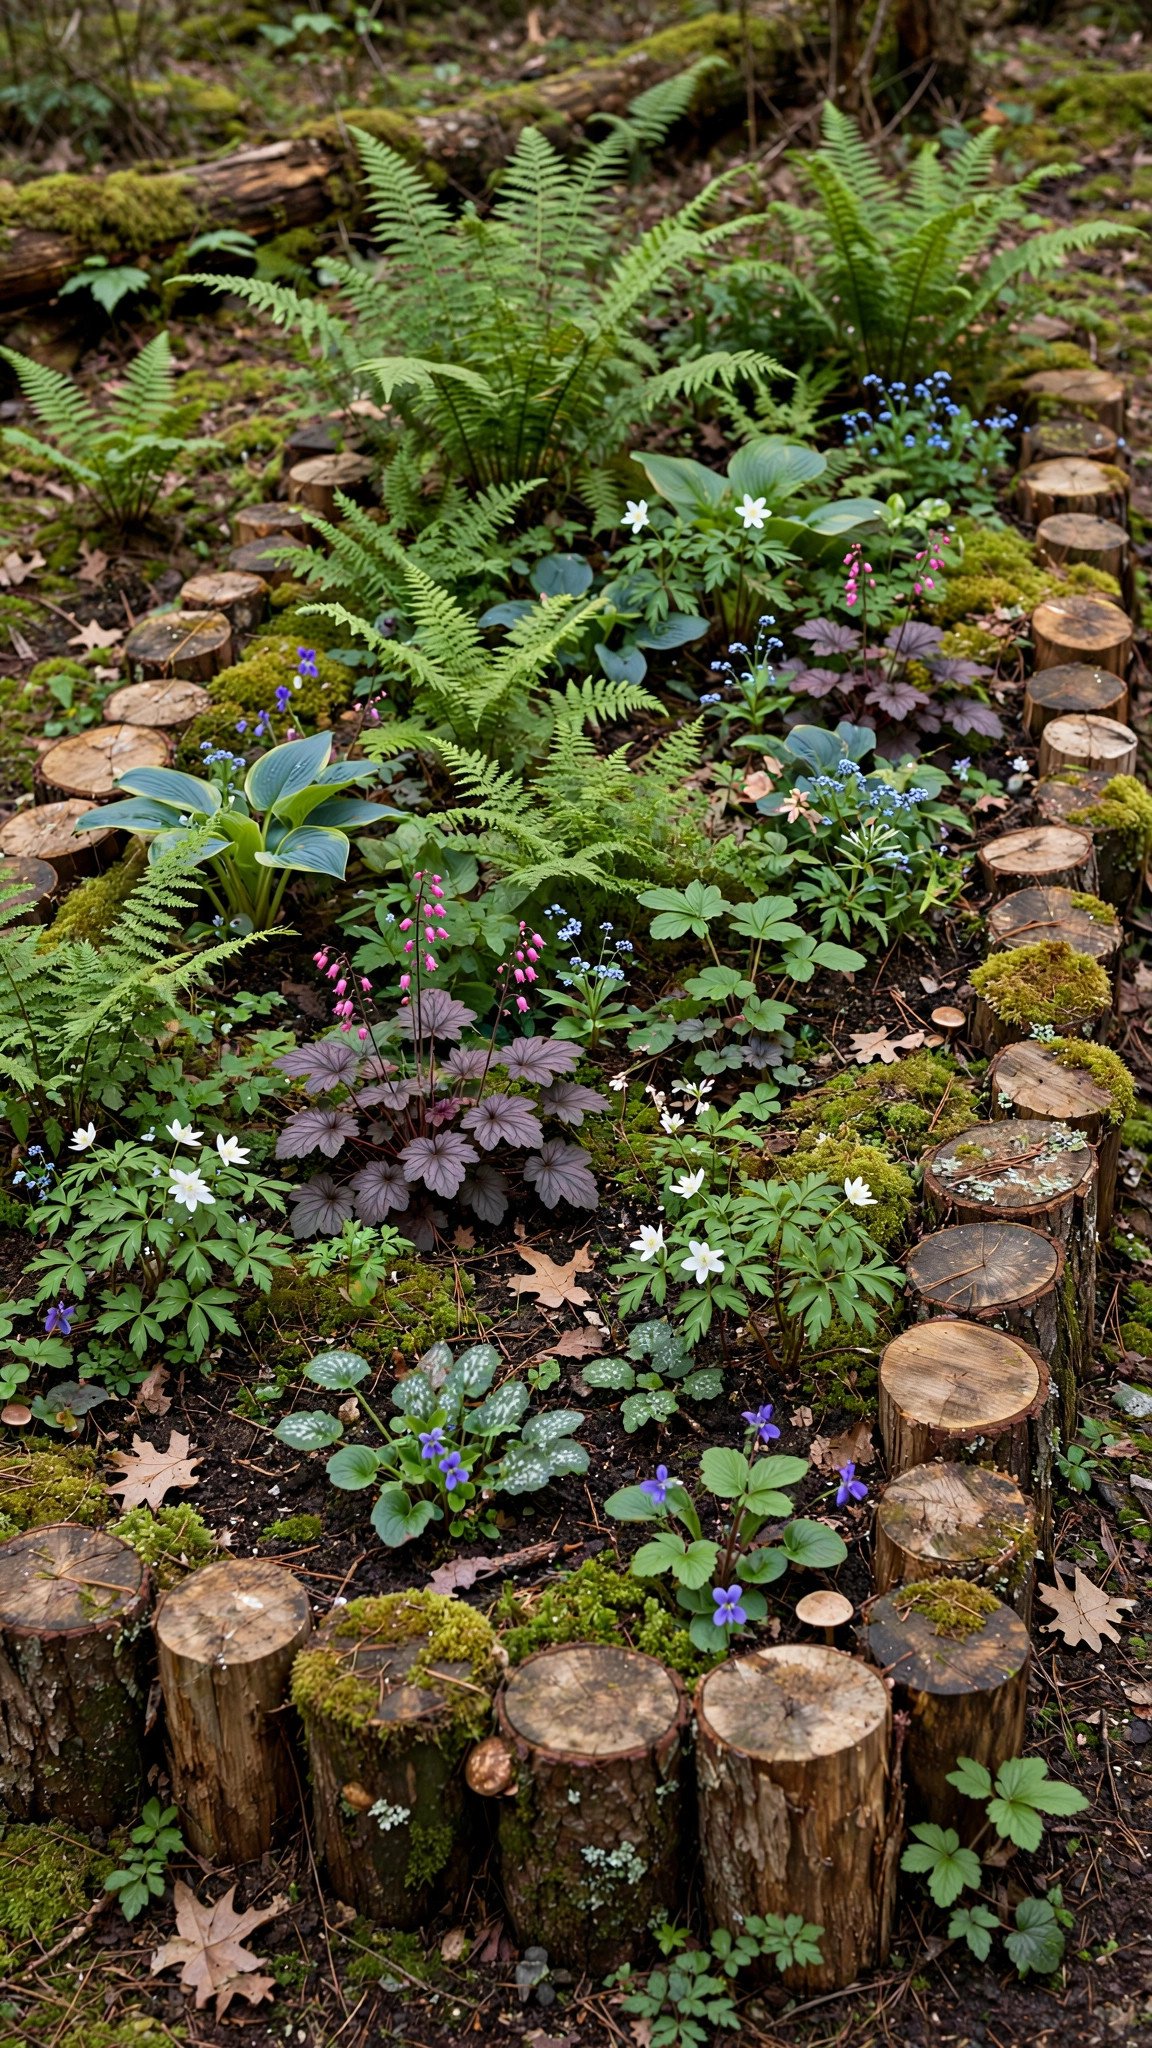
Wood slice borders bring warmth and rustic character to flower beds, and they work especially well in woodland gardens and country-style landscapes. Slices cut from a log, set upright in a row, look like a tiny wooden fence around the bed. Cedar and treated hardwoods last far longer outdoors than softwoods, so choose your wood with care. Vary the height of the slices slightly as you set them — a little unevenness makes the border look natural, like it grew there.
The big risk with wood is rot. Untreated wood placed against constantly damp soil decays fast, so seal every piece with a weather-resistant exterior sealant before you install it, and let it dry fully. Dig a narrow trench and bury each slice upright, partway into the soil, packed side by side tightly for stability. A sealed log slice border can last several seasons, and when a piece does wear out, you can replace just that one slice without rebuilding the whole edge.
4. Modern Metal Landscape Edging
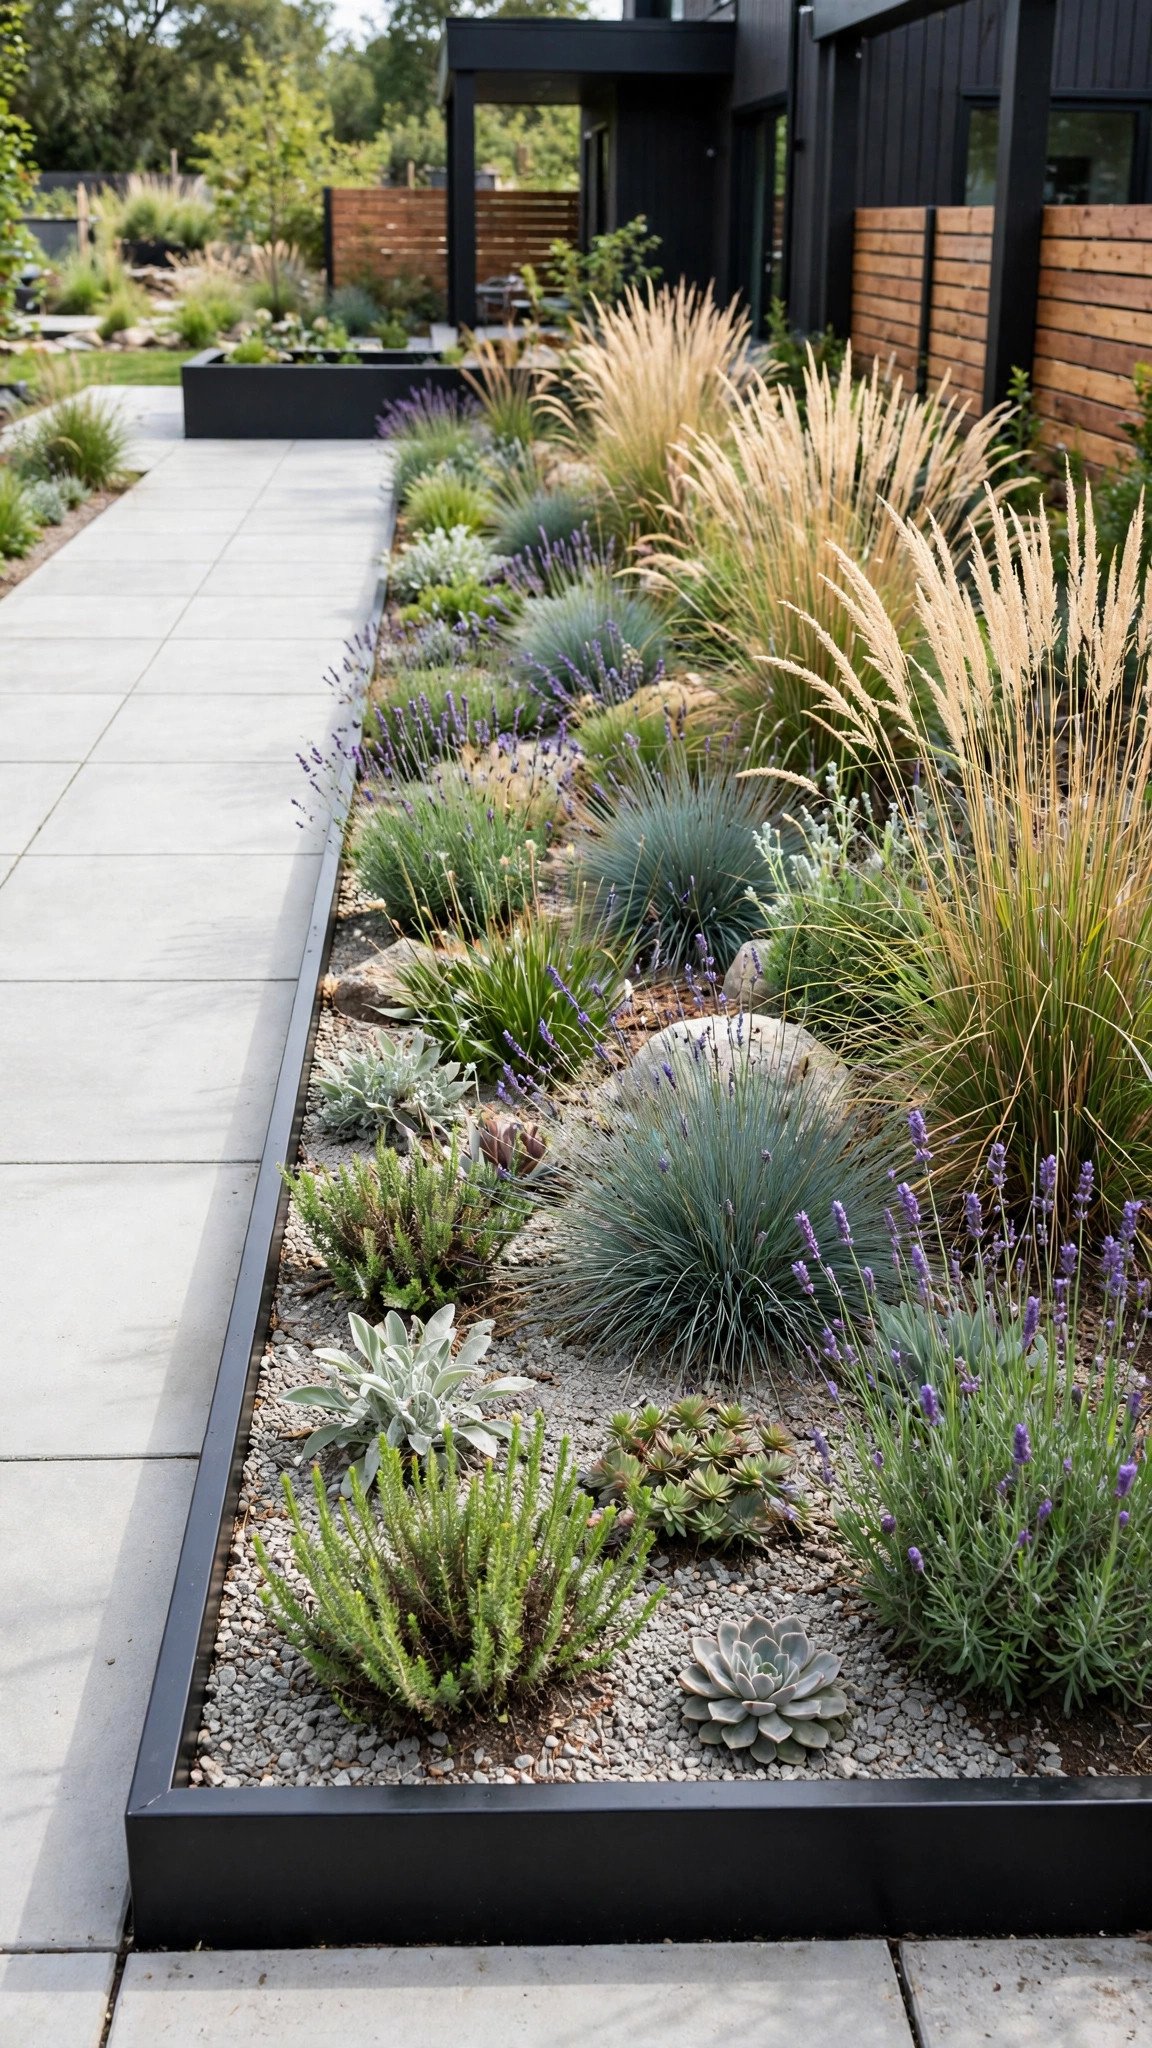
Metal edging gives the crispest, cleanest lines of any border, which is why it suits modern and minimalist gardens so well. Steel and aluminium strips create a nearly invisible edge: from a few steps away you see only a neat line between lawn and bed, with no bulky material in view. Yet the metal holds mulch firmly in place and keeps grass out. Professional landscapers favour metal edging because it stays put for years with almost no maintenance.
Installation is simple but needs care. Dig a narrow trench along the bed, set the edging vertically, and secure it with stakes following the maker’s instructions. Backfill soil firmly on both sides so the strip cannot lean. Choose a powder-coated finish if you live in a humid climate, because the coating slows rust and keeps the border looking neat. Pair metal edging with ornamental grasses and simple planting for a calm, designer look that never feels busy.
5. River Rock Border Accent

Smooth river rocks make a beautiful, low-effort transition between a planting bed and the lawn. They also help drainage and slow soil erosion around the bed, which matters on a slope or in a rainy climate. A border at least six inches wide gives the best visual impact — a thin single line of stones can look lost, while a wider band reads as a real design feature. Mix several rock sizes for a natural stream-bed effect instead of using one uniform size.
Lay landscape fabric underneath the rocks to stop weeds pushing through, and secure the fabric with garden staples before you spread the stones. Dig a shallow channel first, lay the fabric, then spread the river rocks evenly and rake them level. River rock is one of the easiest borders for a beginner: no cutting, no levelling, and no special tools. It also suits almost any garden style, from modern to cottage, depending on the rock colour you choose.
6. Woven Willow Border
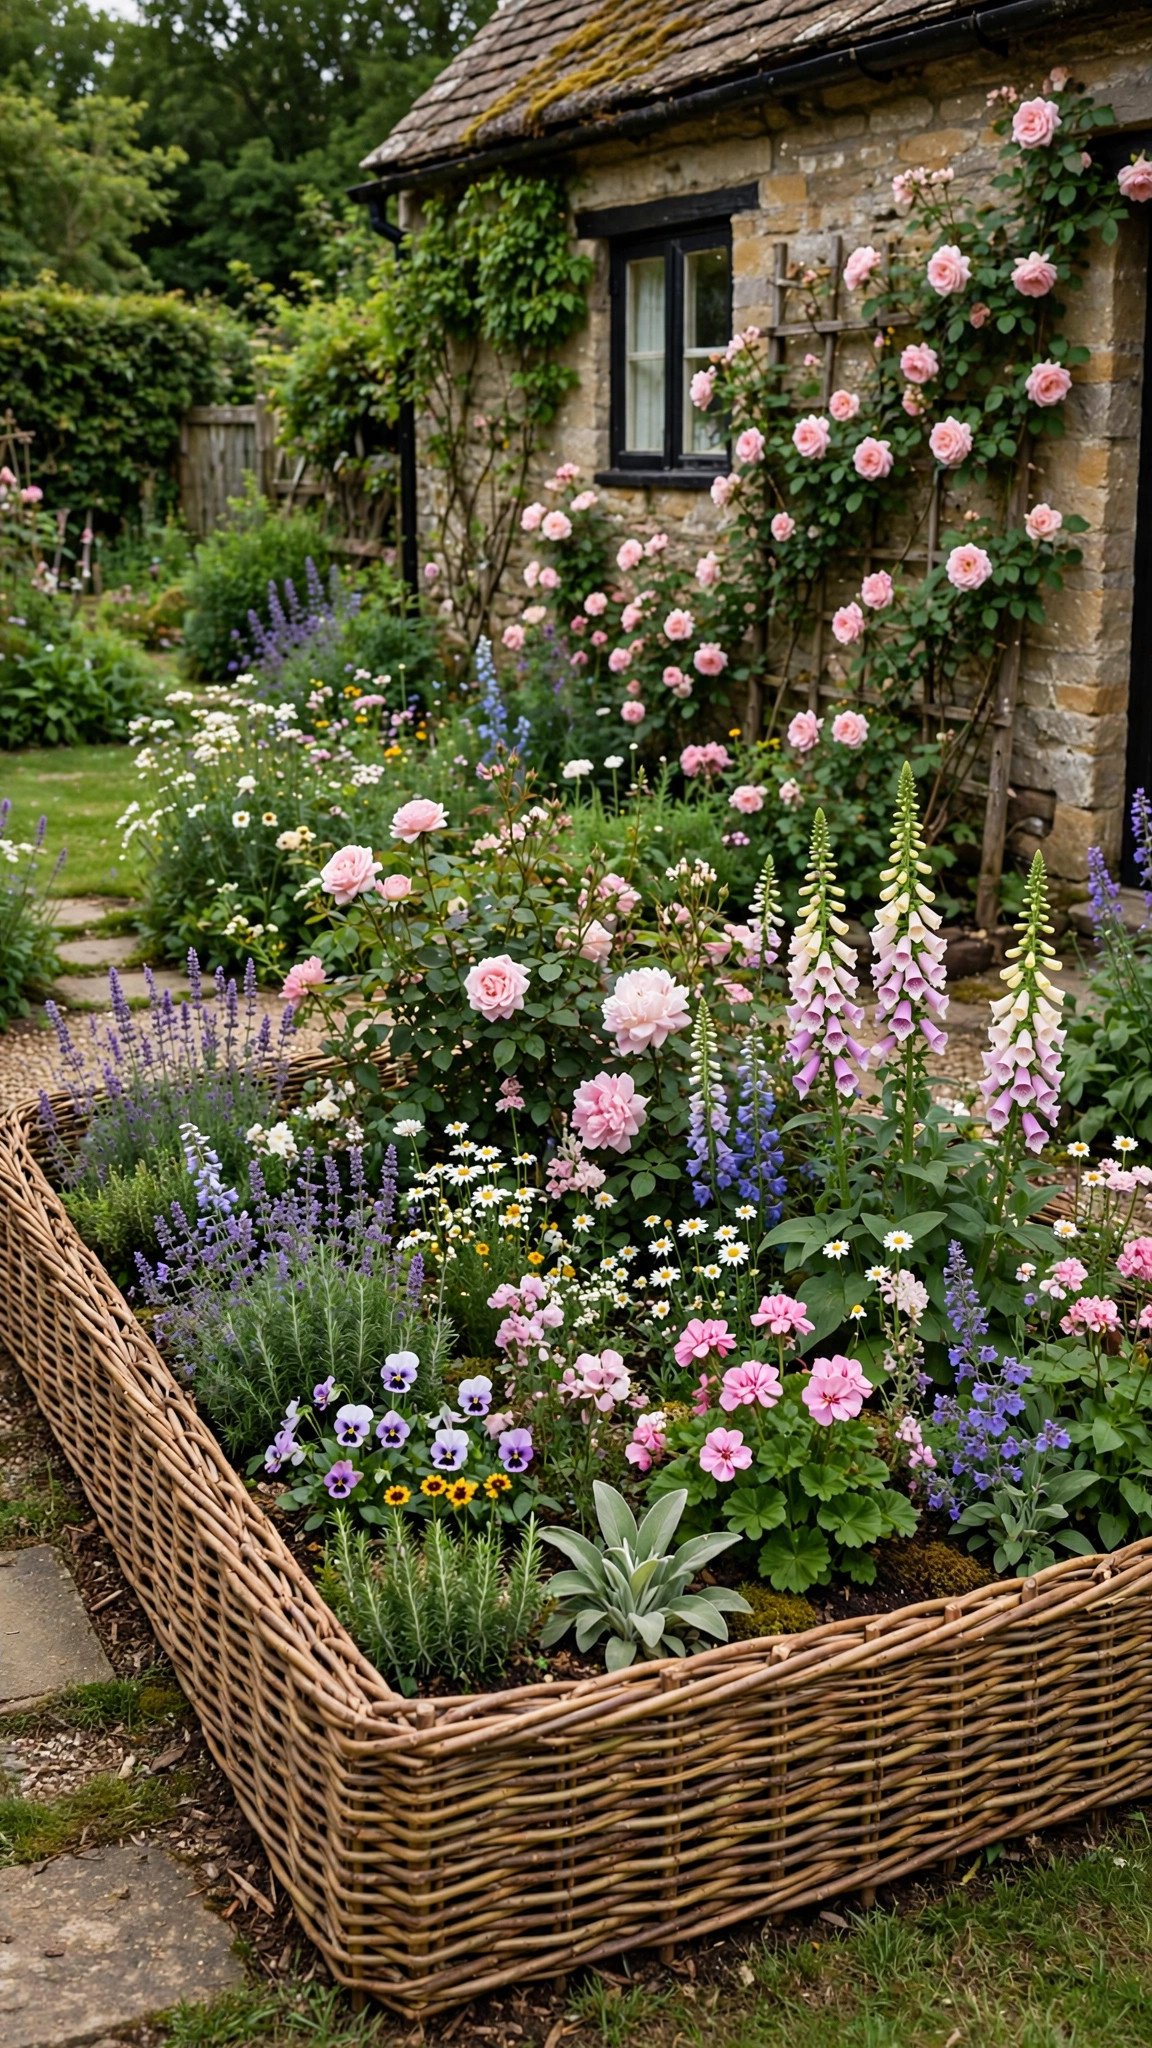
Woven willow edging brings old-world charm to a garden, and it suits cottage gardens better than almost any other border. The woven pattern looks handmade and soft, and it pairs beautifully with climbing roses and full perennial flowers. Willow also holds mulch in place and defines the planting space clearly. Ready-made woven panels make installation much easier than weaving your own, so most gardeners start with panels and wooden stakes.
Natural willow does weather over time, so treat it with an outdoor wood preservative to extend its life and keep its colour. Push support stakes into the ground at regular intervals along the bed, fix the willow panels firmly to the stakes, and backfill soil around the base. A willow border will not last as long as stone or metal, but its charm is hard to match, and replacing a panel is quick and cheap when the time comes.
What you need: woven willow panels, wooden stakes, hammer, garden spade, outdoor wood preservative.
7. Recycled Bottle Garden Edge
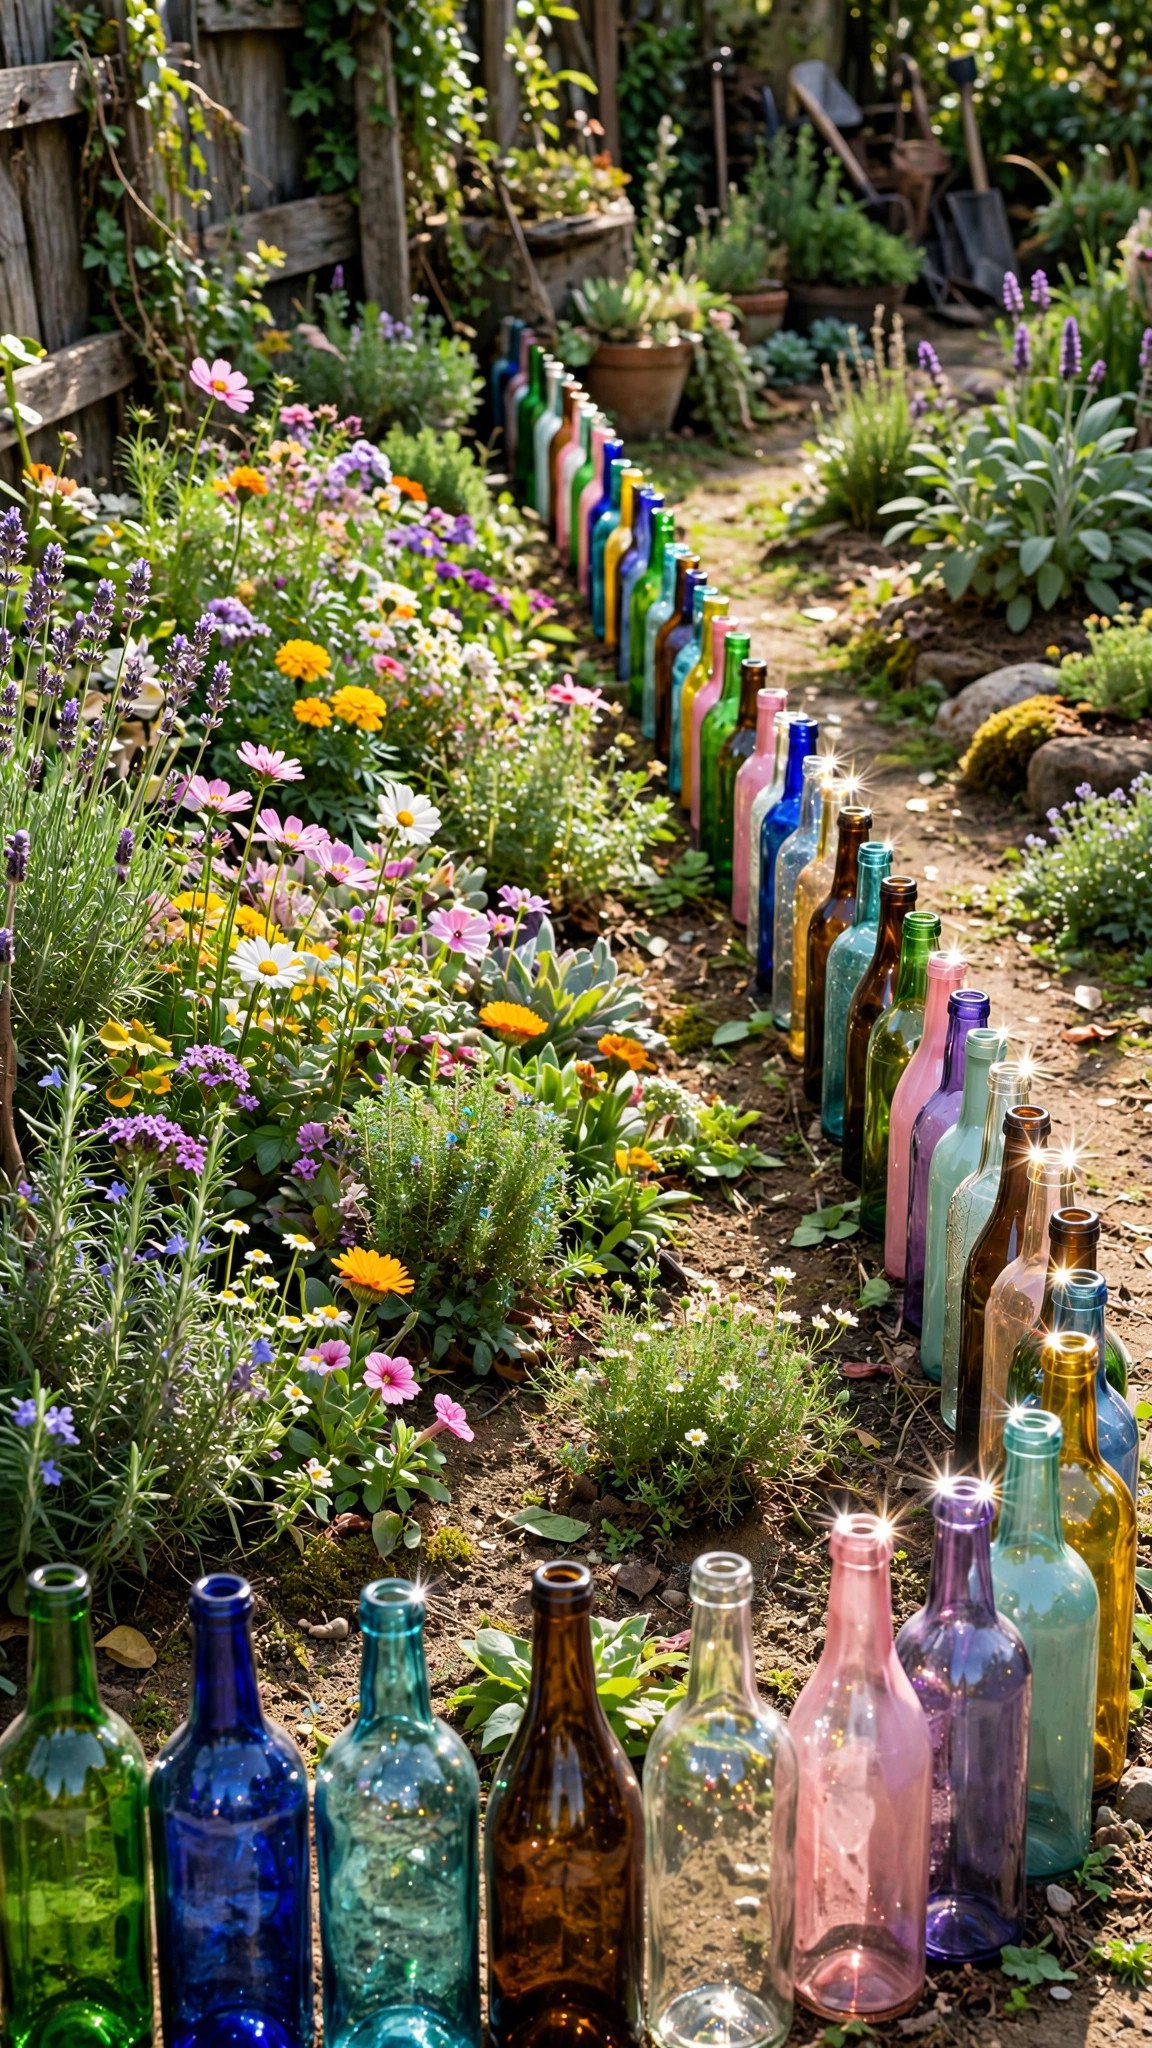
Glass bottle borders are a creative way to reuse materials while adding real personality to a garden. Bottles buried neck-down in a row catch the light through the day, and coloured bottles — green, blue, amber — create gentle reflections that change as the sun moves. Thick glass bottles work best because they handle outdoor conditions and frost better than thin ones. Push each bottle deep enough into the soil that it stays stable when the ground shifts with the seasons.
Mark the borderline with string first so the row stays straight. Dig a narrow trench, set the bottles upside down, and pack soil firmly around each one. Use bottles of a similar colour for a calm, cohesive look, or mix shades for a playful, artistic edge. This border costs almost nothing if you collect bottles over time, and it suits eclectic, bohemian, and cottage gardens where a little whimsy feels at home.
8. Raised Timber Garden Frame
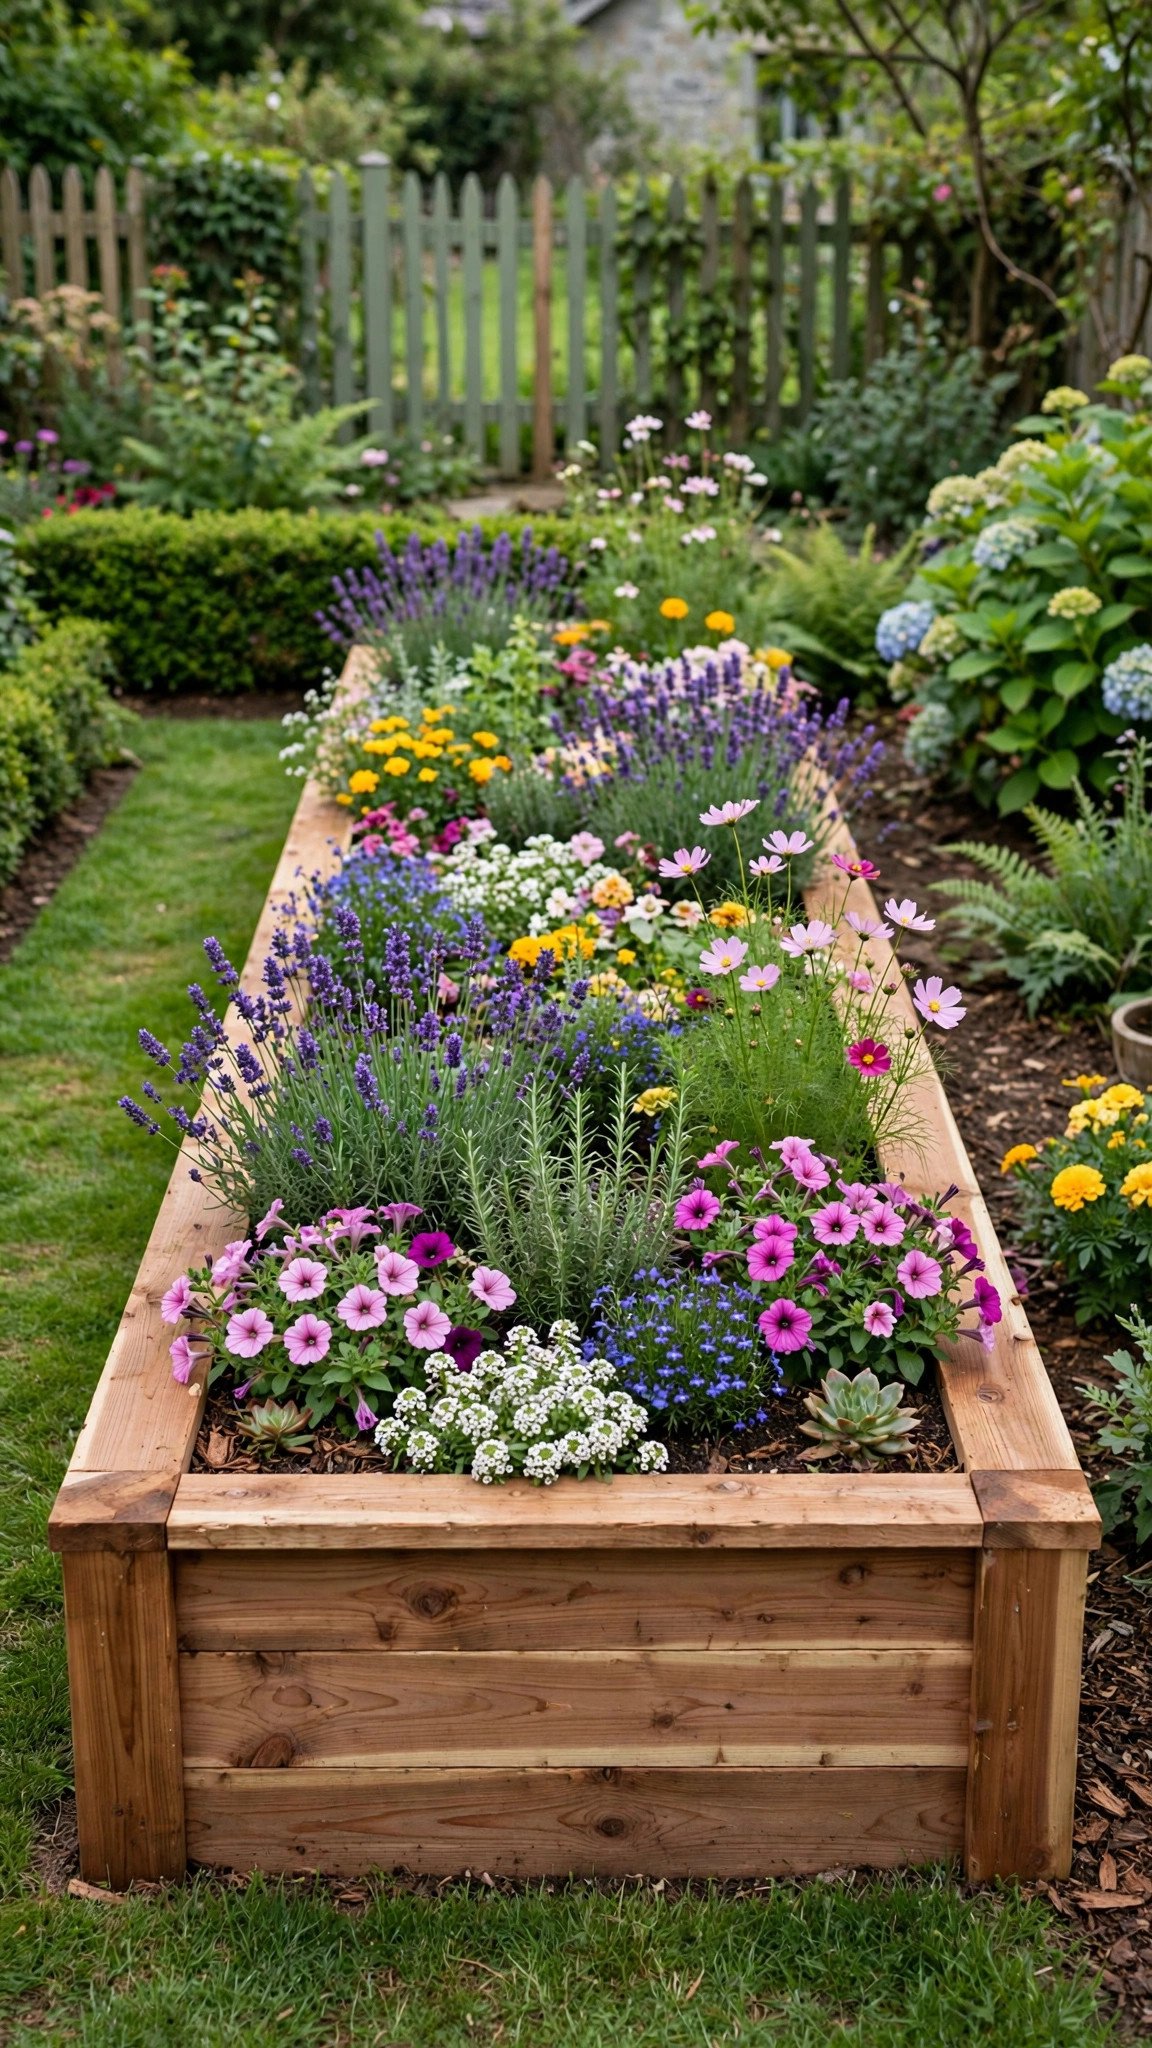
Timber borders give a flower bed strong, clear definition, and they can double as a low raised bed that lifts plants a little higher. Pressure-treated lumber or naturally rot-resistant woods like cedar perform best outdoors. A timber frame suits vegetable gardens, herb beds, and cottage gardens, and it looks right beside wooden decking or garden furniture. Stain the timber in a rich natural tone to tie the whole outdoor space together.
Anchoring matters more with timber than with any other border. Unsecured boards shift over time, so drive corner stakes deep into the ground and screw the frame together firmly. Cut the timber to size, assemble the frame on flat ground, then set it in place and anchor it with stakes. Check with a level before you fill the bed with soil. A well-built timber frame lasts for years, and it makes weeding and planting easier because the bed edge is high and clear.
9. Decorative Concrete Paver Border

Concrete pavers offer excellent durability with endless design options. They come in many shapes, colours, and finishes, and some are made to mimic natural stone at a lower cost. Pavers suit patios, walkways, and modern gardens, and they look neat beside driveways and paths. Choose textured pavers in colours that match your patio or walkway, and the border will look like part of the original design rather than an afterthought.
A stable base is the secret to a paver border that stays level. Dig a trench, add compacted gravel and a layer of sand, then set the pavers tightly together, checking with a level every few pavers. Backfill soil around the edge once the row is complete. Pavers take a little more work than river rock or gravel, but they reward the effort: a paver border can last for many years with almost no maintenance, and a single damaged paver is easy to lift and replace.
10. Living Border With Low-Growing Plants
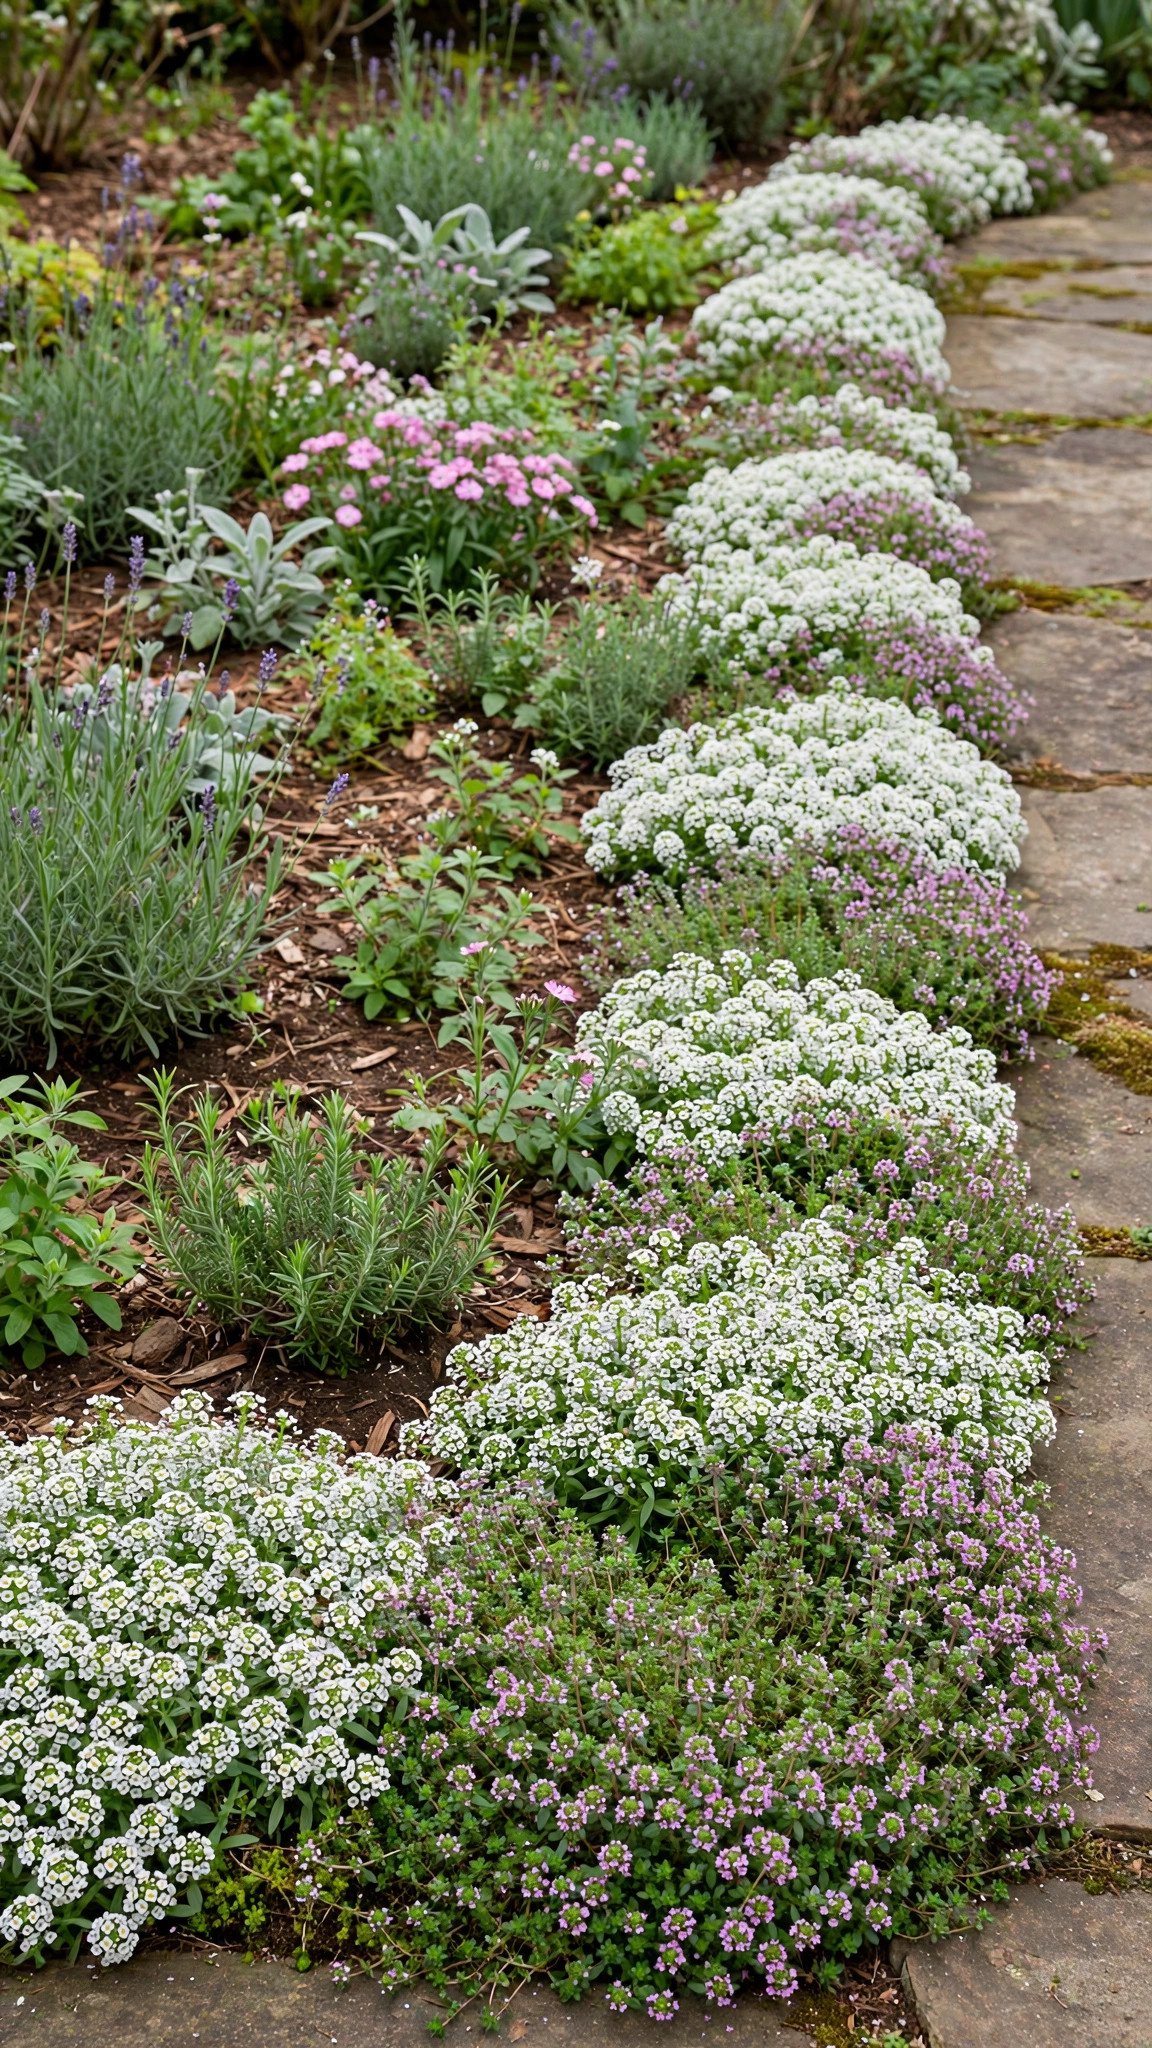
A living border uses plants instead of hard materials, and it gives the softest, most natural edge of all. Low-growing plants like creeping thyme, alyssum, and dwarf boxwood define a flower bed while adding seasonal colour and scent. Creeping thyme even releases a gentle fragrance when you brush past it. A living border suits cottage gardens, herb gardens, and any garden where you want the bed to blend into the lawn rather than stand apart from it.
Spacing matters when you plant a living border. Give each plant room to grow, because overcrowding leads to poor airflow and disease. Prepare the soil with compost, plant the edging plants evenly around the bed, water well, and mulch lightly. Repeat the same border plant around the whole garden for a cohesive, professionally designed look. A living border needs regular trimming to stay neat, but it grows more beautiful every year as the plants fill in.
11. Gabion Stone Border

Gabion borders are wire cages filled with stones, and they make a bold architectural statement in a garden. They are exceptionally strong and durable, and they work especially well in modern landscapes and on slopes, where they can also help hold soil in place. Smaller stones packed tightly inside the cages give the cleanest look and the best stability. Choose stones that match nearby hardscaping, such as a stone wall or patio, for a unified design.
Start with a level gravel base, assemble the gabion cages following the instructions, and fill them evenly with decorative stones before securing the tops. Wear gloves, because the wire edges can be sharp, and keep the fill level so the cage does not bulge. Gabion is one of the most expensive borders on this list, but it is also one of the longest-lasting, and it turns a plain bed edge into a real garden feature.
12. Terracotta Pot Border Display
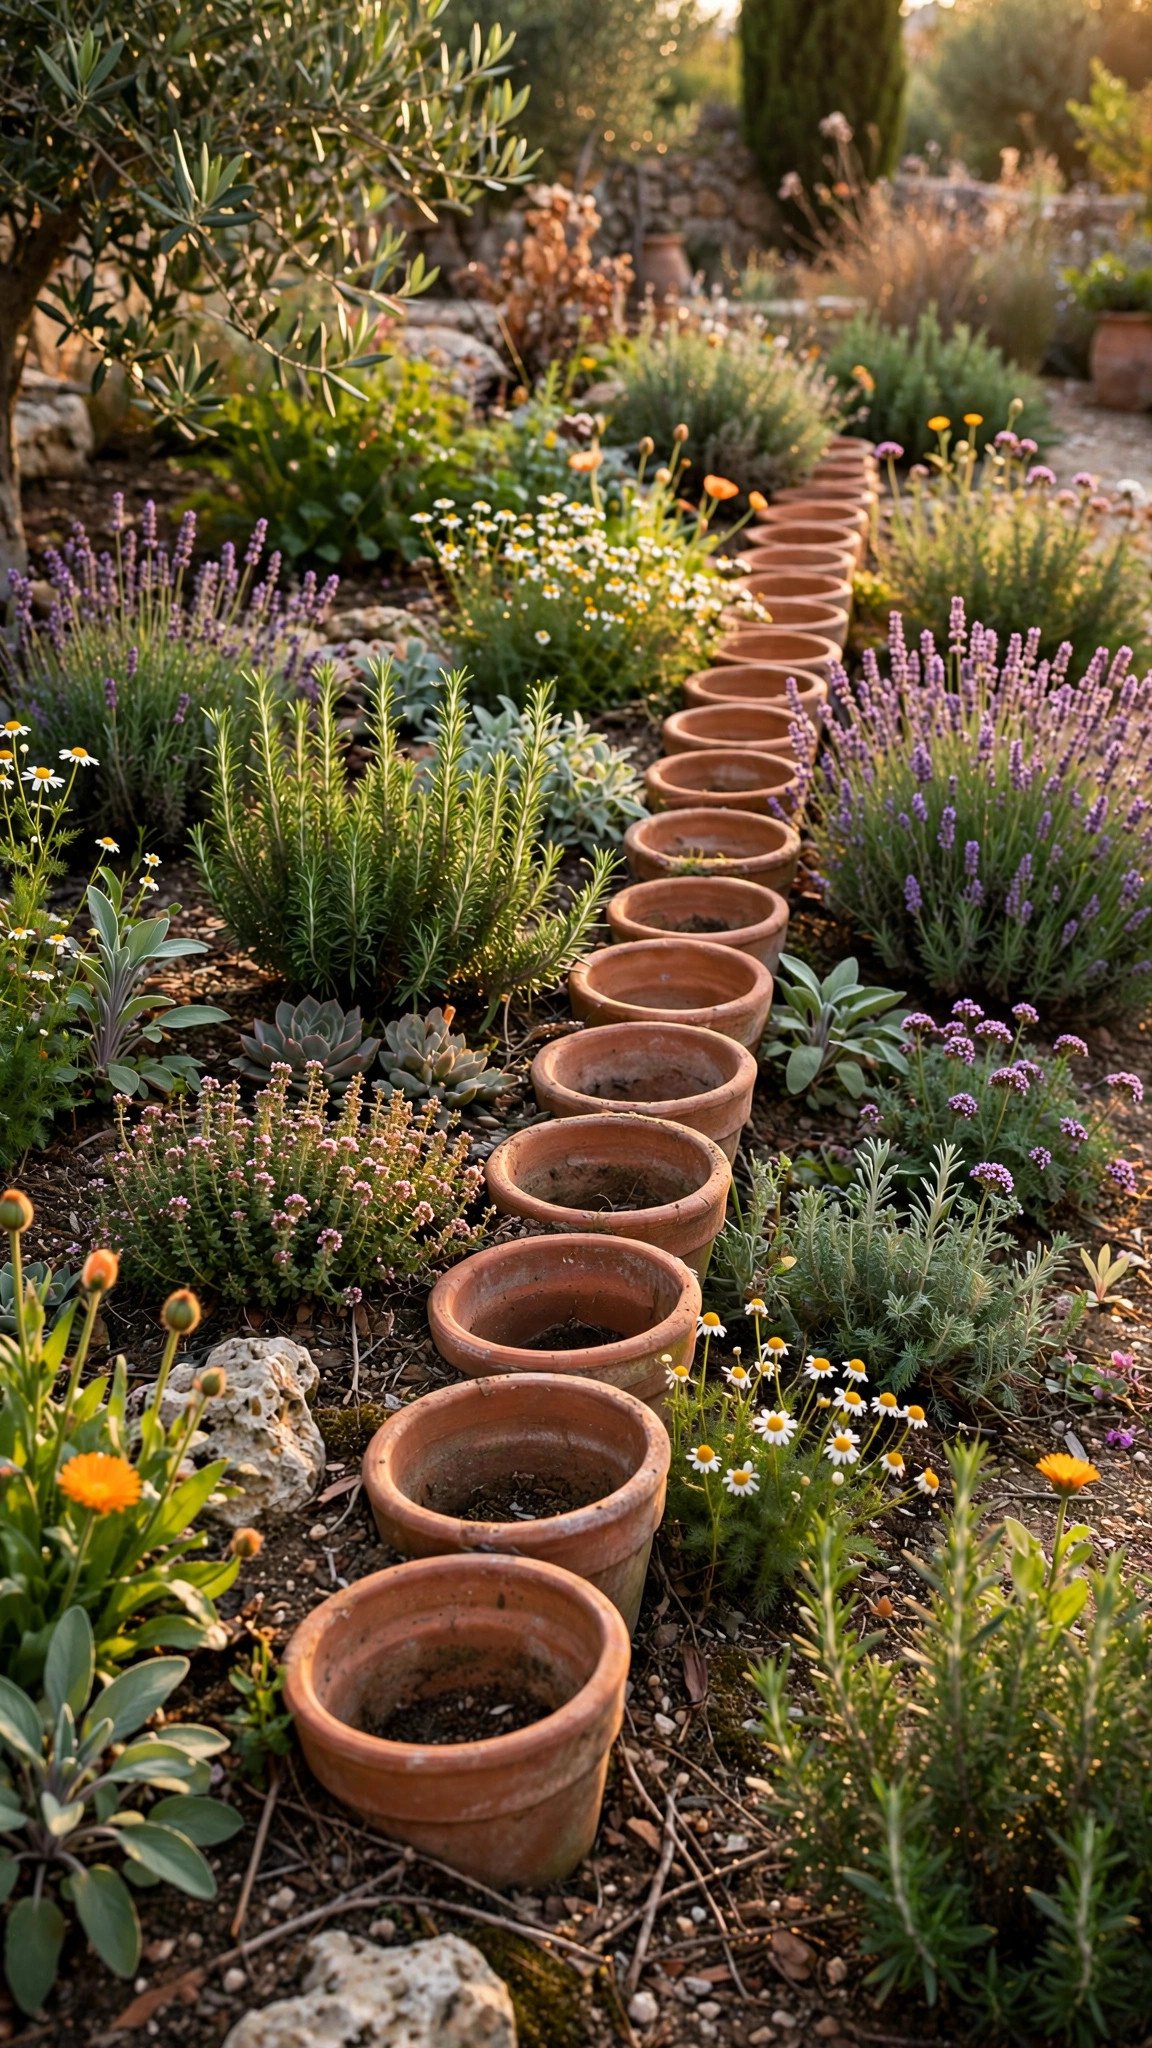
Half-buried terracotta pots create an eye-catching border that looks right at home in Mediterranean-style gardens and herb beds. The warm orange clay contrasts beautifully with green leaves and grey stone, and the round pot shapes soften a straight bed edge. Bury the pots partly on their sides or upside down along the border, and let trailing plants spill around them for a soft, layered look. Larger pots stay stable longer and resist cracking better than small ones in freeze-thaw weather.
Dig a trench along the bed edge and set each pot firmly into the soil, filling gaps with soil and tamping it down well. Space the pots evenly so the row reads as a pattern, not a random scatter. Terracotta is not the toughest border material — pots can crack in a hard frost — so in cold climates, lift the pots in winter or choose frost-proof terracotta. In warm climates, this border can last for years and only grows more charming as the clay weathers.
13. Crushed Gravel Border Strip
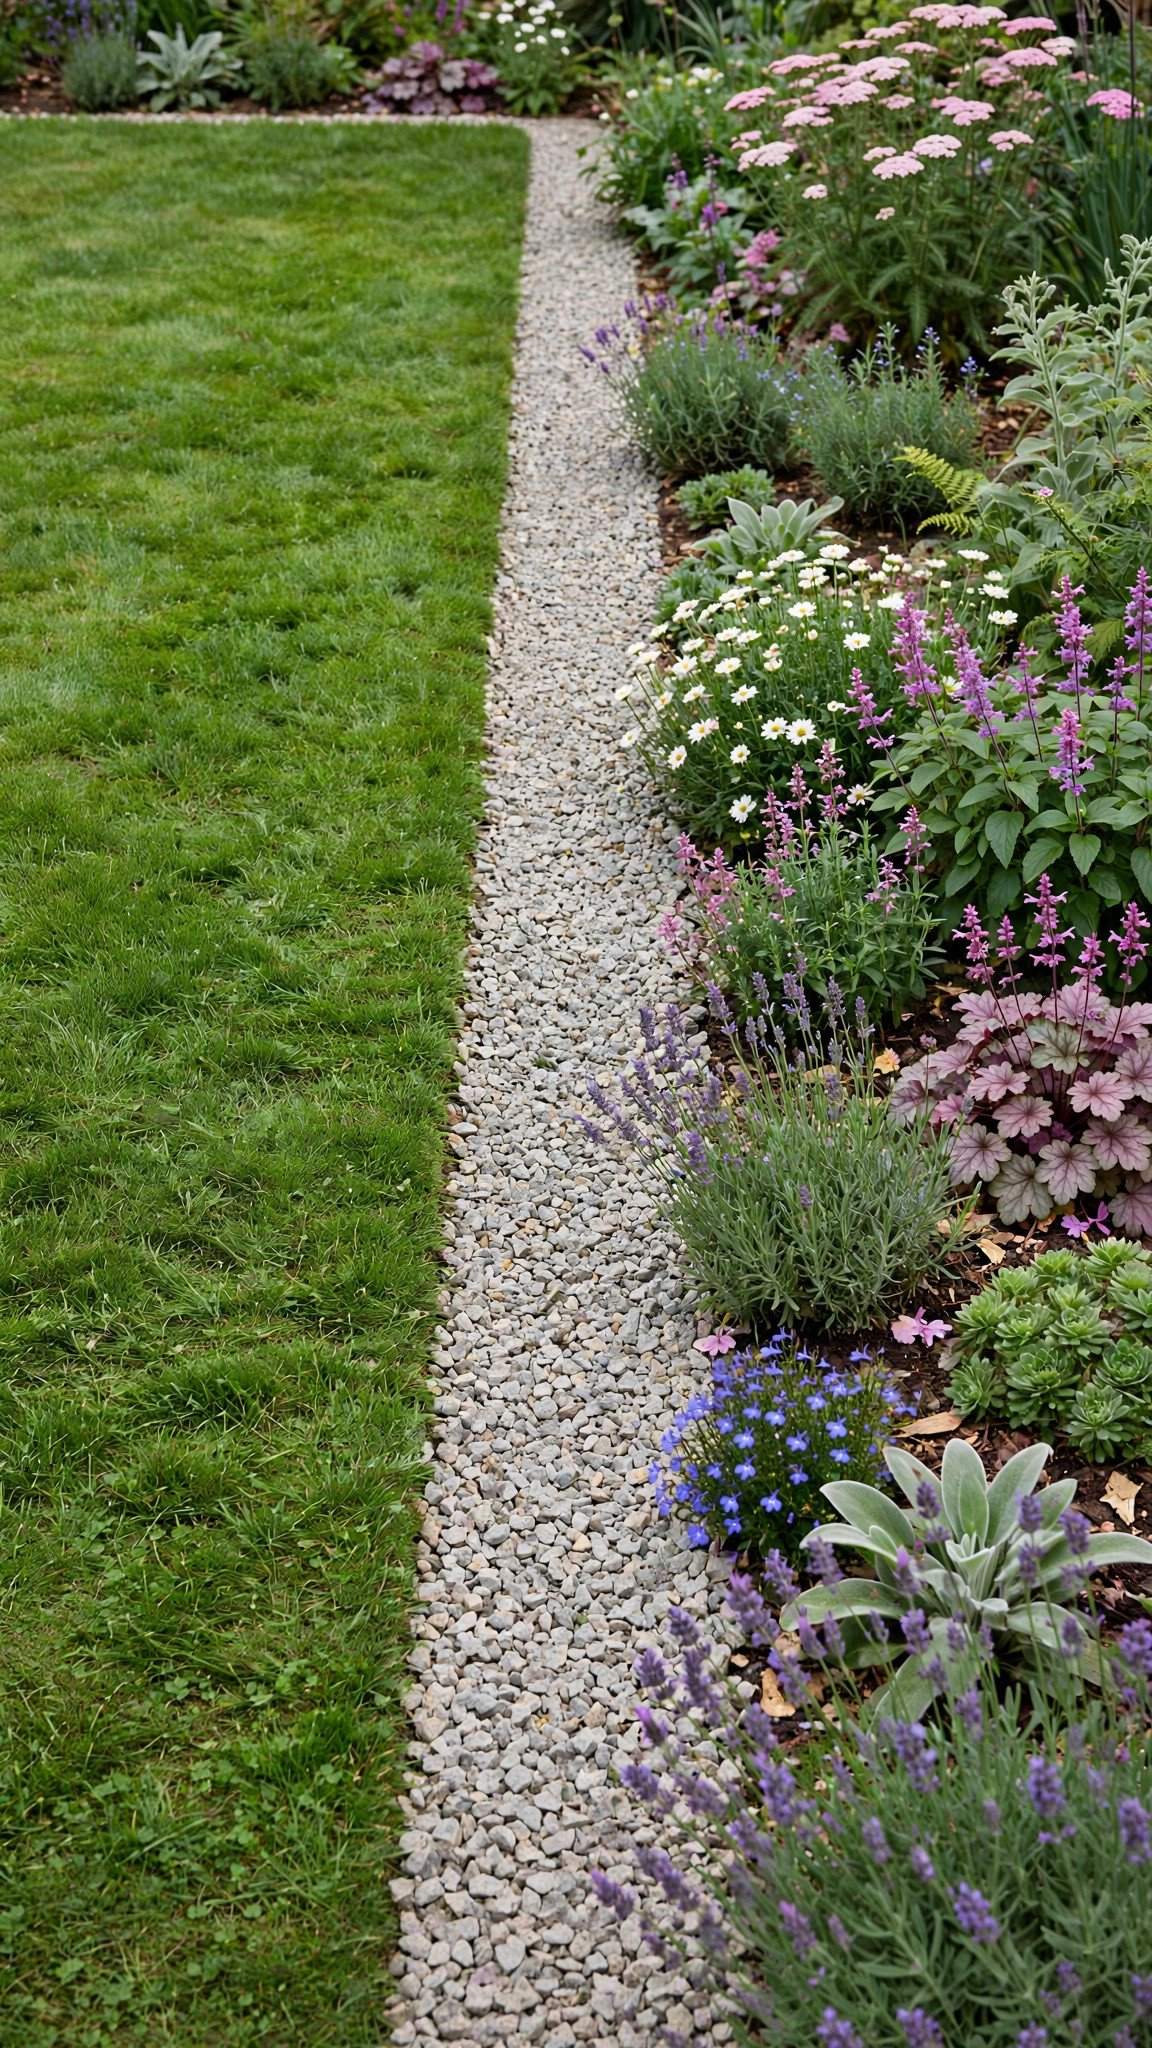
A crushed gravel strip is the simplest border on this list, and it works surprisingly well. A band of gravel between lawn and bed gives clean separation, improves drainage, and cuts trimming time because the mower can run along the gravel edge instead of the bed. It suits large perennial borders especially well, where trimming around plants takes the most time. Use light-coloured gravel to brighten a shady garden, or darker stone for a modern look.
Install sturdy edging first — metal or plastic — because gravel migrates without something to hold it in. Lay landscape fabric inside the strip to stop weeds, spread the gravel evenly, and rake it smooth. A gravel strip is cheap, fast, and beginner-friendly, and it works in almost any garden. Its only weakness is that gravel can scatter onto the lawn, so keep the strip level with the grass and top it up once a season.
Plan Your Flower Bed Border in 4 Simple Steps
- Measure your beds first. Walk each bed with a measuring tape and note the length. This tells you how much material to buy and stops you from running short halfway through.
- Match the border to your garden style. Look at your house, patio, and planting style, then pick a material that fits. A border that matches the garden looks planned; one that clashes looks like an afterthought.
- Prepare the ground properly. Dig a trench, add gravel for drainage, and level the base. Most border problems — shifting, sinking, grass creeping in — start with a rushed base.
- Install one bed, then live with it. Finish a single bed first and see how it looks through a few weeks of weather. If you love it, carry the same border around the rest of the garden for a cohesive look.
FAQs
What is the best material for flower bed borders?
The best material depends on your garden style, budget, and how much care you want to give it. Brick, stone, and metal are among the most durable options and suit most gardens. Wood, willow, and living plant borders look softer and more natural, but they need more care and do not last as long.
How deep should flower bed edging be installed?
Most edging should extend at least 4 to 6 inches into the soil. That depth stops the border shifting after rain or frost and keeps grass roots from creeping under it into the bed. Shallow edging looks neat for a season, then fails, so it is worth digging the trench properly the first time.
What is the easiest flower bed border to install?
River rock borders, crushed gravel strips, and simple brick edging are the easiest for beginners. They need few tools, no cutting, and no special skills. You can finish a small bed in an afternoon. Metal edging and gabion cages take more time and care, so save those for a weekend project.
How can I keep grass from growing into flower beds?
Install physical edging at least 4 to 6 inches below soil level, and combine it with regular mulching and weeding. The edging blocks most grass roots, while mulch smothers the rest. Check the border each spring and repair any gaps before grass finds its way through.
Are flower bed borders necessary?
Borders are not essential, but they improve a garden in several ways. They make beds look finished, simplify mowing and trimming, contain mulch, and create clear separation between lawn and planting areas. Most gardeners find that a border saves time on maintenance over the whole season.
How much does a flower bed border cost?
The cost varies widely by material and by the length of your beds. Recycled bottles and crushed gravel are usually the cheapest options, while natural stone, metal edging, and gabion cages cost the most. Measure your beds first, then compare material prices per foot at a local garden centre before you buy.
Which flower bed border lasts the longest?
Stone, concrete pavers, metal edging, and gabion borders last the longest, often for many years with little care. Brick also lasts well when it is set on a proper gravel base. Wood, willow, and terracotta wear out sooner, especially in wet or freezing weather, and need sealing or replacing.
Conclusion
A good flower bed border does far more than frame your plants. It gives your garden structure, cuts your maintenance time, and makes every bed look finished and cared for. Whether you choose timeless brick, natural stone, simple gravel, or a living edge of creeping thyme, the best border is the one that fits your garden style, your budget, and the amount of care you are happy to give.
Start with one small bed and one idea from this list. Install it properly, with a good base and enough depth, and watch how it changes the whole garden. Then carry the same border around your other beds, and enjoy a garden that looks neat, beautiful, and welcoming all season long.