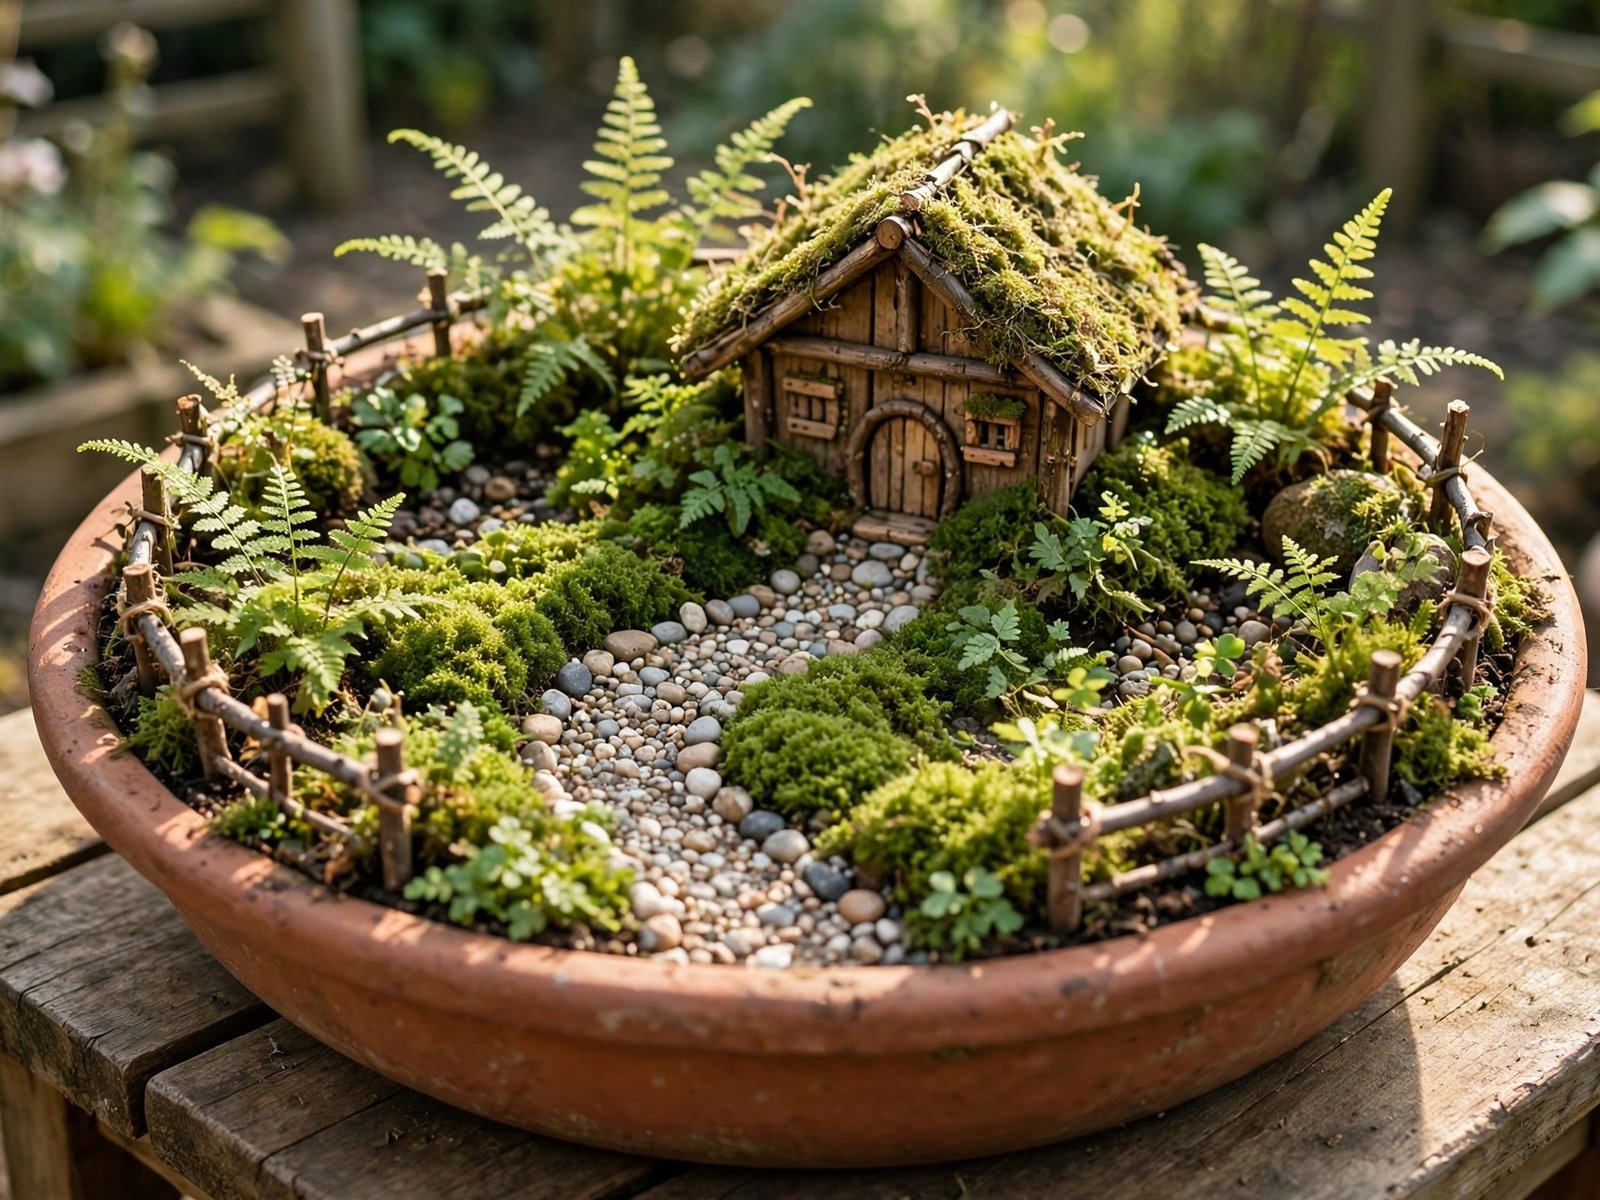
13 DIY Fairy Garden Ideas to Build a Tiny Magical World
You know that feeling when you walk into someone’s backyard or porch and find a tiny, magical world tucked into a corner, and you cannot stop staring? Yeah, that is the fairy garden effect. It is enchanting, it is whimsical, and honestly, it is way easier to create than it looks.
Whether you have got a sprawling garden or a tiny apartment balcony, DIY fairy gardens fit anywhere. And the best part? You do not need a massive budget or professional skills to pull one off. A cracked terracotta pot, a few pebbles, some tiny plants, and a little imagination are enough to start.
Best DIY Fairy Garden Idea at a Glance
If you want the safest first fairy garden, start with a wide, shallow terracotta pot. A 12-inch terracotta dish costs around $8 to $12, which leaves plenty of budget for the fun stuff. Fill it with soil, add a tiny house, a pebble path, and a few miniature plants, and you have a complete fairy garden in one afternoon.
The most important rule is drainage. Put gravel or broken pot pieces at the bottom of any container before adding soil, because soggy roots will kill plants faster than anything. Pick plants that stay small, keep the scale consistent, and leave a little space so the garden reads as a world, not a crowded pot.
1. The Enchanted Woodland Fairy Garden
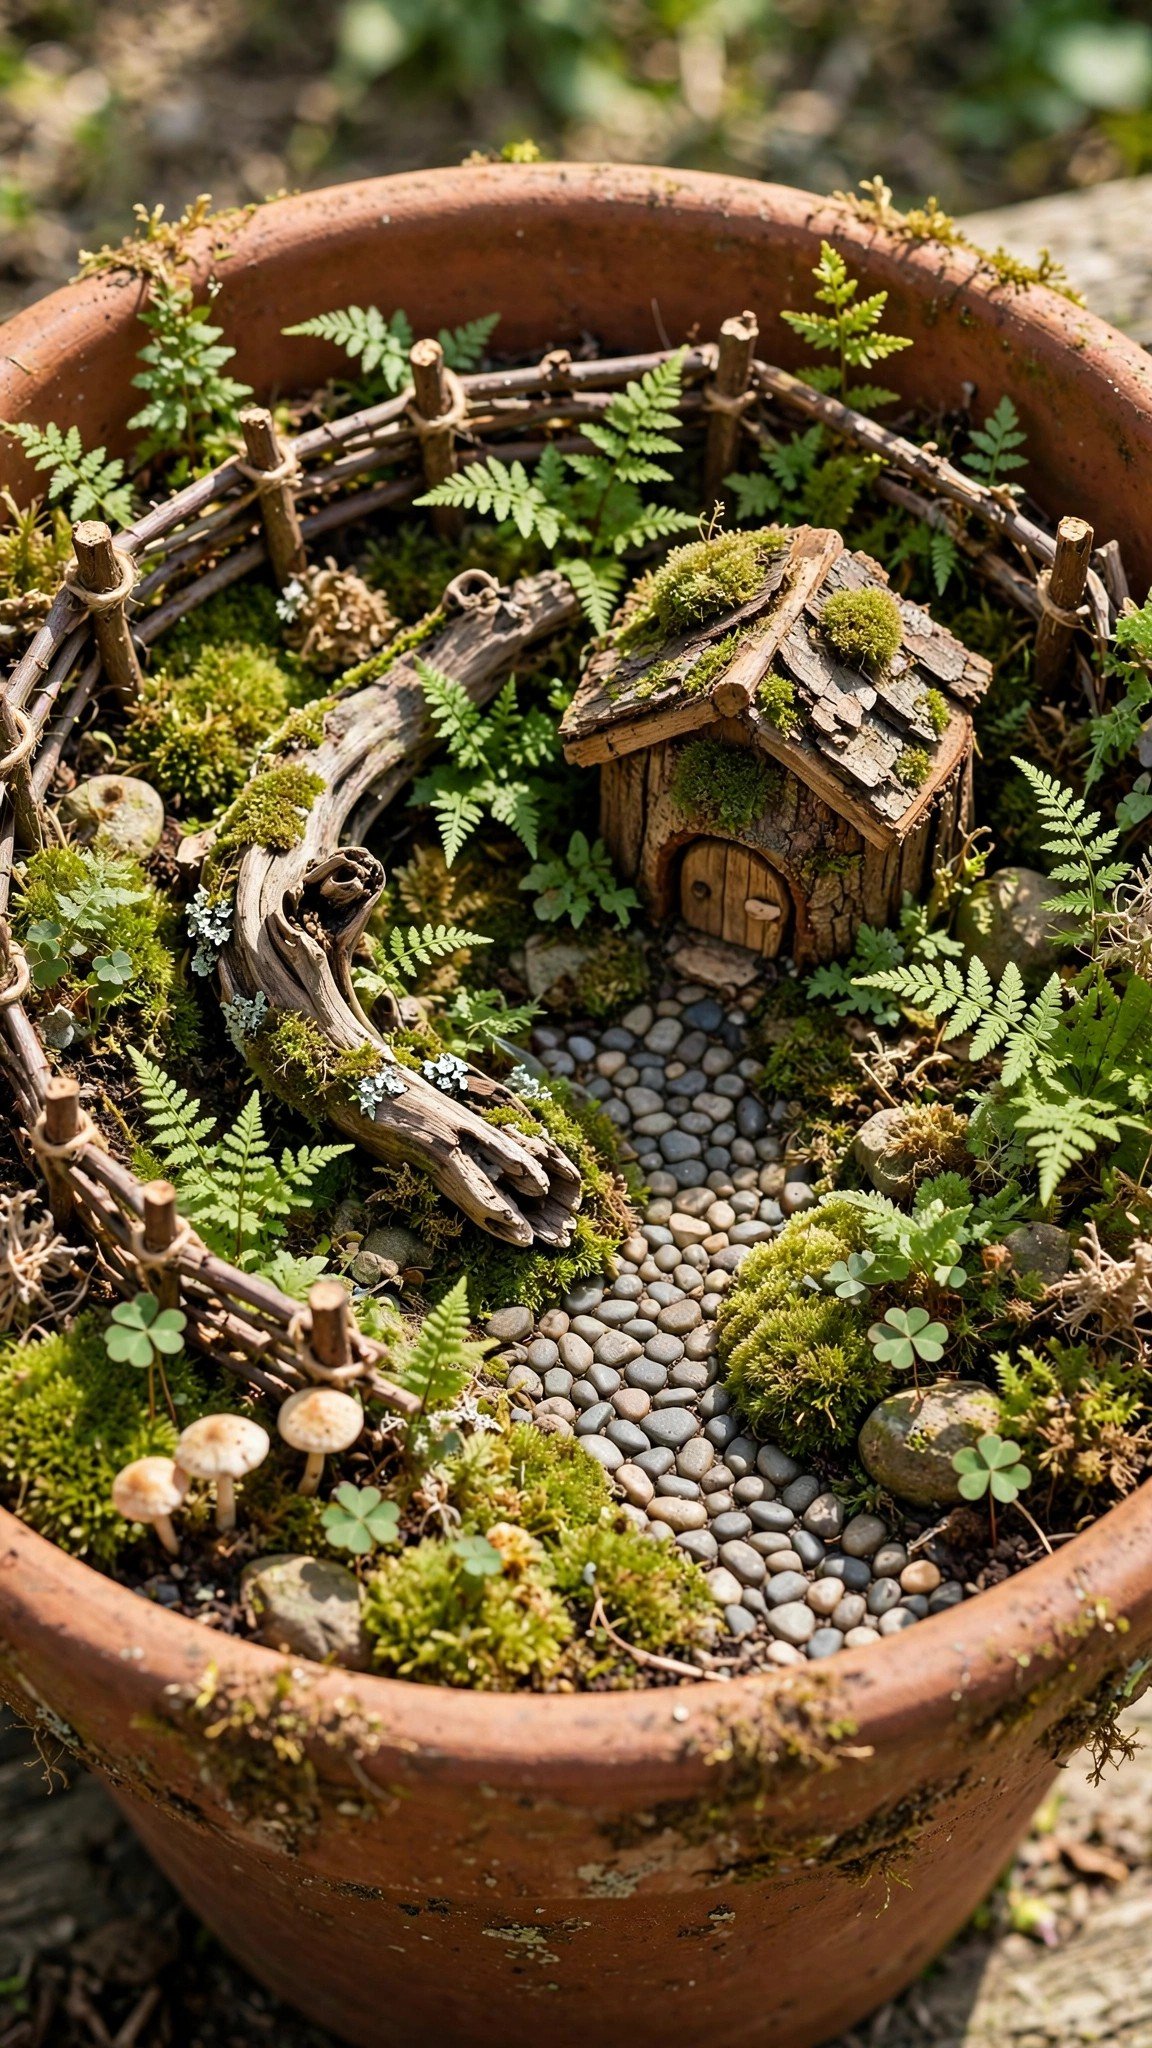
Think mossy forest floor, twig fences, a little stone path, and a house that looks like it grew right out of a tree stump. Use Irish moss or live moss collected from your yard as ground cover. Add a few miniature ferns and a tiny wooden bench, and if you can find an actual small piece of driftwood or a gnarly branch, use it as a focal point. This style is earthy and timeless.
The woodland garden works best in a wide, shallow terracotta pot or a wooden crate, where the moss can spread into a soft green carpet. Keep the palette green and brown, and let the textures do the work — rough bark, soft moss, smooth pebbles. A tiny fairy door painted on a flat rock, leaned against a plant base, adds the final touch of magic.
What you need: wide shallow terracotta pot, Irish moss, miniature ferns, twig fence pieces, small driftwood branch, tiny wooden bench, pebbles, flat rock, and craft paint for a fairy door.
2. The Beach Fairy Garden
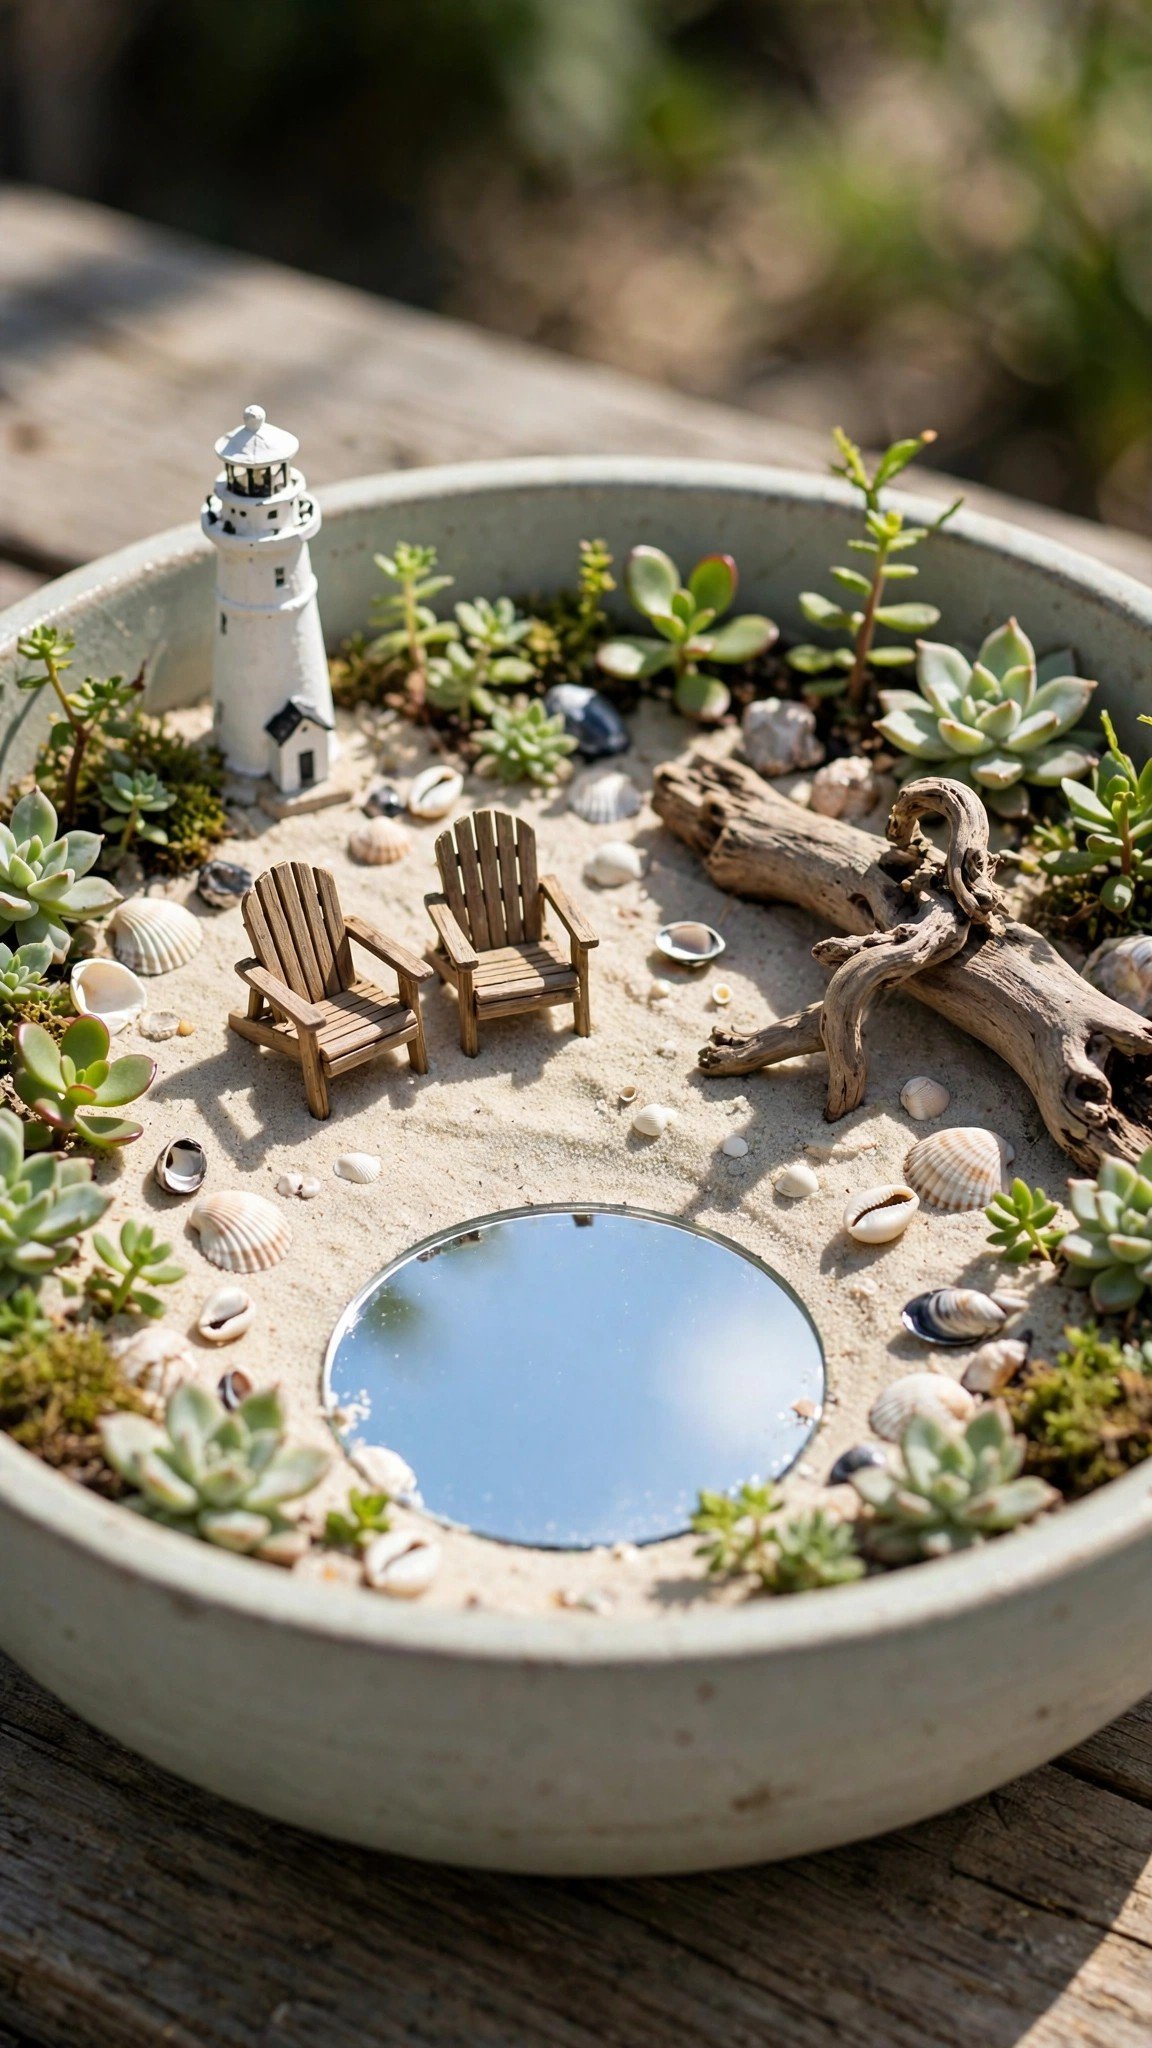
Sand, tiny shells, driftwood, maybe a little mirror or a jar lid filled with blue-tinted resin to represent the ocean. Add a miniature lighthouse and a couple of miniature Adirondack chairs, and you have a tiny seaside world. This one is especially fun if you have got kids helping — they can collect shells from a beach trip and use them.
The beach garden is one of the easiest fairy gardens to build, because sand is forgiving and shells do the decorating for you. Use a shallow bowl or a wide planter, lay down a layer of sand, and arrange the shells, driftwood, and chairs like a tiny beach scene. A small piece of blue glass or a mirror works as the sea, and a few tiny succulents stand in for beach plants.
What you need: shallow bowl or wide planter, sand, tiny shells, driftwood, miniature lighthouse, two miniature Adirondack chairs, small mirror or blue glass, tiny succulents.
3. The Secret Garden Fairy Hideaway
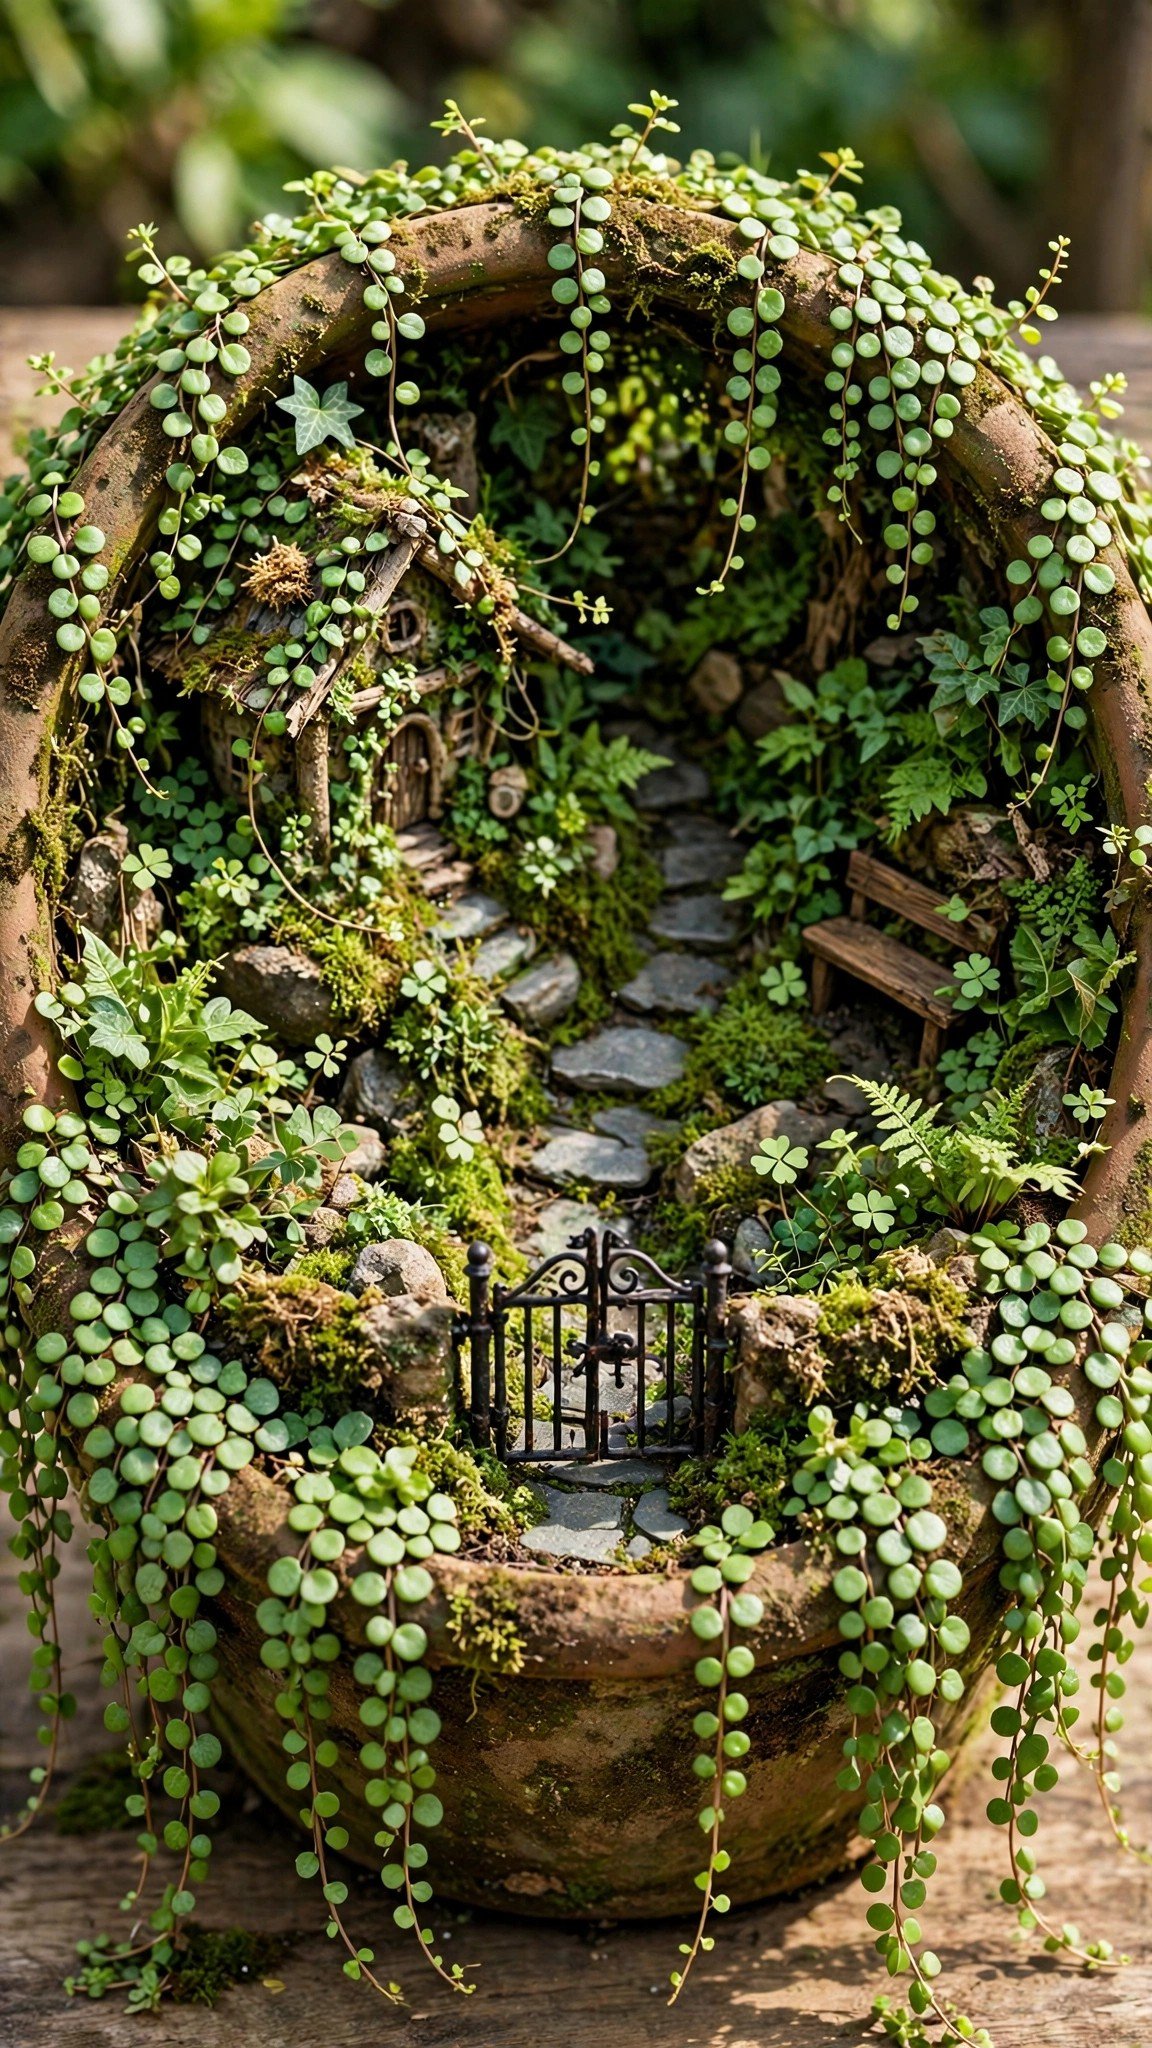
Dense planting, a tiny iron gate, climbing vines made from wire and tiny artificial leaves, and a worn-looking stone path. Add a little bench tucked into a corner behind the plants. The whole vibe is “hidden world nobody knows about,” which is exactly what a fairy garden should feel like.
The secret garden works because it hides its best parts. Plant densely around the edges so the centre feels discovered rather than displayed, and put the tiny gate at the entrance of the path so the eye has to travel to find the house. Baby’s tears cascades beautifully over edges and softens the container rim, while thyme stays low, smells amazing, and has tiny leaves that look right at fairy scale.
- What you need: container with room for dense planting, tiny iron gate, wire and artificial leaves for vines, baby’s tears, thyme, small stone path pieces, tiny bench.
4. The Fairy Garden in a Teacup

Miniature fairy gardens in vintage teacups or old enamel kettles are so charming it is almost unfair. You just need a well-draining base layer, a bit of soil, a tiny succulent or two, a micro-sized fairy, and a few pebbles. Done. Perfect as a gift or as a tabletop centerpiece, and the small scale means you can pull this off for under $15 total.
The teacup garden is the best fairy garden for someone with no outdoor space at all. A sunny windowsill is enough, and the tiny scale forces you to edit — one plant, one fairy, a few pebbles, and nothing else. Use a cup with a chip or a crack if you like, because the imperfection adds character, and drill or ask someone to drill a small drainage hole if the cup has none.
- What you need: vintage teacup or old enamel kettle, gravel for drainage, potting soil, one or two tiny succulents, micro-sized fairy figurine, small pebbles.
5. The Broken Pot Cascading Fairy Garden
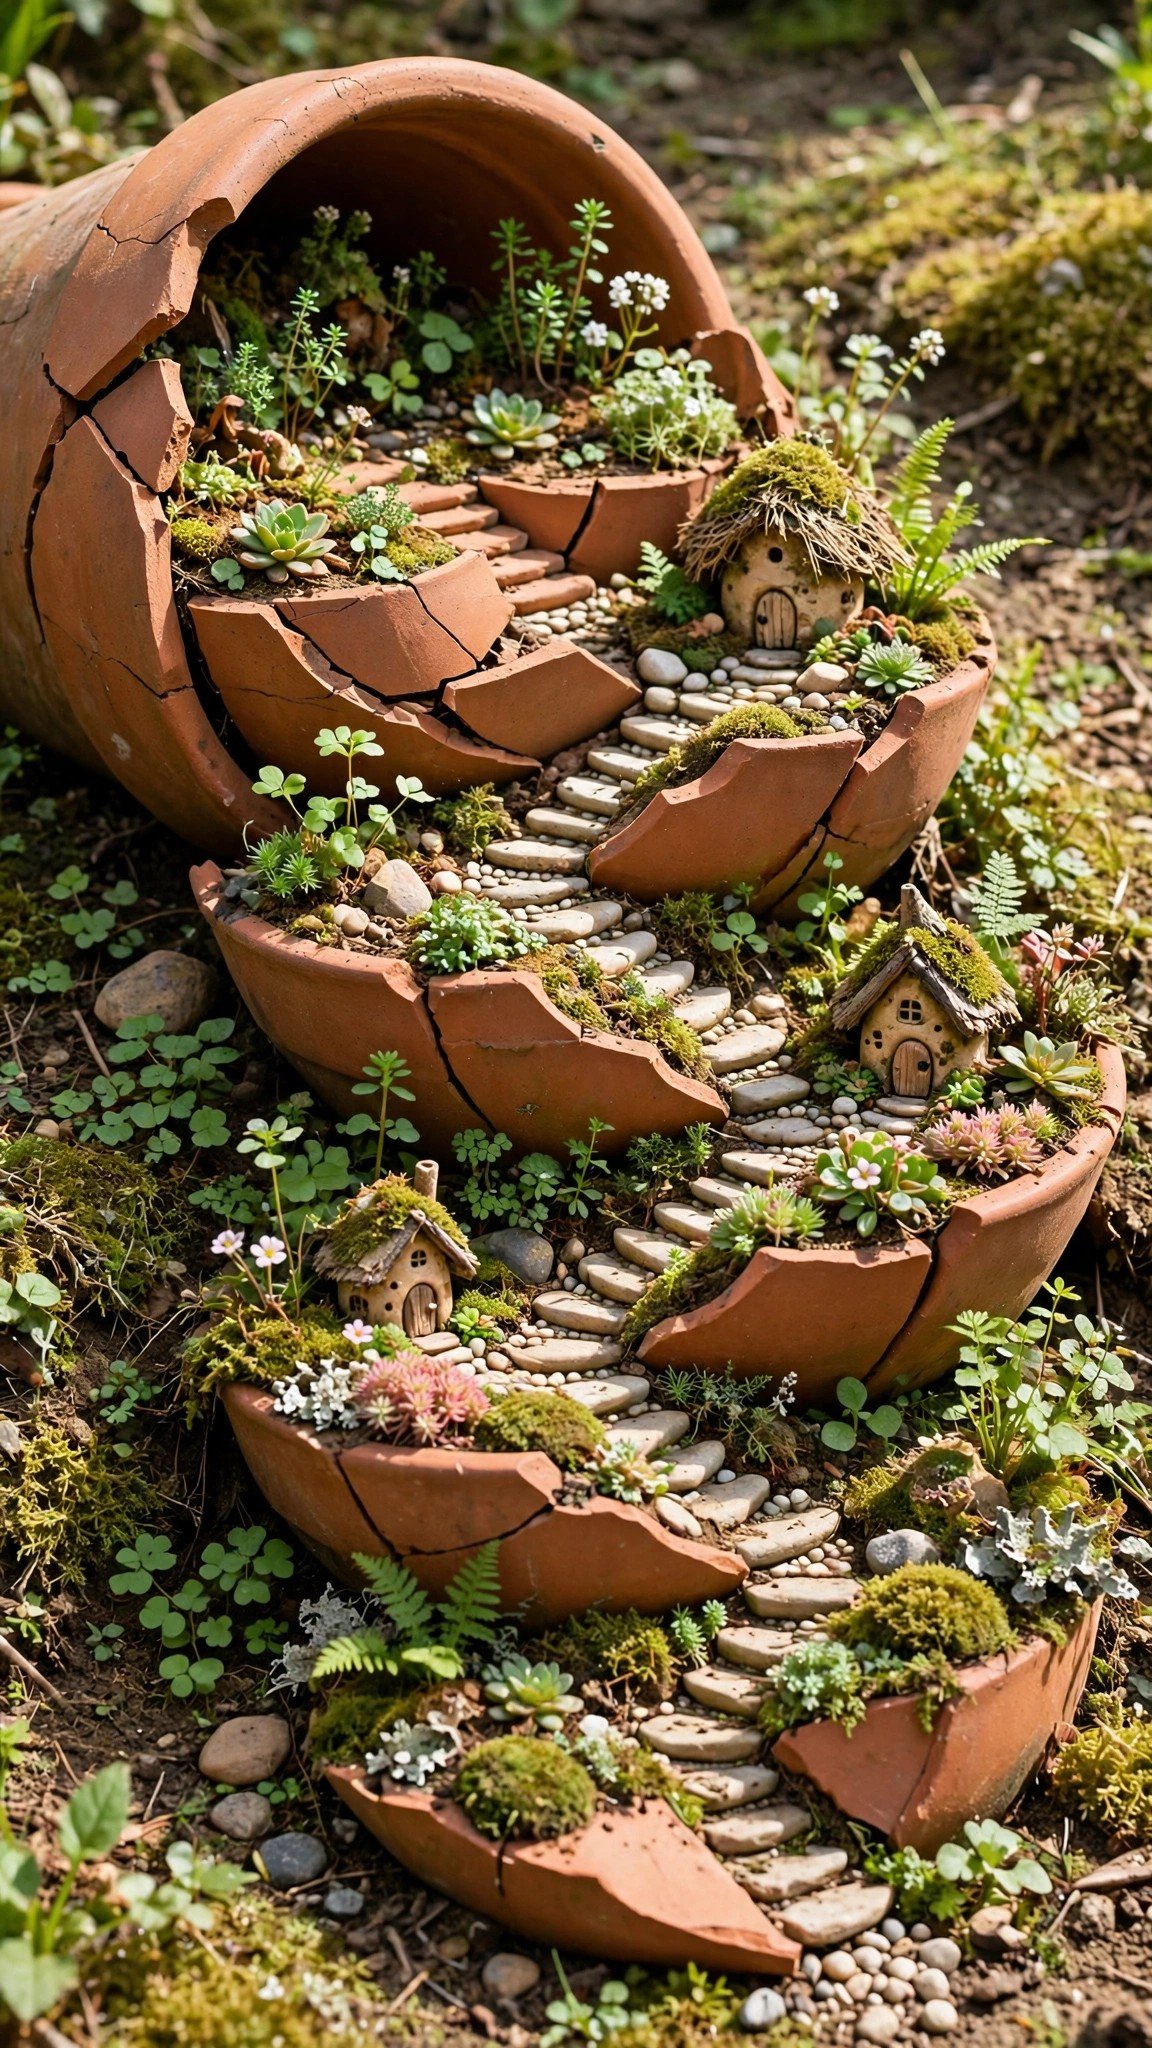
Here is one that looks wildly impressive but is actually beginner-friendly. You take a cracked or intentionally broken terracotta pot, lay the pieces at angles, and use the “steps” created by the broken edges to build a cascading miniature landscape. Fairy houses on one level, tiny stairs on the next, a small garden on the top. It looks like it took great skill. It did not, and this style photographs beautifully too.
The broken pot garden is the best way to rescue a pot you would otherwise throw away. Break it carefully into a few large pieces, stack them so each piece forms a terrace, and fill each level with soil. Plant the top level with something trailing, like baby’s tears, so it spills over the edges, and put the fairy house on the middle terrace where the eye lands first.
- What you need: cracked or broken terracotta pot, potting soil, small fairy house, tiny stairs or pebble steps, baby’s tears, miniature plants, small pebbles.
6. The Vintage Wooden Crate Fairy Garden
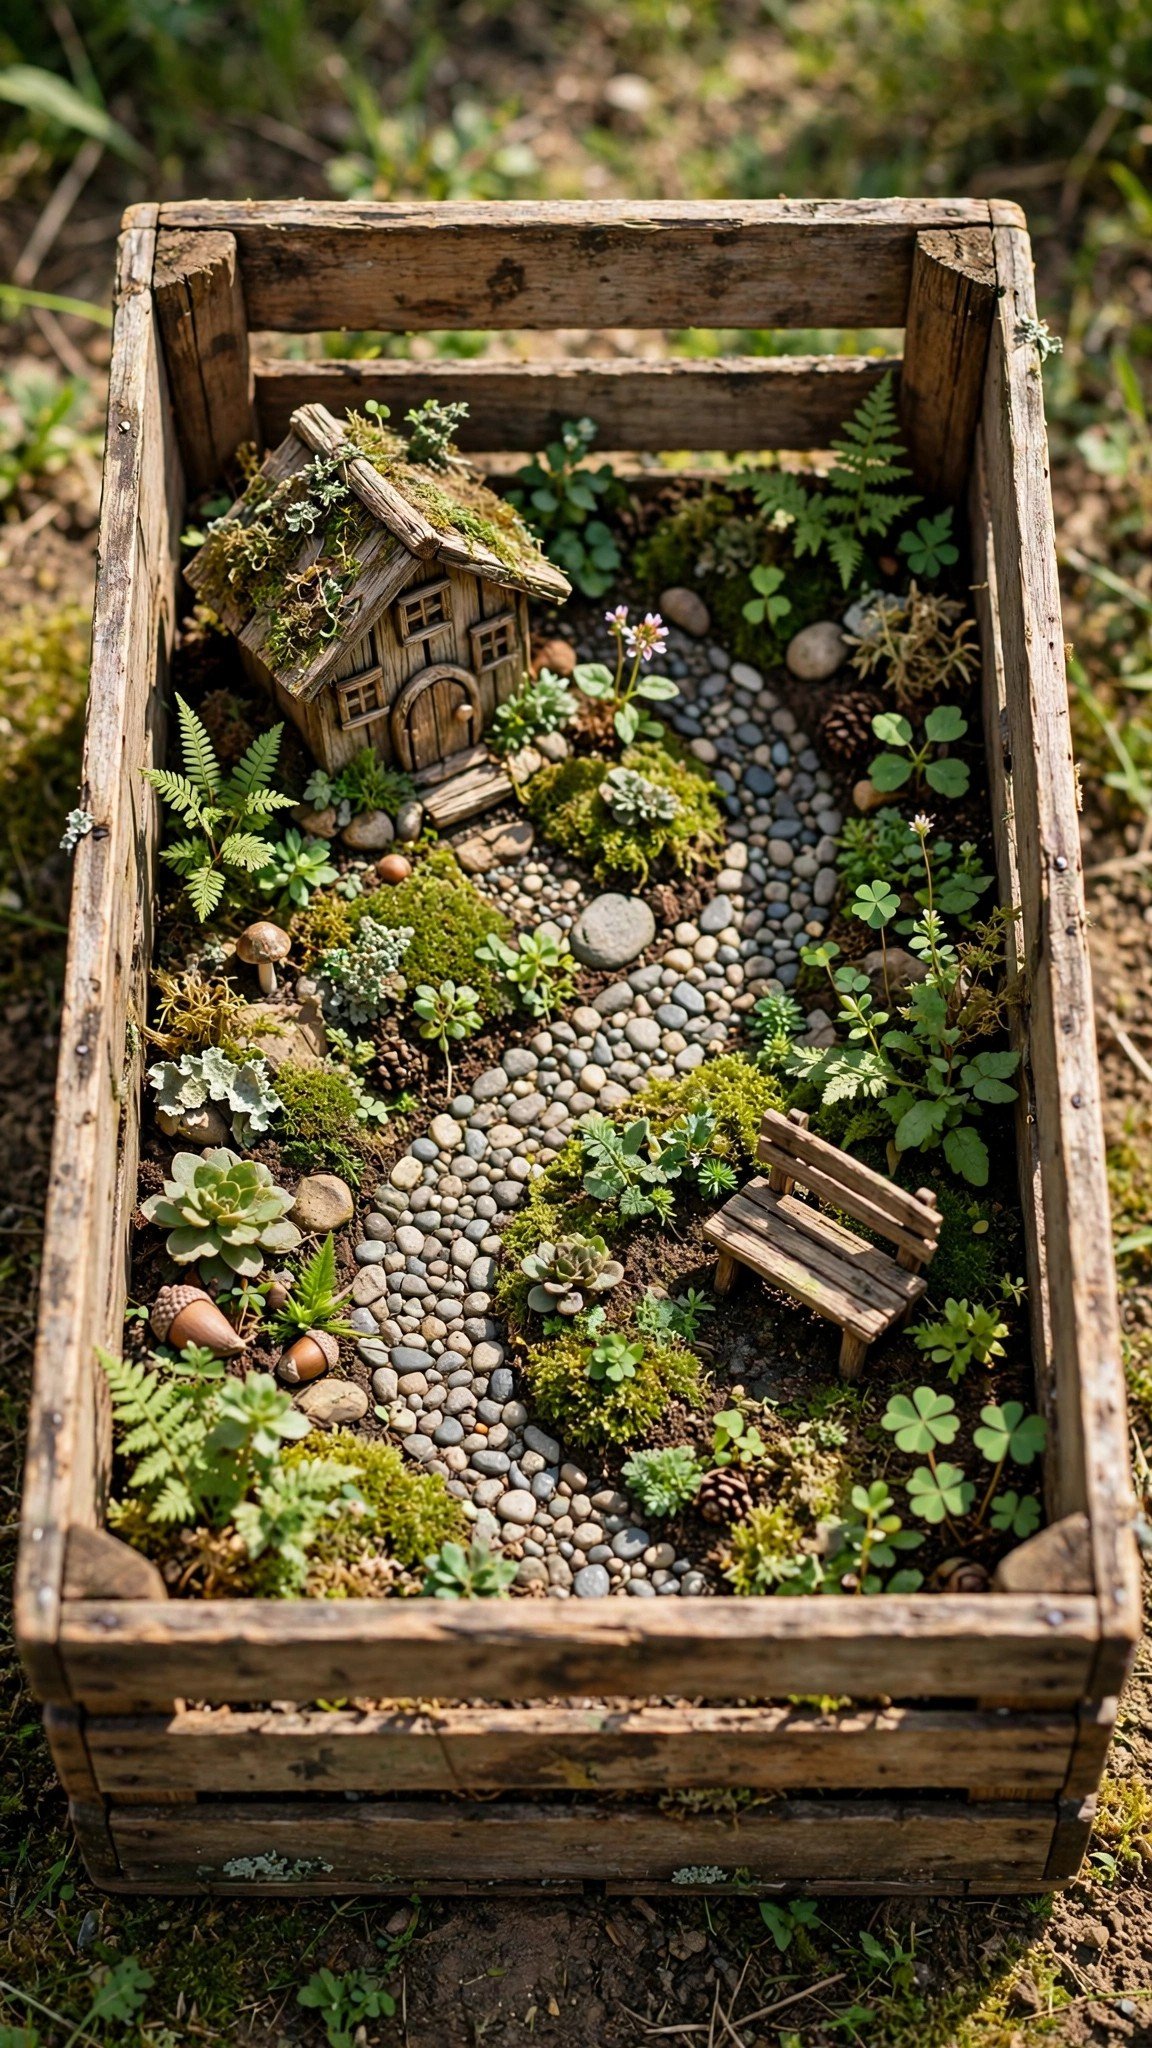
If you want a rustic, farmhouse-adjacent vibe, an old wooden crate is your best friend. Line it with landscape fabric, fill it with soil, and you have got a container with character. A beat-up wine box from an antique market, painted on the inside, can become one of the best fairy garden bases you will ever own.
The crate gives you more room than a pot, so you can tell a bigger story — a house, a path, a tiny garden bed, and a bench all in one scene. Because the crate is wood, seal any painted parts with waterproof varnish before placing them outside, or the paint will fade and the wood will deteriorate. The rustic look only gets better with age, as long as the structure stays sound.
- What you need: vintage wooden crate or wine box, landscape fabric, potting soil, small fairy house, pebble path pieces, miniature plants, tiny bench, waterproof varnish.
7. The Fairy Garden With Tiny Lights
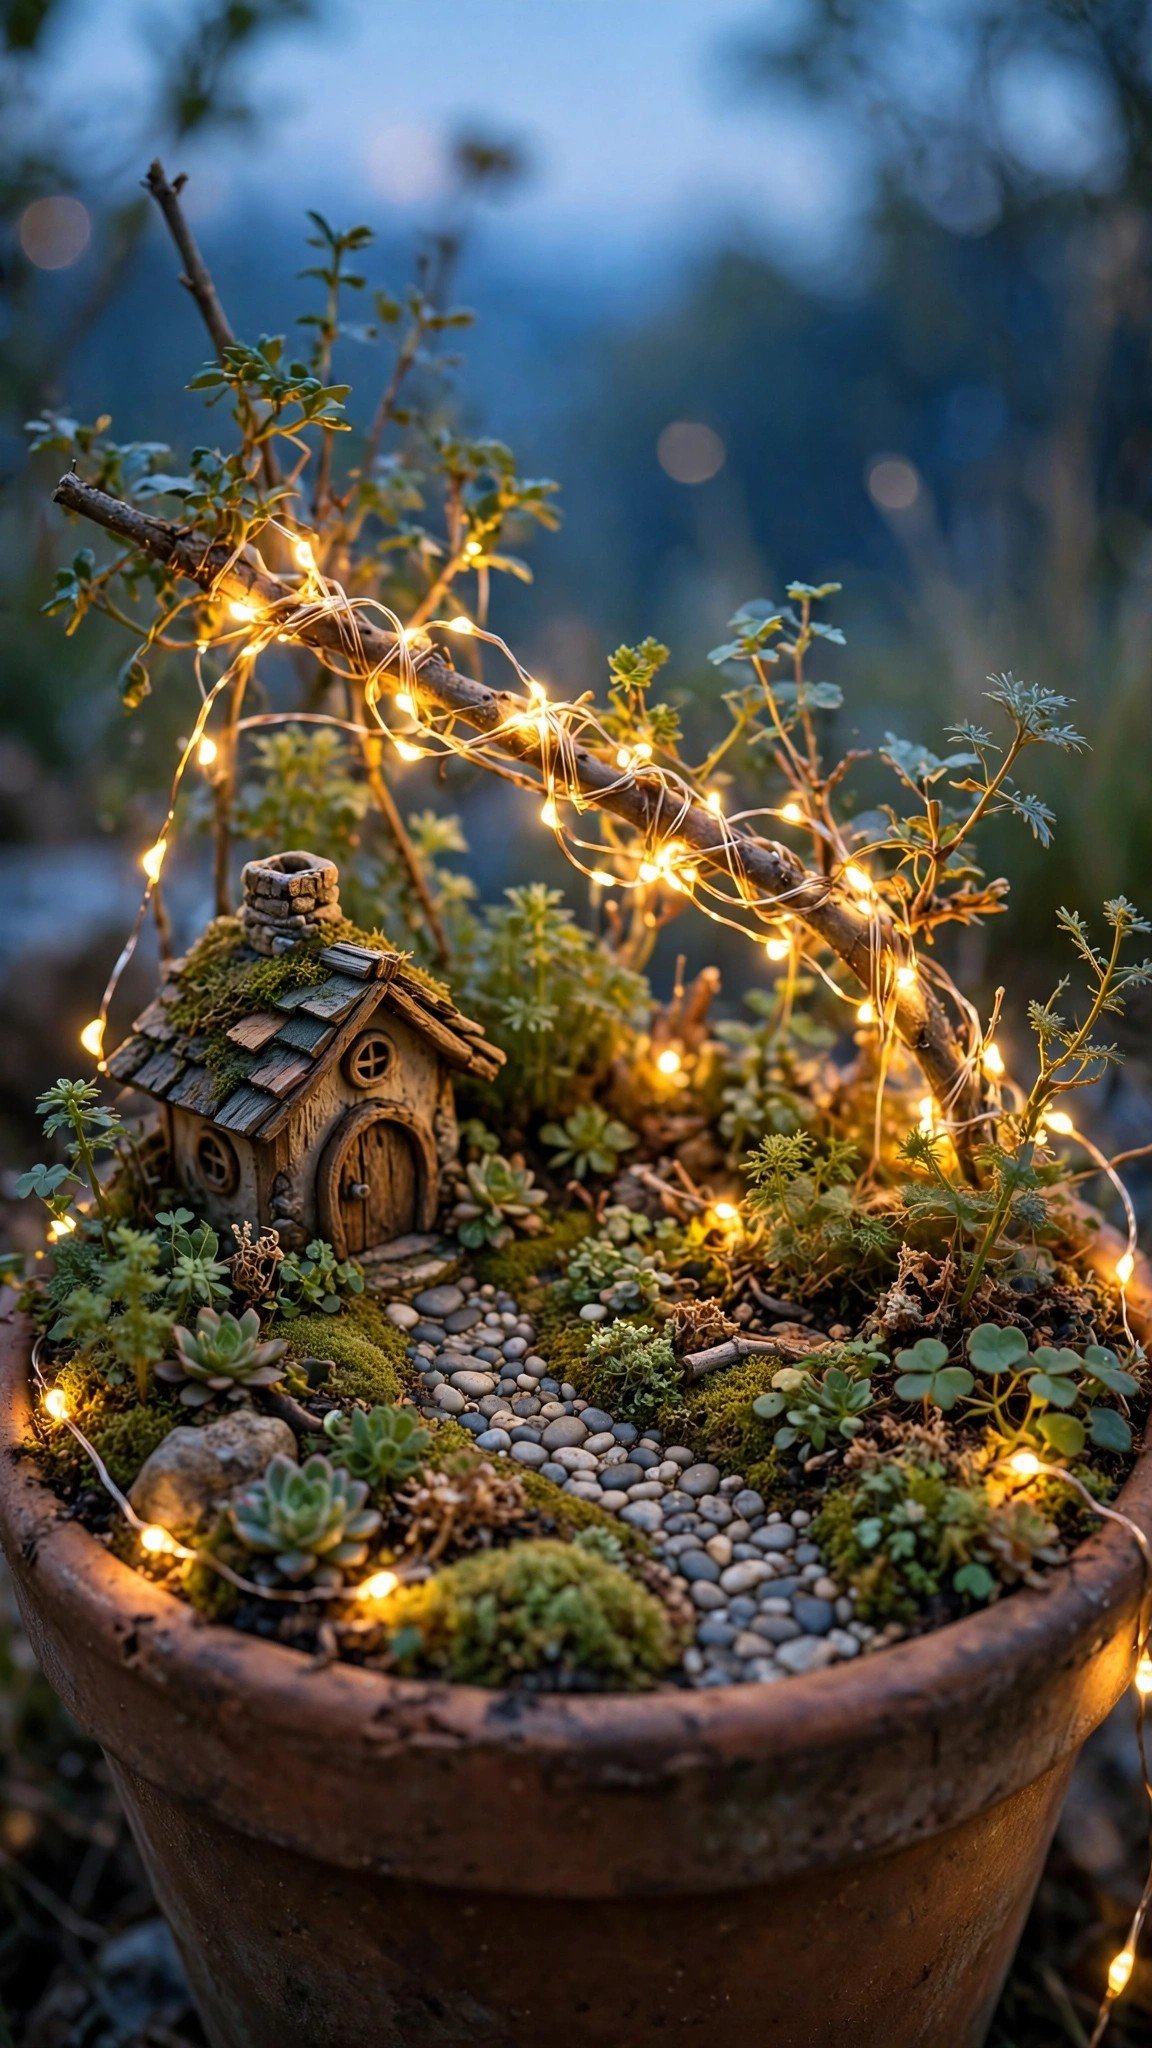
Solar-powered micro fairy lights or tiny LED string lights are game-changers. Weave them through the plants or wrap them around a tiny tree branch, and at night, the whole thing glows. It turns a daytime project into something magical after dark, and small solar fairy light sets are widely available for under $10.
The lights garden is best built in a spot you can see from a window after dark — a porch step, a garden border near the house, or a windowsill. Use a small solar panel tucked behind the plants so it charges during the day, and keep the wire hidden under moss or pebbles. One short string is enough; too many lights make the tiny world look like a Christmas tree instead of a fairy village.
- What you need: container of your choice, solar micro fairy lights or tiny LED string lights, miniature plants, tiny fairy house, moss to hide wires, pebbles.
8. The Seasonal Fairy Garden
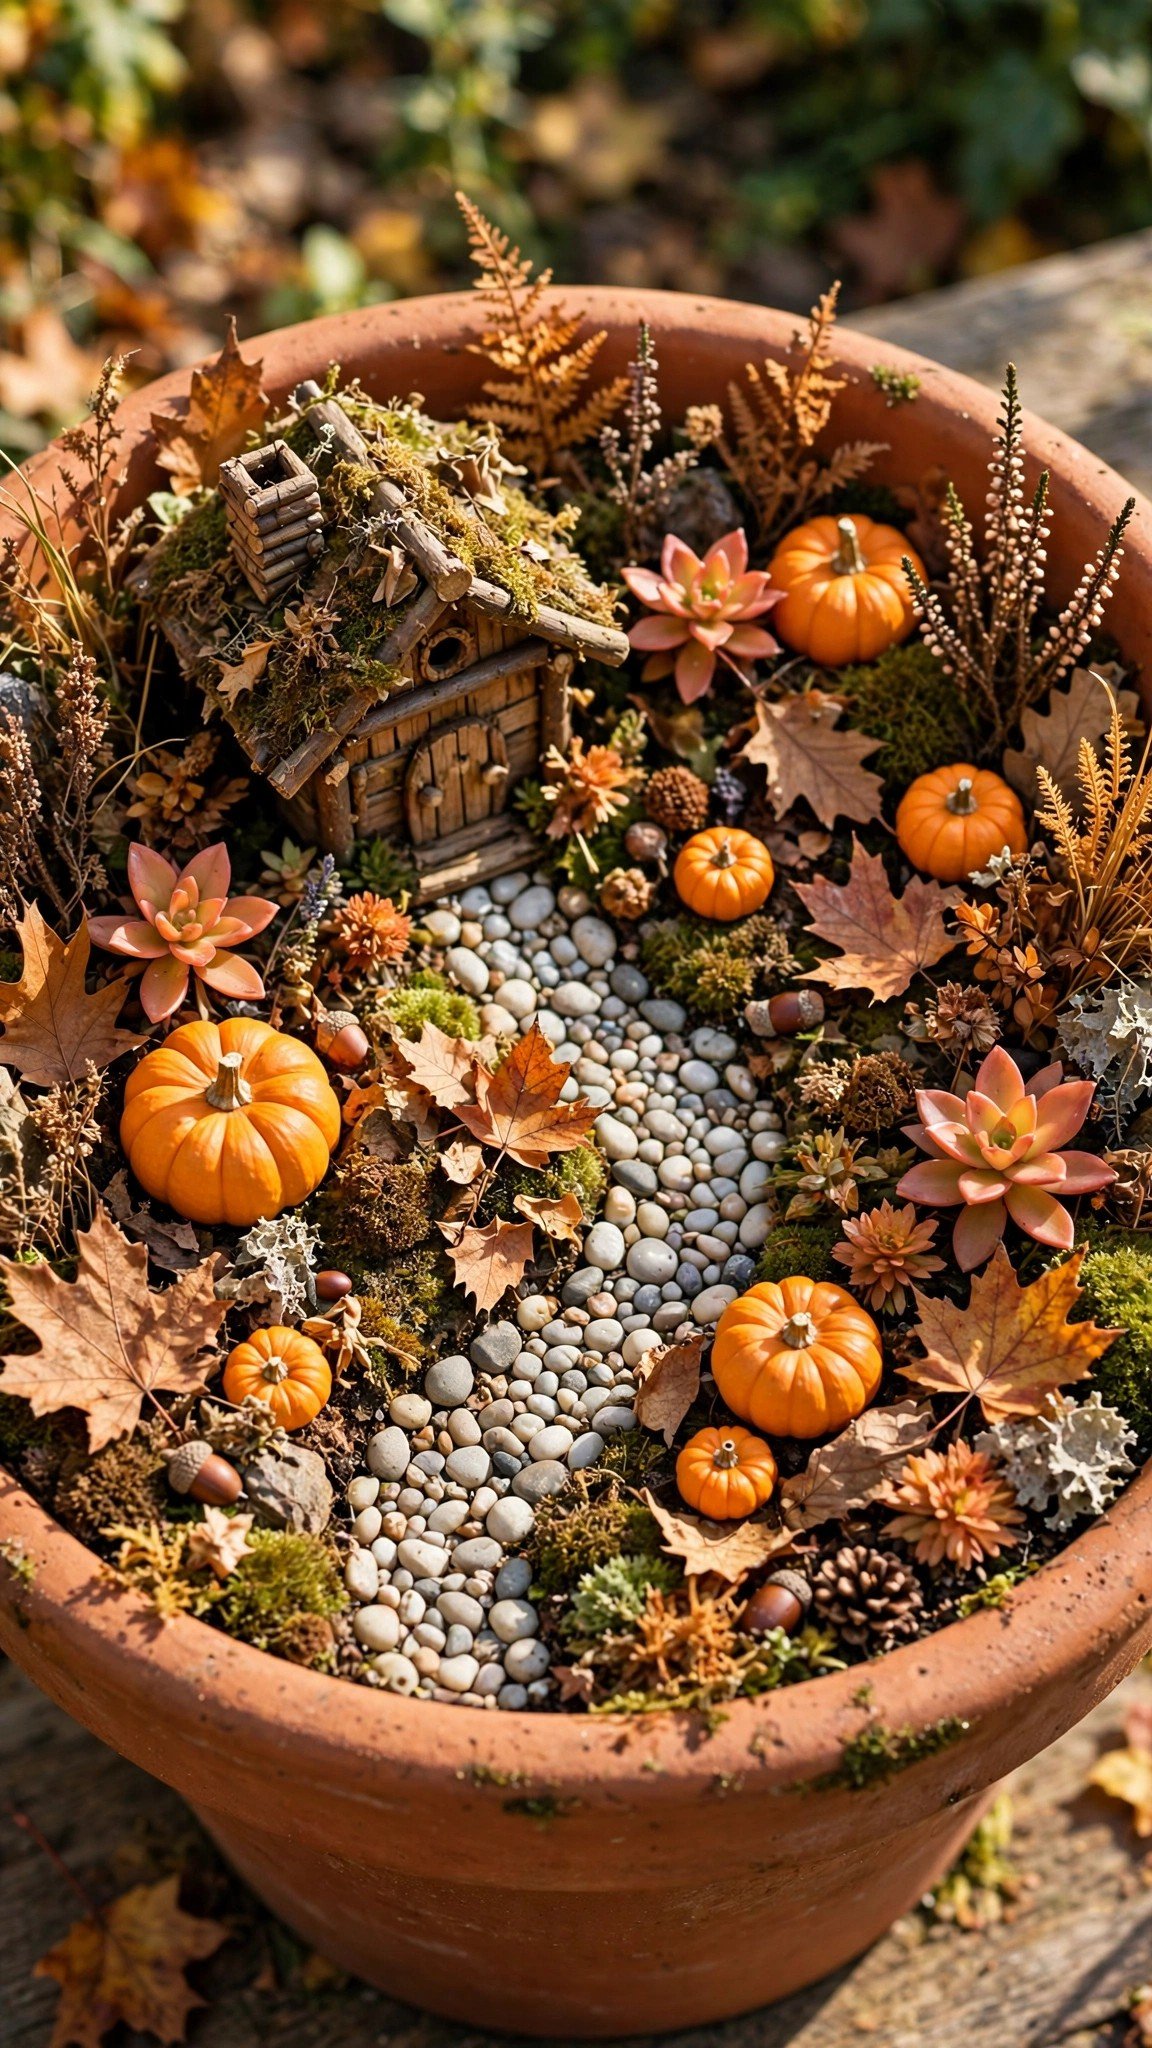
Switch out accessories and plants seasonally to keep things fresh. A summer garden might have bright flowers and a tiny pool. A fall version could incorporate tiny pumpkins, dried leaves, and warm-toned plants. A winter setup could go full snowy wonderland with white gravel and silver accents. Seasonal swaps keep the project alive and give you an excuse to keep adding to it.
The seasonal garden works best when the base stays the same, and only the details change. Keep the house, the path, and the main plants in place, and swap the small accessories — pumpkins in fall, tiny flowers in spring, white gravel in winter. It is the cheapest fairy garden to keep interesting, because each season’s update costs just a few dollars at the dollar store.
- What you need: one sturdy container and fairy house, seasonal accessories (tiny pumpkins, dried leaves, white gravel, tiny flowers), miniature plants, pebble path.
9. The Fairy Garden With a Mini Pond
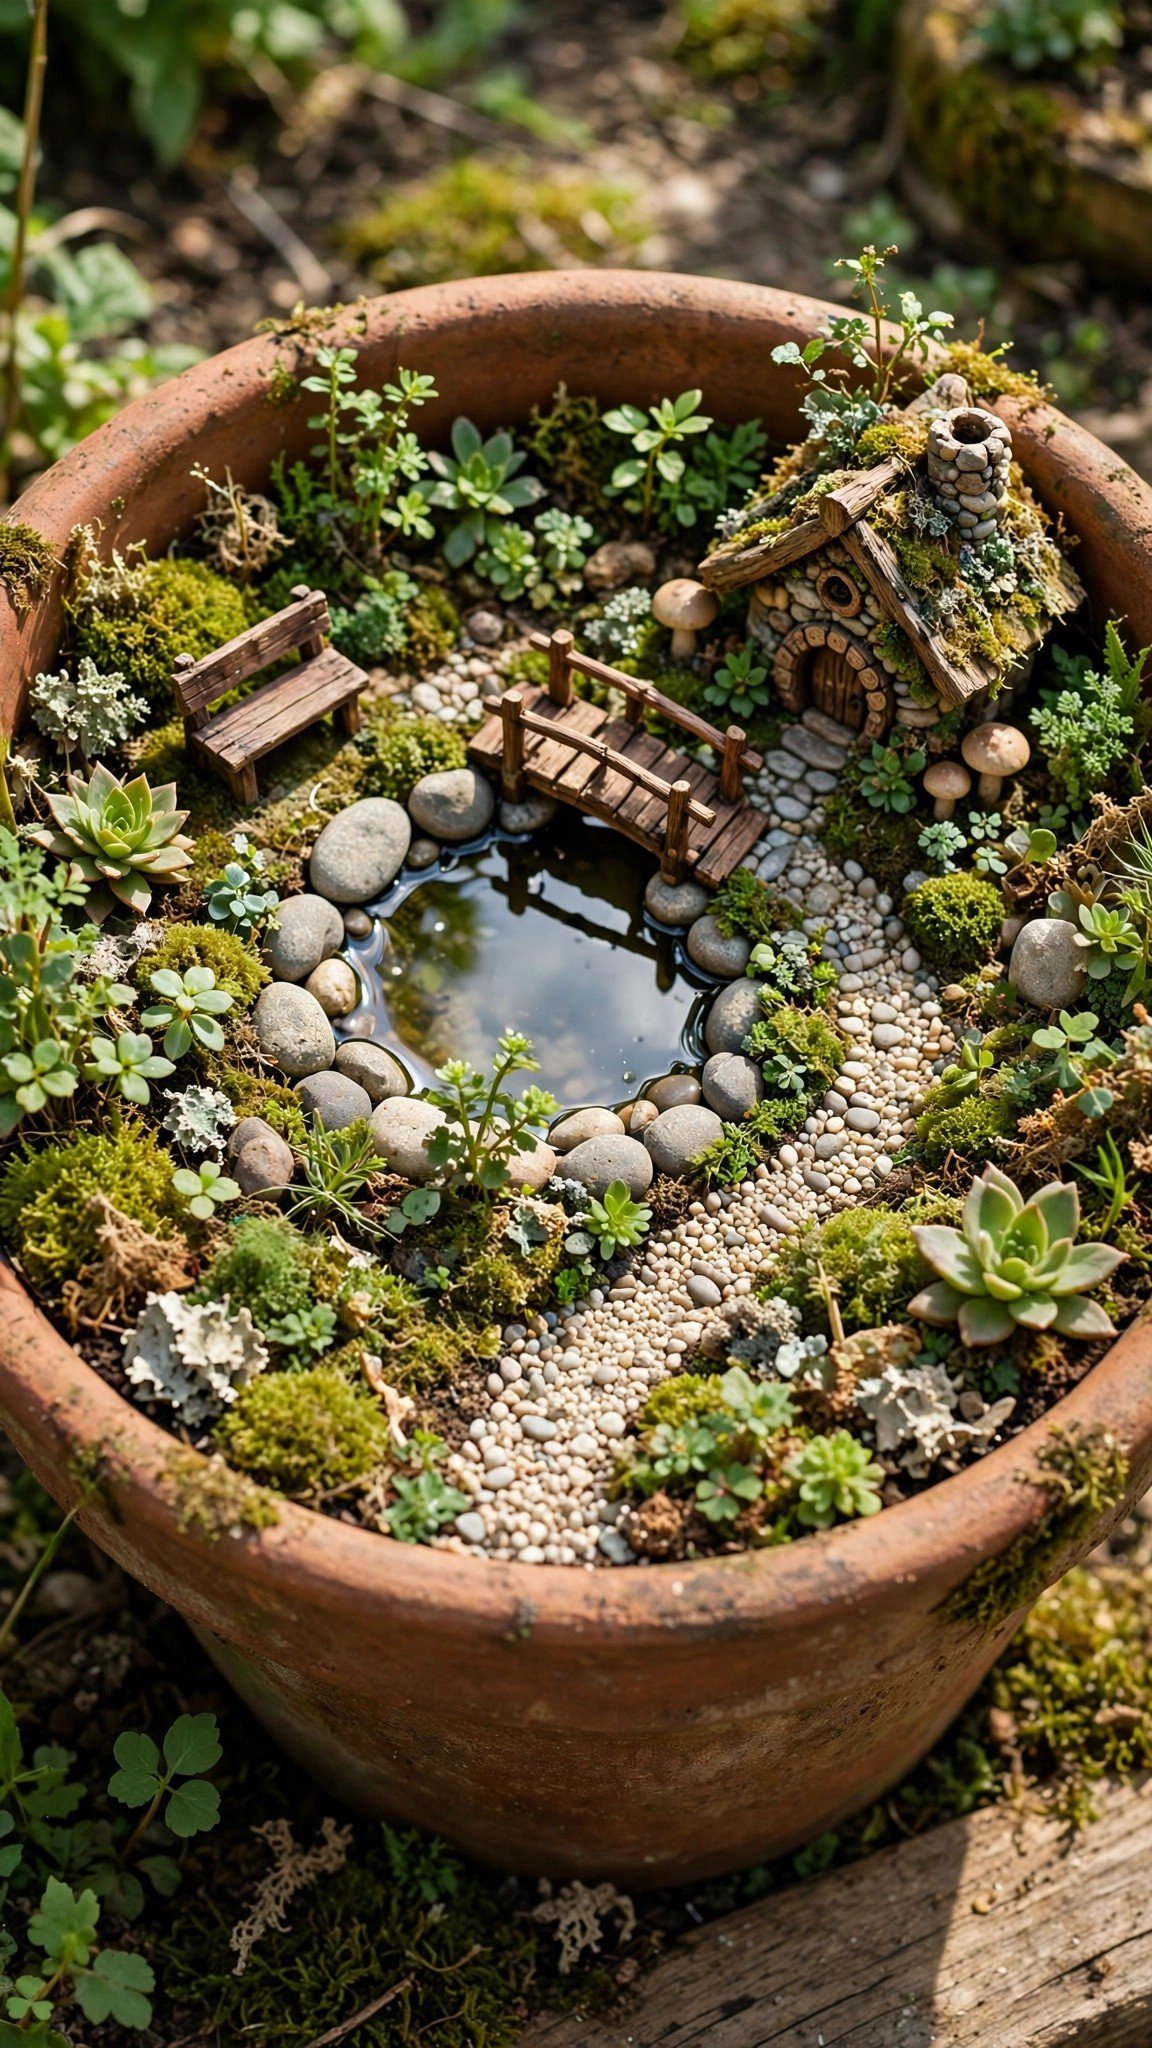
A tiny pond turns a fairy garden from a plant arrangement into a real place. A shallow dish, a jar lid, or a small mirror set into the soil reads as water at fairy scale, and a few pebbles around the edge make it look natural. Add a tiny bridge over it, or a miniature bench beside it, and the whole scene suddenly has a story.
The pond garden needs the same drainage care as any fairy garden, with one extra rule — keep the water feature shallow and easy to clean, because stagnant water attracts mosquitoes. A small mirror is the easiest pond of all, since it never needs cleaning and always reflects the sky. If you use real water, change it every few days and keep the dish small enough to lift out.
What you need: container, shallow dish or small mirror for the pond, pebbles, tiny bridge or bench, miniature plants, moss.
10. The Succulent Fairy Garden

Succulents are ideal for fairy gardens with a desert or modern feel, because they stay small, hold their shape, and need very little water. A shallow bowl of mixed miniature succulents, a few smooth stones, and one tiny house makes a clean, modern fairy garden that almost takes care of itself.
The succulent garden is the best fairy garden for forgetful waterers. Miniature gardens dry out faster than larger pots because of the small soil volume, but succulents actually like that — they want to dry out between waterings. Use a gritty, well-draining soil mix, give them plenty of light, and resist the urge to water on a schedule. A tiny fairy door on a rock and a pebble path are all the decoration this style needs.
What you need: shallow bowl or wide pot, gritty cactus soil mix, miniature succulents, smooth stones, tiny fairy house, flat rock and craft paint for a fairy door, pebbles.
11. The Fairy Garden in a Large Planter or Garden Bed

If you have outdoor space, you can dedicate a raised bed or a large planter bowl to a full fairy village setup. More space means more storytelling — you can add paths, multiple structures, water features, and dense plantings, all in one scene. This is the fairy garden that guests actually stop and stare at.
The large planter garden is the only fairy garden where you can build a real village instead of a single scene. Give each structure its own little zone — a house here, a bench there, a pond in the corner — and connect them with pebble paths. Plant densely, but leave the paths clear, and use plants that stay small so the village does not get swallowed by overgrowth.
- What you need: large planter bowl or raised bed, potting soil, two or three small fairy houses, pebble path pieces, miniature plants, tiny bench and bridge, moss.
12. The Fairy Garden With DIY Twig Furniture

Seriously, just collect some straight twigs on your next walk. Cut them to size, use twine or hot glue to bind them, and you have got chairs, tables, and benches that look rustic and adorable. It takes maybe 20 minutes and costs nothing, and handmade furniture makes the whole garden feel personal in a way bought accessories never do.
The twig furniture garden is the best fairy garden to build with kids, because every piece is a small craft project. A twig bench, a twig table, a tiny twig fence — each one takes minutes and teaches the scale of the miniature world. Seal the finished pieces with waterproof varnish if the garden lives outdoors, or they will fade and fall apart in the rain.
- What you need: straight twigs, twine or hot glue, small scissors, container and soil, miniature plants, tiny fairy house, pebbles, waterproof varnish.
13. The Fairy Garden for Kids

Fairy gardens are one of those projects that work for all ages. Five-year-olds go absolutely wild with excitement over tiny fairy doors, and a kids’ fairy garden should be built for touching, rearranging, and playing — not just looking. Let the kids choose the accessories, place the furniture, and move things around as much as they like.
The kids’ garden is best built in a sturdy container that can survive being carried around, with chunky accessories that are easy for small hands to grip. Painted rock fairy doors, bottle cap stepping stones pressed into the soil, and an acorn cap bird bath on a small stone base are all free or nearly free, and each one is a little craft project in itself. If a plant dies or a piece breaks, that is part of the fun — the garden is supposed to be whimsical and a little wild.
- What you need: sturdy container, potting soil, flat rocks and craft paint for fairy doors, bottle caps for stepping stones, acorn caps and small stones for a bird bath, miniature plants, small fairy figurines.
Plan Your DIY Fairy Garden in 4 Simple Steps
- Choose your container first. A wide, shallow terracotta pot is the safest start, but a crate, a teacup, or a garden bed all work. The container sets the whole tone, so pick it before anything else.
- Sort out drainage. Put gravel or broken pot pieces at the bottom of any container before adding soil. Soggy roots will kill plants faster than anything, so this step is non-negotiable.
- Place the big pieces, then the small ones. Put the fairy house and the path in first, then the plants, then the tiny accessories. Work from large to small so nothing gets buried.
- Water lightly and watch the light. Match the plants to the light your spot actually gets, and water carefully — miniature gardens dry out faster than larger pots. Check moisture regularly, especially in summer, and fertilize lightly so plants do not outgrow the fairy scale.
Take a photo of your garden from across the room. It shows you at a glance whether the scene looks like a world or a crowded pot.
DIY Fairy Garden Mistakes to Avoid
- Skipping drainage. Without gravel or broken pot pieces at the bottom, the soil stays soggy, a nd the plants die within weeks.
- Choosing plants that grow too big. A plant that outgrows the fairy scale swallows the whole scene. Pick miniature varieties and fertilize lightly.
- Putting shade plants in full sun. Match the plants to the light. Shade-loving ferns in a south-facing window will burn.
- Crowding every inch. A fairy garden needs space to read as a world. Leave gaps between the pieces so the eye can rest.
- Using unsealed wood outdoors. Painted wooden items fade and deteriorate in the rain. Seal them with waterproof varnish first, or plan to replace them.
- Overwatering. Small soil volumes dry out fast, but they also drown fast. Water a little, check the soil, and water again only when it is dry.
A fairy garden is one of those projects that reward you with something genuinely magical, and the process itself is pure joy.
FAQs
How do I start a DIY fairy garden?
Pick a container first — a wide, shallow terracotta pot is the safest start. Add gravel at the bottom for drainage, fill it with soil, place a tiny house and a pebble path, then add miniature plants and a few small accessories. You can build a complete fairy garden in one afternoon for around $20.
What plants are best for a fairy garden?
Choose plants that stay small with fine-textured foliage so they look right at fairy scale. Irish moss makes a lush green carpet, thyme stays low and smells lovely, miniature ferns give woodland vibes, succulents suit desert or modern gardens, and baby’s tears cascades beautifully over edges.
How much does a DIY fairy garden cost?
You can spend $15 or $150 — it is entirely up to you. A budget build costs around $20: a repurposed container, $5 to $10 of miniature plants, $5 of soil, and dollar-store accessories. A mid-range build with a bought fairy house and lights costs around $75 to $110.
How do I keep a fairy garden alive?
Drainage comes first — gravel or broken pot pieces at the bottom before the soil. Match the plants to the light your spot gets, water carefully because small soil volumes dry out fast, and fertilize lightly so plants do not outgrow the fairy scale. Replace any plant that dies rather than letting it sit.
Can I make a fairy garden indoors?
Yes. A teacup garden or a succulent garden on a sunny windowsill works beautifully indoors. Stick to low-light varieties or succulents you can manage easily, and use a container with drainage or a gravel layer at the bottom. A bookshelf nook or a bathroom countertop also works for moisture-loving plants.
What container is best for a fairy garden?
A wide, shallow terracotta pot is the best all-round choice — cheap, earthy, and roomy enough to arrange a scene. A vintage wooden crate suits a rustic look, a teacup suits a windowsill, and a large planter or raised bed suits a full fairy village. Any container works as long as it drains.
How do I keep a fairy garden from looking cluttered?
Edit ruthlessly and leave space. Place the house and path first, then the plants, then only a few accessories — one bench, one door, one light. A crowded pot looks like storage, while a scene with breathing room looks like a world. If something looks off, move it or take it out.
Conclusion
DIY fairy gardens are one of those projects that reward you with something genuinely magical, and the process itself is pure joy. There is something deeply satisfying about choosing every single element, placing tiny things with care, and watching it come together into a miniature world that feels alive.
The best part? You really cannot mess this up. Even an imperfect fairy garden has charm. If something looks off, move it. If a plant dies, replace it with something else. It is supposed to be whimsical and a little wild — that is what makes it feel real. So grab a pot, raid your backyard for pebbles, pick up a few tiny plants, and just start. Your fairy garden does not have to be perfect. It just has to be yours.