

Christmas Kitchen Ideas: 22 Cozy Looks That Still Work for Cooking
Christmas kitchen ideas work best when they respect what the room is for. Between cookie sheets, simmering pots, and a crowd gathered at the island, a kitchen needs decor that looks warm and still stays out of the way.
This guide shows you how to build a cozy Christmas kitchen with light, greenery, useful festive objects, and one clear color palette. You will find 22 practical Christmas kitchen decor ideas for counters, open shelves, windows, and the breakfast table, each with a styling tip. Then we cover small-kitchen and renter options, a safety checklist, and a simple December timeline.
How to Decorate a Kitchen for Christmas: The 4-Layer Formula
To decorate a kitchen for Christmas, build the look in four layers and stop when the counters still have room to work:
- Add light. Warm white string lights and candles set the mood before any object does.
- Bring in greenery. Garland, wreaths, and cut branches add color, texture and scent.
- Style useful objects. Cookie jars, cake stands, mugs and baking supplies double as decor.
- Repeat one palette. Choose two or three colors and use them in every layer.
This order matters. Light and greenery create the atmosphere with very little clutter. Objects come third because they take up counter space, and the palette ties everything together so a few pieces look planned rather than random.
Warm White Lights on Cabinet Tops and Windows
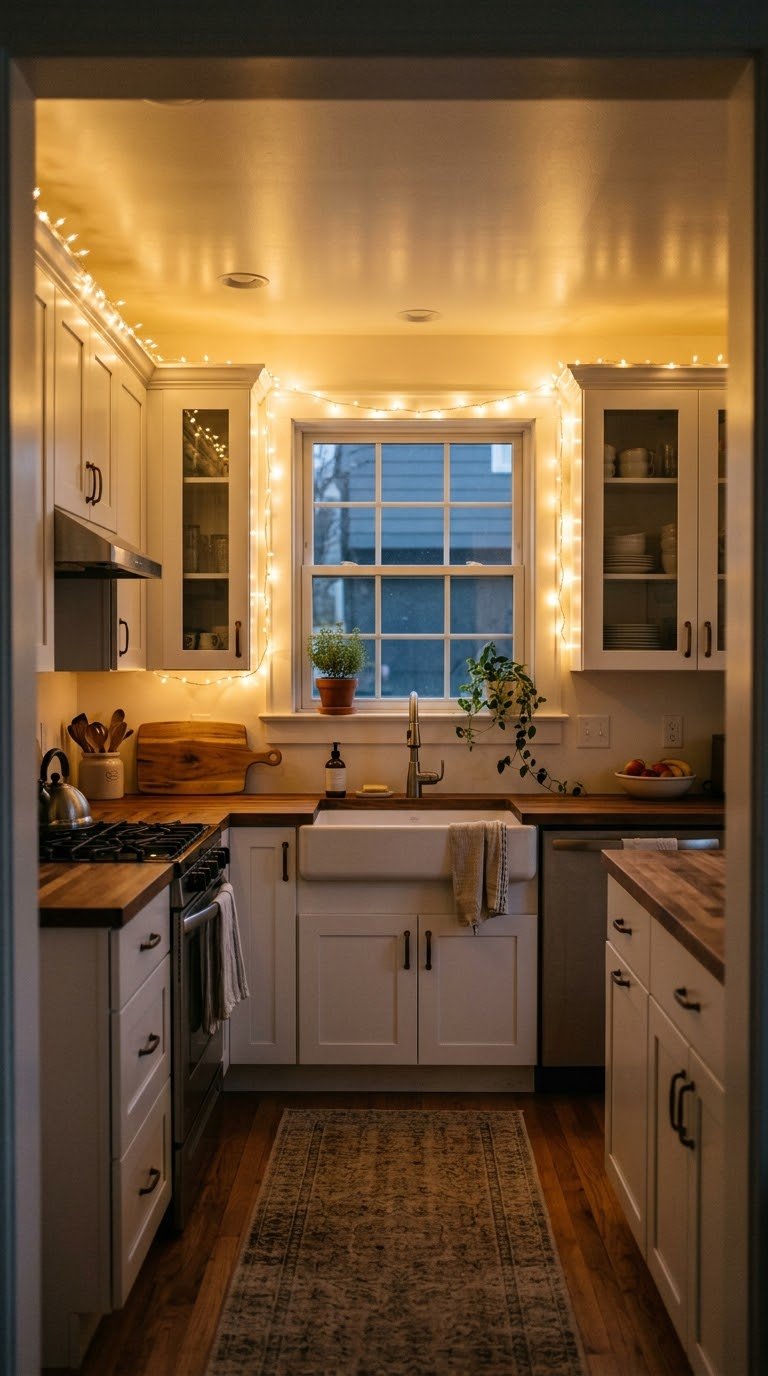
Light is the fastest way to make a Christmas kitchen feel different at night. Run warm white string lights along the top of your cabinets so the glow bounces off the ceiling, then add a second strand around the window frame above the sink.
Choose lights rated for indoor use and keep every strand the same warm tone. If outlets are far away, battery strands with a timer avoid long cords across the counter. Small adhesive hooks hold lights on a window frame without nails, but check their weight rating first.
The trade-off is dust. Lights on top of cabinets collect it, so wipe the cabinet tops before you hang them.
Styling tip: Leave a few inches of gap between the lights and the ceiling so the glow looks soft instead of like a border.
Pillar and Taper Candles on a Tray

Candles add the soft flicker lights cannot copy, but a kitchen needs a plan for them. Group two or three pillar candles of different heights on a wooden or metal tray, and place it on the island or a table instead of beside the stove.
Taper candles in short brass or wooden holders fit a deep windowsill, as long as curtains and garland sit well away from the flame. For a busy cooking day, swap in flameless candles. Modern ones with a flickering bulb look convincing, and you can leave them on without watching them.
Styling tip: Use cream, deep green or red candles and vary the heights. Three candles at one height look stiff.
Garland Along Open Shelves

Open shelving gives garland an obvious home. Drape a strand of evergreen along the front edge of one shelf, or weave it between plates, jars, and mugs so the greenery looks like part of the display.
Fresh garland smells wonderful but dries out within a couple of weeks in a warm kitchen. Faux garland lasts the whole season and stays safer near cooking. Either way, keep it away from the stove and from any hot appliance, and tuck a small battery light inside for evening glow.
Styling tip: Drape garland on the top shelf only. Greenery on every shelf hides the dishes that make open shelving work.
Mini Wreaths on Cabinet Doors

Mini wreaths are one of the easiest Christmas kitchen decor ideas because they add festive color without using any counter space. Hang one on each upper cabinet door, or on the doors flanking the range hood, using a ribbon loop over the cabinet pull or a small removable hook.
Boxwood and pine wreaths about 8 to 10 inches wide suit standard cabinet doors. Dried orange and rosemary wreaths add scent too. Make sure each wreath is light enough that the door still opens and closes smoothly.
Styling tip: Use one ribbon color on every wreath. A repeated plaid or velvet ribbon makes six wreaths look like a set.
Fresh Greenery in a Pitcher by the Sink

A pitcher of cut greenery looks natural and costs very little. Fill a stoneware or enamel pitcher with pine, cedar or fir branches, and add eucalyptus or rosemary if you want a softer scent.
Place it beside the sink or at the end of the counter where it will not block prep space. Cut the stems at an angle and refresh the water every few days. Keep the arrangement lower than your faucet so it does not get in the way when you wash dishes.
Styling tip: Add three or four branches only. A loose, uneven bunch looks more natural than a full, round one.
A Low Centerpiece for a Christmas Kitchen Island
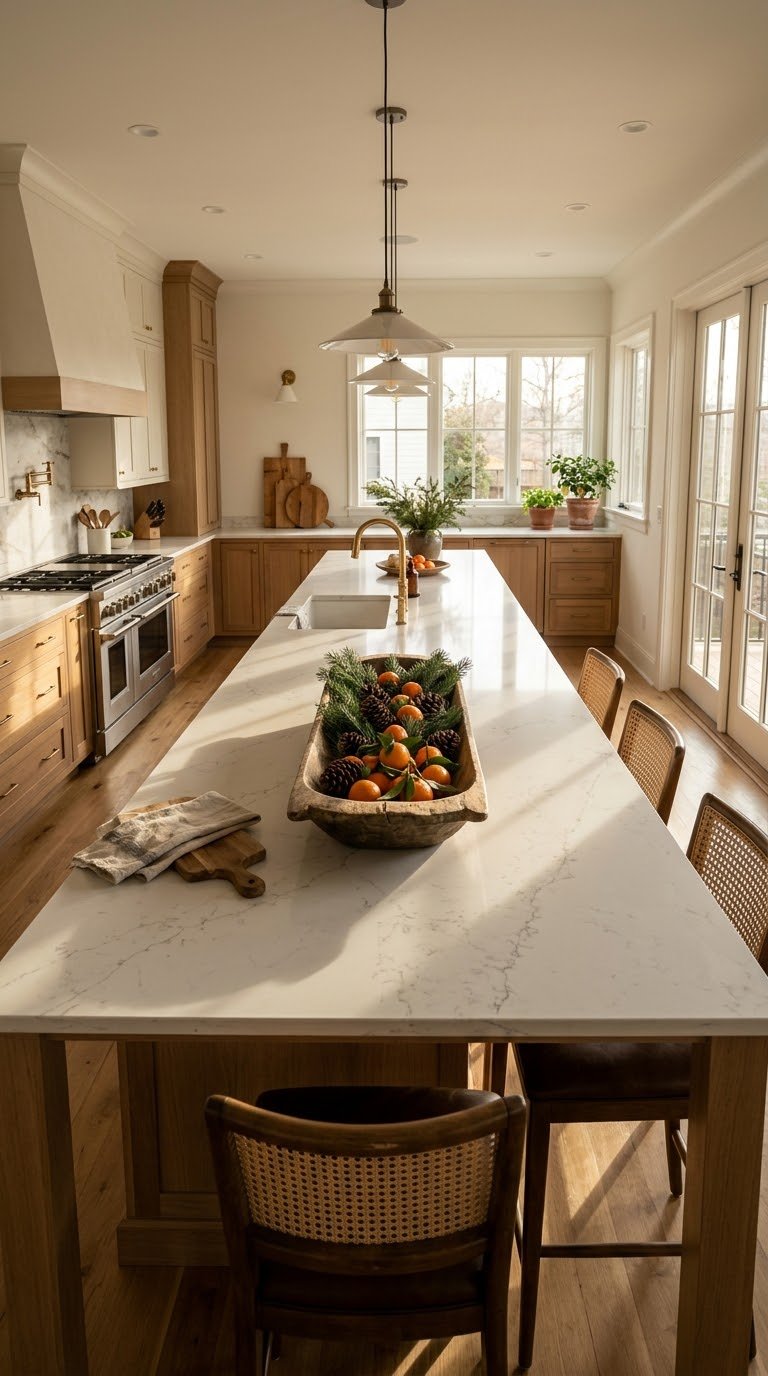
A Christmas kitchen island needs a centerpiece that people can see over and work around. Keep it low and long: a wooden dough bowl, a narrow tray, or a linen runner with greenery down the middle.
A good size is about one third of the island length, which leaves space at both ends for chopping, rolling dough or setting down a laptop. Include something that moves, such as a bowl of clementines, so guests can take from it without wrecking the look.
Styling tip: Keep everything on the centerpiece below eye level for people sitting on stools, so conversation stays easy.
A Cloche or Cake Stand with Real Cookies
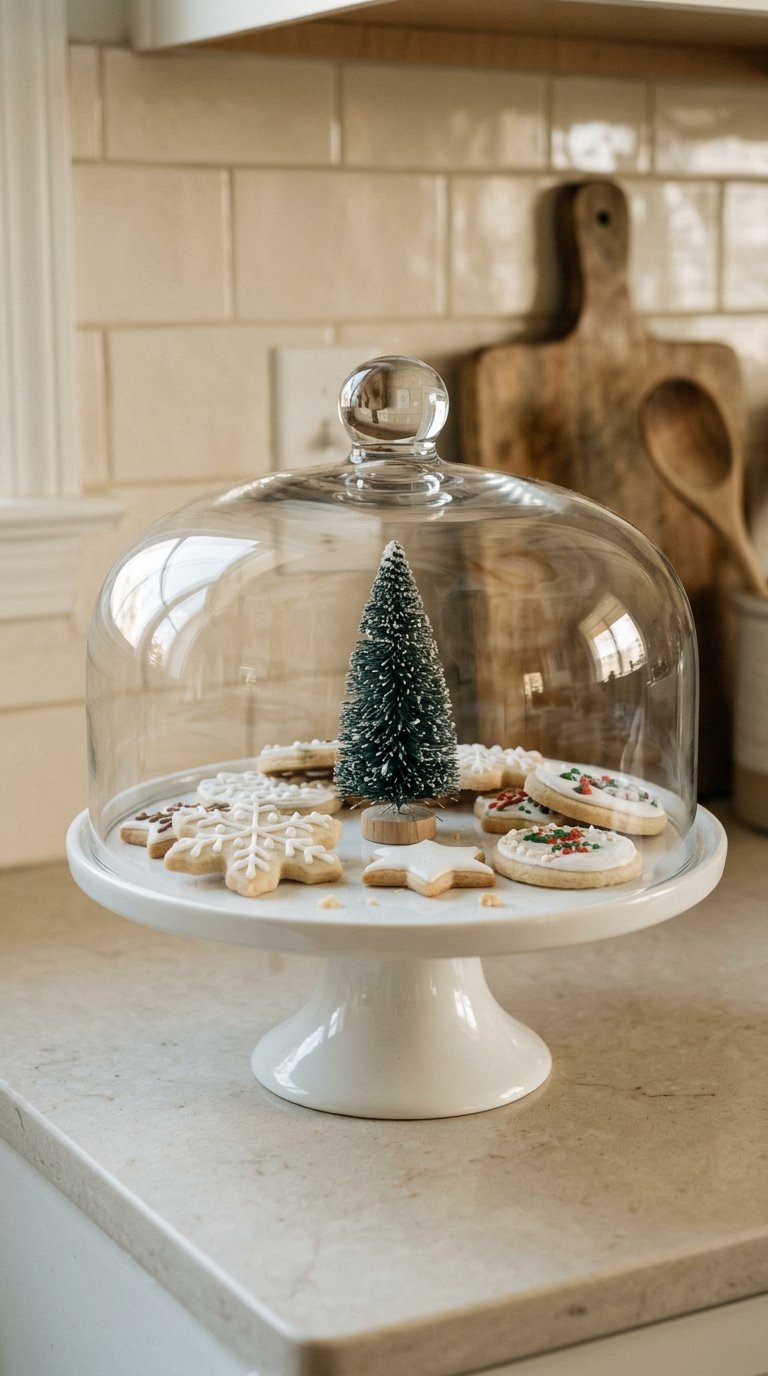
A glass cloche on a cake stand puts the cookies you actually baked on display. It adds height to the counter, protects the cookies from dust, and fits any palette.
Choose a stand around 10 to 12 inches wide so it does not crowd the counter. Line the plate with parchment, add a few cookies, and rotate them as they get eaten. For a non-food version, fill the cloche with ornaments and a bottle brush tree.
Styling tip: Put the cake stand on a tray with a candle and a sprig of greenery so the cookies read as a vignette rather than just a snack.
A Wooden Bowl of Citrus, Pomegranates and Pine
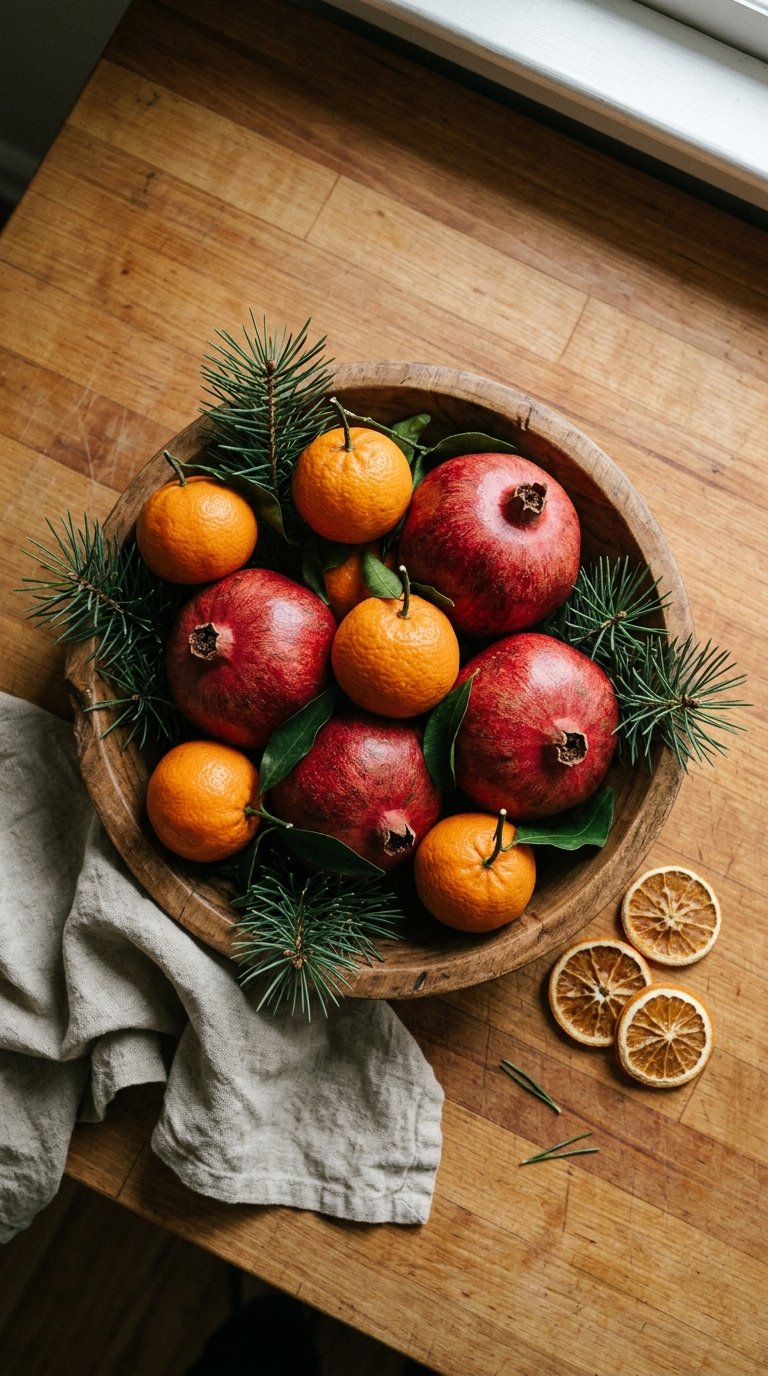
A bowl of fruit and evergreen is festive, fragrant, and edible. Fill a wooden bowl with clementines, red apples or pomegranates, then tuck pine or cedar sprigs between them.
Choose fruit with firm skins that last a few weeks, and add a few dried orange slices for contrast. Leave it near the stove or sink, where people pass often, so it feels like part of the room instead of a separate display.
Styling tip: Mix two kinds of fruit rather than three or four. A tight color story looks calmer and more expensive.
Baking Supplies in Glass Jars
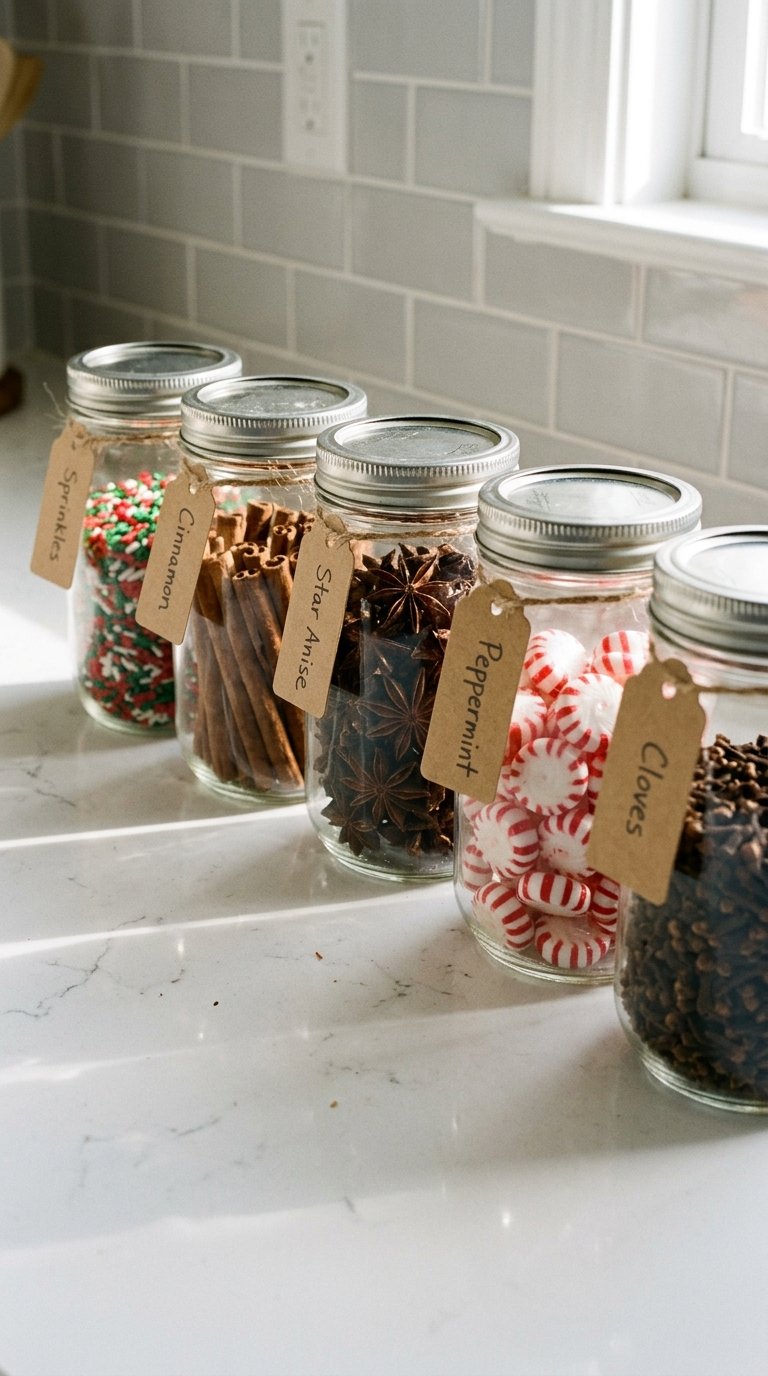
Glass jars turn baking staples into decor. Fill tall jars with red and green sprinkles, whole cinnamon sticks, star anise, pearl sugar, and candy canes, and line them up on a tray or counter shelf.
Use airtight lids for anything you plan to bake with. Label each jar with a small kraft tag or a strip of masking tape so you can find ingredients quickly during a baking session.
Styling tip: Group jars in odd numbers and vary the heights. Add one short jar in front of two tall ones.
Vintage Cookie Tins as Storage and Decor

Vintage cookie tins add color and nostalgia, and they do real work. Stack two or three on the counter, on top of the fridge or on a pantry shelf, and keep flour, sugar or baking cutters inside.
Thrift stores and flea markets are the best sources. Wash used tins with warm soapy water, dry them well and line them with parchment before you store food. Skip any tin with rust inside.
Styling tip: Pick tins in the same color family, such as red, cream and gold, even if the patterns differ.
A Hot Cocoa Station That Fits on a Tray

A hot cocoa station is a decoration people use. Build it on a large tray so you can move it when you need the counter, and keep everything within reach.
Stock cocoa mix in a jar, marshmallows and crushed candy canes in small bowls, spoons in a cup and a few mugs. Add a kettle or slow cooker nearby if the outlet allows. Place the tray at one end of the counter, away from the stove.
Styling tip: Hang a small chalk tag on each topping jar. Labels make the setup look intentional and help guests serve themselves.
A Cookie Decorating and Cooling Station

If you bake, set up one zone for the cookie process instead of spreading it across the kitchen. Use the island or the kitchen table, and put stacking cooling racks at one end, small bowls of icing in the middle and sprinkles in a muffin tin at the other.
Cover the surface with butcher paper or a washable cloth so cleanup takes a minute. Keep greenery and candles at the far end, away from the icing, and put finished cookies on a tiered stand or cake stand where the room can see them.
Styling tip: Add a small sign or chalk tag that names each icing color. It makes the setup look planned and helps children join in.
A Coffee and Tea Nook for Christmas Morning
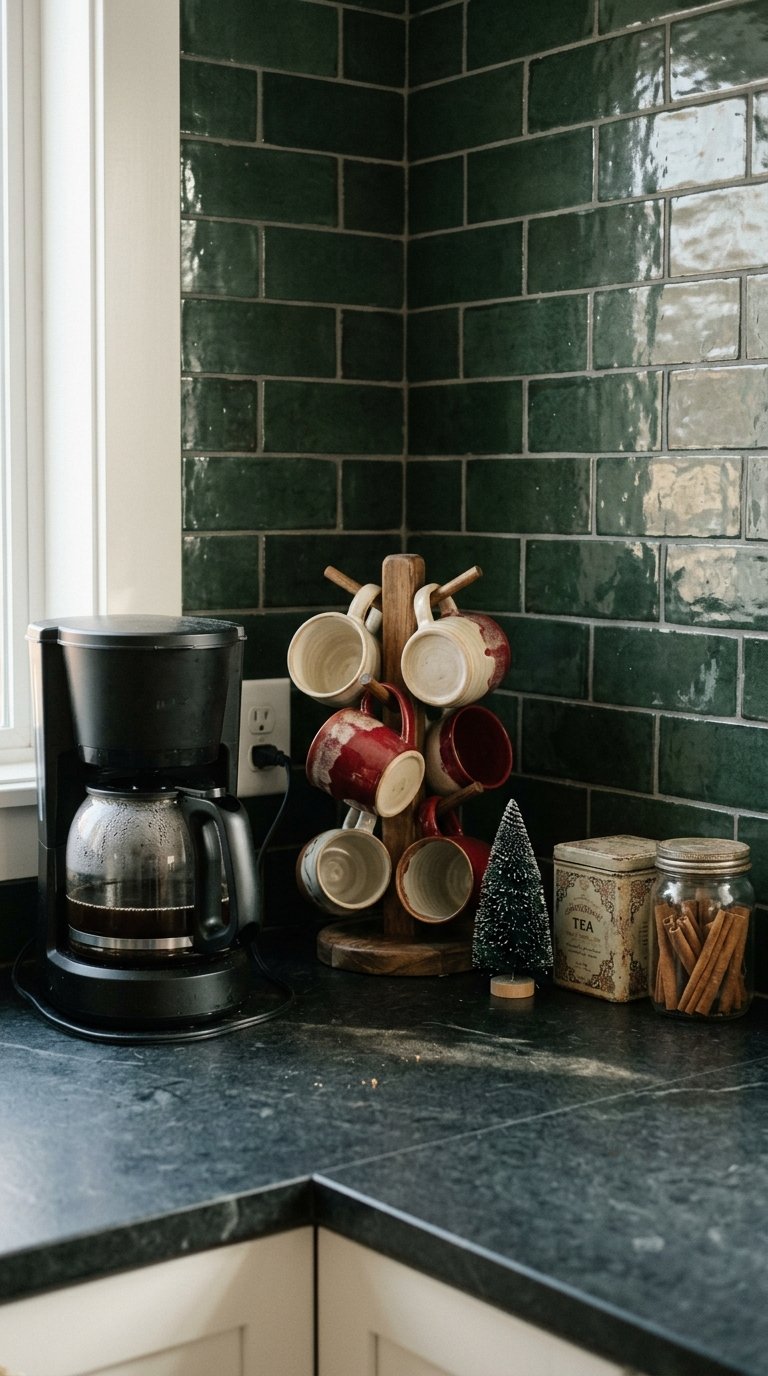
Christmas morning starts with coffee, so give that corner some attention. Put the coffee maker, a tray of festive mugs, a jar of cinnamon sticks and a tin of tea on one stretch of counter, and add a tiny tree or a sprig of greenery.
Leave room to work. A narrow tray keeps loose items together, and a lamp or battery candle makes the nook glow before sunrise. Keep guests in mind too: set out spoons, sugar and a small bowl of candy canes so they can help themselves.
Styling tip: Use mugs from a single color family on a wooden stand or hooks. Mixed patterns look festive when the colors match.
Open Shelf Dishware That Isn’t Only Red and Green

Christmas open shelf decor looks better when it mixes your everyday dishes with a few festive pieces. Start with white ironstone or plain stoneware, then add two or three seasonal plates, a patterned platter or a red pitcher.
Stack plates in short piles and lean one against the wall for height. Place larger pieces on the bottom shelf and smaller ones higher up, so the display looks balanced and does not feel top-heavy.
Open shelves keep dishes easy to reach, but they also show dust and clutter. Wipe the shelf before you style it and keep only what you use.
Styling tip: Limit festive pieces to about one in three items on the shelf. The rest of the display should stay quiet.
Bottle Brush Trees and Ornaments on a Shelf

Bottle brush trees give a shelf a tiny forest in about one square foot. Group three trees in different heights, such as green, white, and sage, and place them at one end of the shelf or on a counter ledge.
Add a small bowl of ornaments or a few glass baubles beside them. If you prefer a quieter look, stay with one color and let the different heights do the work.
These pieces are light, so they suit floating shelves and narrow window ledges where a larger decoration would not fit.
Styling tip: Set the tallest tree at the back and the shortest in front, then step the three apart by an inch or two so each one reads clearly.
A Glass-Front Cabinet Display
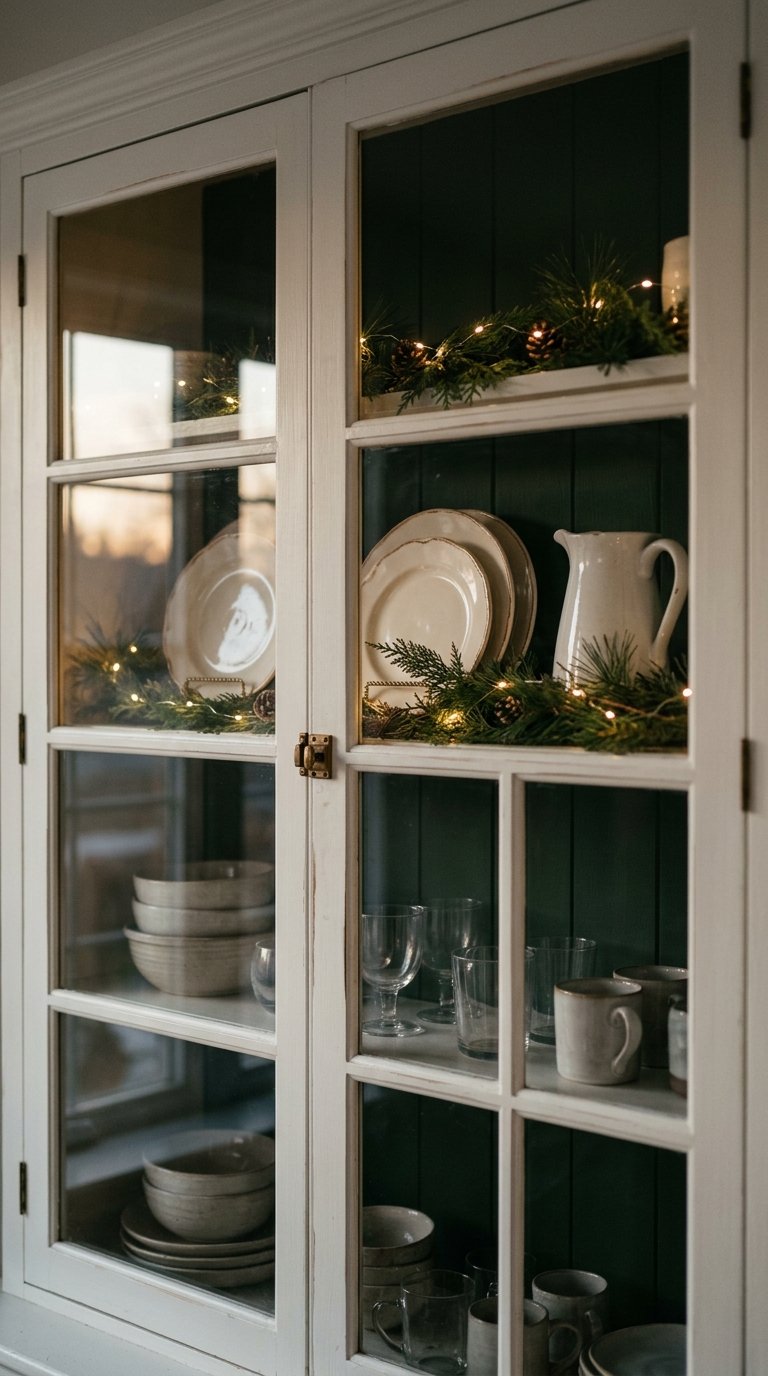
A glass-front cabinet gives you a protected place to display holiday pieces. Arrange one shelf only, so the cabinet still stores everyday dishes.
Place a few cream plates upright on plate stands, add a small wreath or garland across the top, and tuck in a battery light strand along the back edge. Turn the lights on in the evening and the whole cabinet glows like a shop window.
Choose lightweight decorations for the cabinet door itself. A small ribbon or wreath works, but a heavy piece can loosen the hinges.
Styling tip: Paint or line the back of the cabinet in a deeper color or add fabric to make the display stand out.
Dish Towels, Oven-Door Towels and Napkins

Textiles are the easiest swap in a Christmas kitchen. Replace your everyday towels with two or three festive ones, and use a matching set of cloth napkins in a basket on the counter.
Coordinate prints rather than mixing five. A plaid towel, a solid linen towel and a simple stripe look relaxed together. Hang one towel from the oven handle and keep another folded near the sink.
Keep fabric away from burners and open flame. Hang towels only on the oven door when the oven is cool, and move them if you start cooking.
Styling tip: Fold one towel in thirds and drape it over the oven handle with the pattern showing, then keep the other for actual drying.
A Non-Slip Rug or Runner by the Sink

A washable rug or runner adds color and comfort where you stand most. Choose a runner about 2 feet wide for a galley kitchen, or a smaller mat in front of the sink.
Pick cotton or a washable synthetic with a non-slip backing, so edges stay flat and nobody trips. Look for a plaid, stripe or a plain deep green that matches your palette instead of a large holiday graphic that looks out of place in January.
Styling tip: Choose a pattern you like in all seasons, then add Christmas through the towels and shelf decor instead of the rug.
A Runner and Simple Setting for the Breakfast Nook
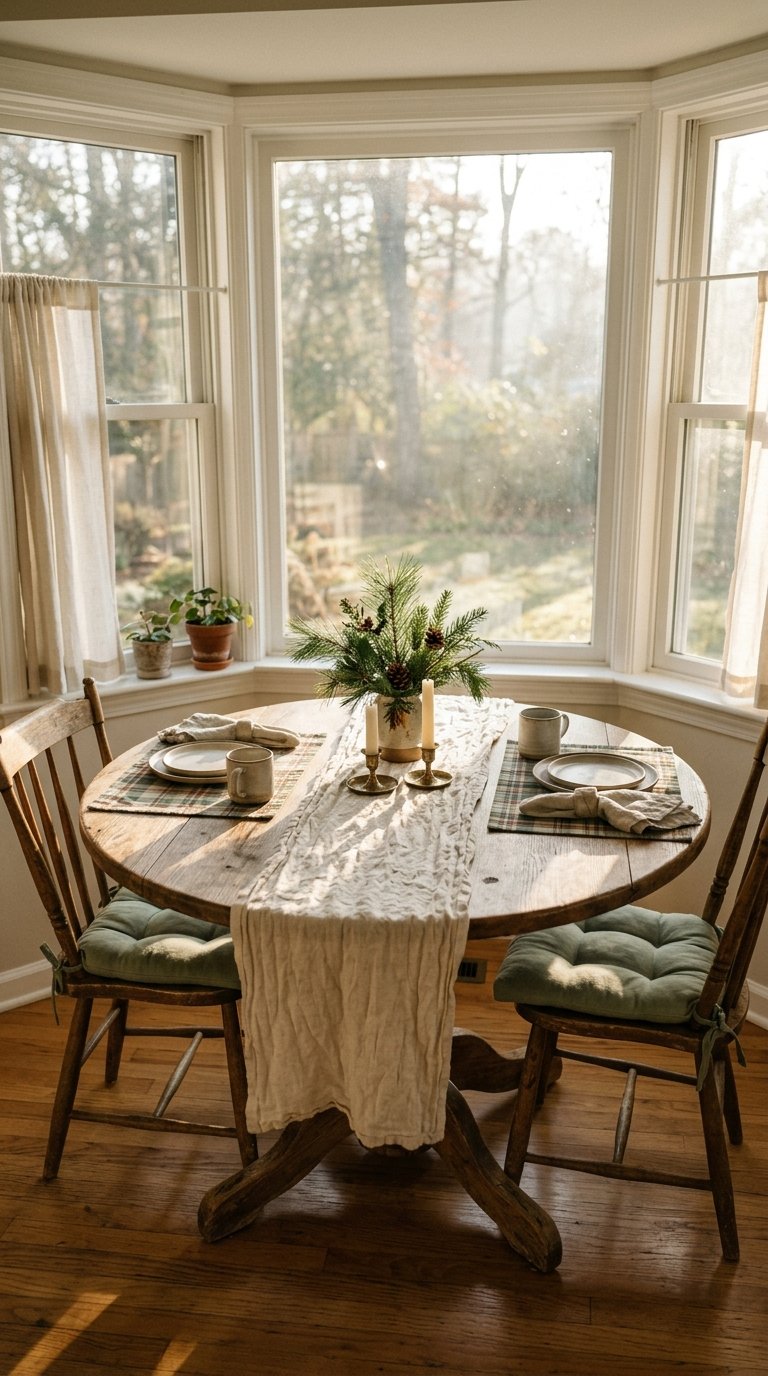
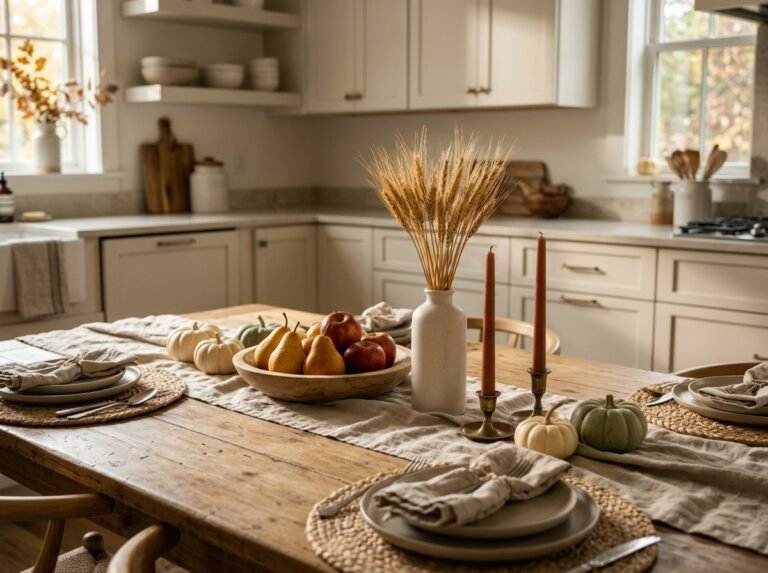
A Christmas kitchen table needs less than a dining room table. Lay a linen or plaid runner down the center, add two candles or a small evergreen arrangement, and set out simple placemats.
Keep the centerpiece low so people can talk across the table. Seat cushions in a coordinating color add comfort and can be washed. If the table does double duty for homework or baking, use items you can move in a minute.
Styling tip: Tie each napkin with a short length of twine and a snip of rosemary for a quick place setting.
A Mini Tree on the Counter or in a Corner
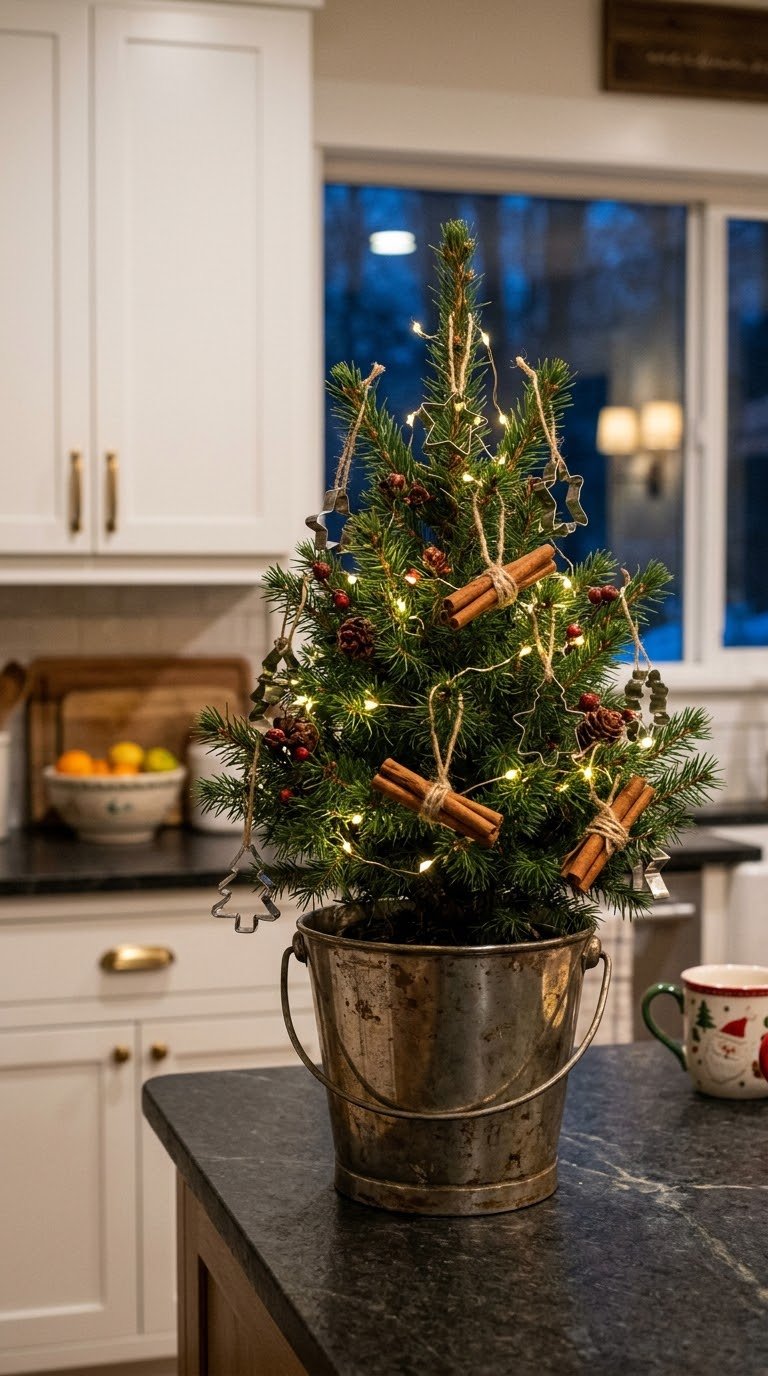
A kitchen does not need a full-size tree. A 2-to-3-foot tabletop tree works on a counter, a deep windowsill or a bench in a corner.
Place it in a vintage silver bucket, a wooden crate, or a galvanized pail so it feels like part of the kitchen. Decorate with miniature cookie cutters, cinnamon-stick bundles, and small paper-wrapped treats. Add warm white lights and keep the plug away from water.
Place it away from the stove and sink. Real trees need water, so choose a spot you can reach easily.
Styling tip: Hang a few small, edible-looking ornaments, then skip the rest. A tree decorated lightly looks sharper on a counter.
A Stovetop Simmer Pot for Christmas Scent
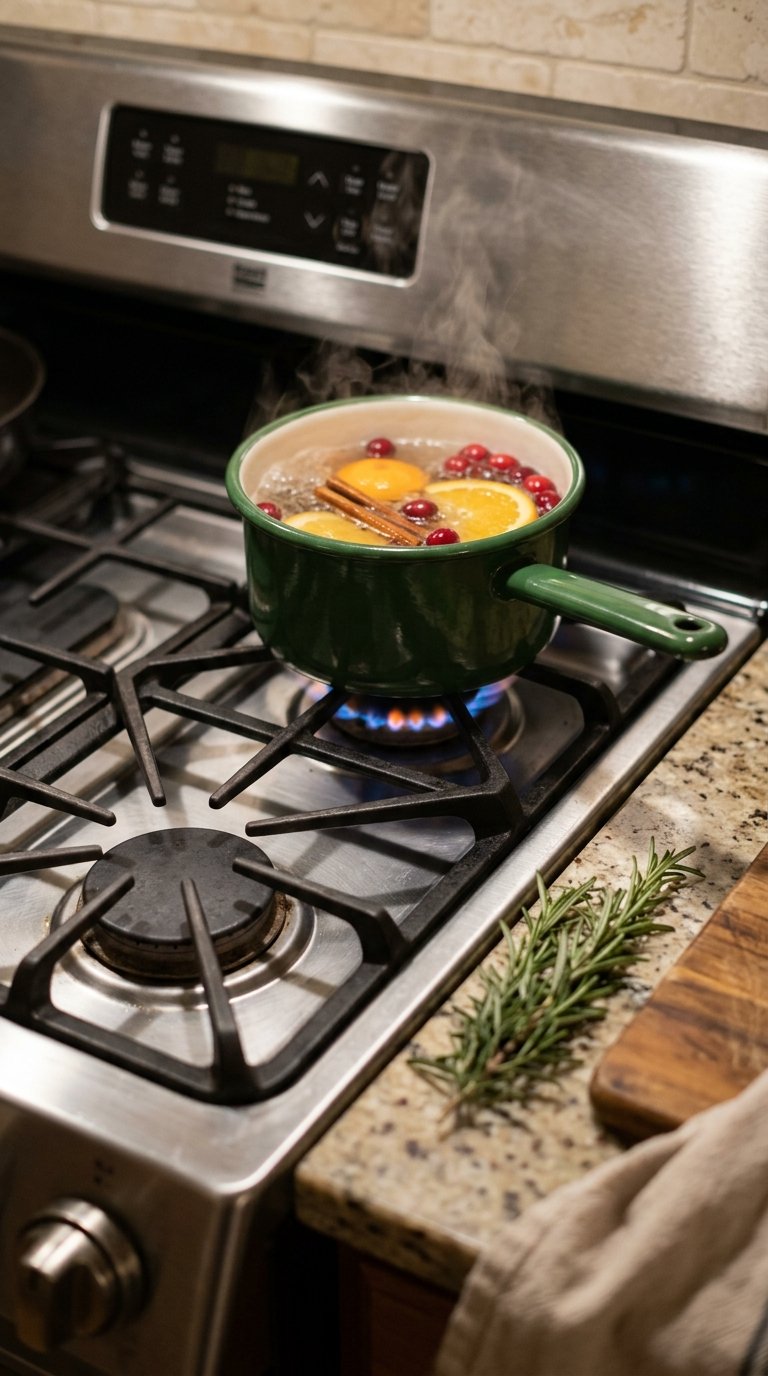
A simmer pot fills the kitchen with a warm, spiced scent and uses ingredients you probably have already. Add water, orange slices, a few cinnamon sticks, cloves, and cranberries to a small pot and heat it gently on low.
- Fill a small pot about three-quarters full with water.
- Add orange slices, cinnamon sticks, a few cloves, and a handful of cranberries.
- Bring it to a gentle simmer, then turn the heat down.
- Top up the water as it reduces.
Stay home while it simmers, never leave it on an empty pot, and keep it out of reach of children and pets. For a quieter version, put the same ingredients in a bowl and use it as a counter display only.
Styling tip: Keep the pot on a back burner and a sprig of rosemary beside it, so it looks as good as it smells.
A Chalkboard or Letterboard Christmas Menu
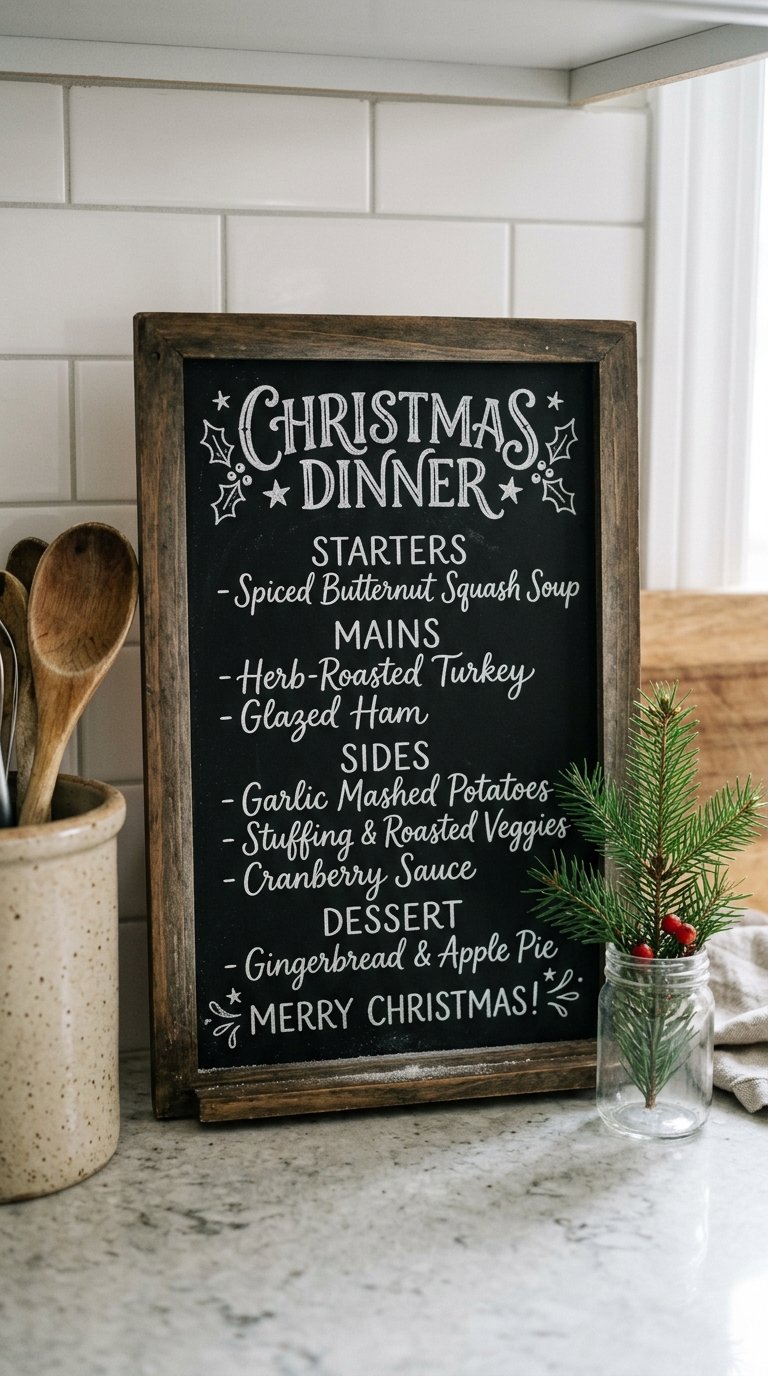
A Christmas menu board is decor that helps you plan. Write the Christmas Eve or Christmas Day menu, a baking schedule or a simple countdown on a small chalkboard, letterboard or framed glass panel.
Place it on a counter, on a shelf or against the backsplash, where people will see it. Use a chalk marker and clear block letters. It keeps the family informed, and it gives you a written plan when the kitchen gets busy.
Styling tip: Keep the writing to five or six short lines and leave margins around the edge. A cleaner board looks better in photos.
Christmas Kitchen Ideas for Small Kitchens, Renters and Budgets
Not every kitchen has an island or open shelves. These adjustments keep the festive look and fit real limits.
Small kitchens
Choose two or three ideas and skip the rest. Lights on the cabinet tops, one wreath on a door and a tray with a candle and a sprig of greenery add atmosphere without using counter space. Use the windowsill for a bottle brush tree or two, and keep the counters clear for work.
Renters
Use adhesive hooks for wreaths and lights, battery candles, removable ribbon and washable textiles. Test every hook on a small hidden spot first, and check the weight limit on the package. Cabinet pulls can hold a ribbon loop with a small wreath without any marks.
Budget
Start with what you already own: white dishes, wooden boards, jars and mugs. Add fresh greenery from a market or garden, a few clementines and a ribbon in one color. One new item at a time, such as a set of towels or one strand of lights, costs less than a full set of themed decor and looks more intentional.
Modern and minimalist kitchens
Stay with one or two colors and strong shapes. A single long strand of greenery along a shelf, white candles on a tray and a plain wooden bowl of citrus suit flat-front cabinets and clean counters.
Farmhouse and vintage kitchens
Mix wood, enamel, transferware and tins. Plaid towels, a cloche of cookies and a wreath on a window pair well with open shelves and a farmhouse sink.
Safety Checklist for a Decorated Christmas Kitchen
A few habits keep a festive kitchen safe to cook in.
- Keep garland, paper, towels and ribbon well away from burners and open flame.
- Place candles on a stable tray, away from the stove, and never leave them burning while you are out of the room.
- Use flameless candles near anything flammable.
- Choose lights rated for indoor use, and replace any strand with a damaged wire or plug.
- Run cords where nobody will trip on them, and keep plugs away from the sink.
- Never leave a simmer pot unattended, and refill the water as it reduces.
- Wash decorative pieces that touch food, and keep greenery away from food prep areas.
- Check the weight limit on any adhesive hook before you hang anything on a cabinet or window.
A Christmas Kitchen Timeline: Early December to January
You do not need to decorate everything at once. Building in stages keeps the look fresh and the workload small.
- Late November or the first weekend of December: Hang lights and add the wreaths. Place the mini tree and swap in festive towels.
- Mid-December: Add fresh greenery, the cocoa station, the cookie station and the citrus bowl. These work best when you will use them.
- Christmas Eve and Christmas Day: Set out the coffee nook, update the menu board and bring out the candles. Keep the counters as clear as you can.
- After Christmas: Take down food-based decor first, then fresh greenery. Keep lights and candles if you like a winter glow into January.
- Storage: Wrap ornaments in tissue, coil lights around a piece of cardboard and keep wreaths in a labeled box so next year takes ten minutes.
Do’s and Don’ts for a Christmas Kitchen
Do
- Start with lighting and greenery before adding objects.
- Keep at least one work surface clear.
- Repeat the same two or three colors.
- Use food and baking supplies as decor.
Don’t
- Cover every shelf and counter.
- Put garland or candles near the burners.
- Mix five patterns on one set of towels.
- Buy a themed item you will not use after December.
FAQs
How do I decorate my kitchen for Christmas without losing counter space?
Use vertical and overhead spaces first. Lights on top of cabinets, wreaths on doors, garland on shelves and a tree on a windowsill add festive color without using work surfaces. Then add one small tray or bowl on the counter and keep the rest clear.
Is it safe to hang garland or use candles near the stove?
No. Keep garland, towels, and any flammable decor well away from burners and open flame. Place candles on a tray away from the cooking area and use flameless candles when you are cooking or leaving the room.
What Christmas colors work besides red and green?
Cranberry and cream, deep green with brass, gingerbread and amber, white and wood, and silver and white all work. Choose the palette that matches your cabinets and countertops, then repeat it in towels, dishes and greenery.
How do I decorate a small kitchen for Christmas?
Pick two or three ideas and keep them simple. Lights, one wreath and a tray with a candle and greenery cover the look. Use the windowsill for small items and leave the counters clear.
How can renters decorate kitchen cabinets without damage?
Use adhesive hooks, ribbon loops over the cabinet pulls and battery lights. Test the hook in a hidden spot and check the weight limit before you hang anything heavier.
How do I set up a hot cocoa or cookie station without making a mess?
Build it on a tray or a washable cloth, and keep toppings in small bowls or jars. Place it away from the stove and sink, and keep greenery and candles at the far end.
What are the best low-cost Christmas kitchen decorations?
Fresh greenery, clementines, cinnamon sticks, dried orange slices, towels and baking supplies in jars. They cost little and double as useful items.
How early should I decorate the kitchen for Christmas, and when should I take it down?
Most people start in late November or the first week of December. Add food-based decor closer to Christmas and take it down in the first week of January, or sooner if fresh items dry out.
Conclusion
You do not need every idea on this list. A cozy Christmas kitchen usually comes from three or four good choices: warm light, a bit of greenery, one useful display, and a color palette you repeat.
Start with the lights, add one wreath or garland, then style a single counter or shelf. Keep the work surfaces clear, and let the rest of the kitchen stay a kitchen. The details you add after that are a bonus, and they are easy to adjust as December goes on.

One Comment